Publish / Subscribe
14 Minute Read
This tutorial will introduce you to the fundamentals of the Solace REST messaging API. The tutorial will show you how to connect a client, send a message on a topic subscription and receive this message again through the Solace REST messaging API.
Assumptions
This tutorial assumes the following:
-
You are familiar with Solace core concepts.
-
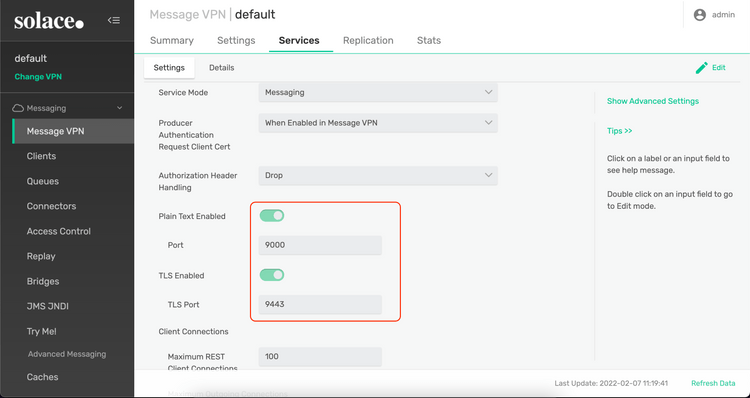
You have access to a running Solace Event Broker with the following configuration:
- Connectivity information for a Solace Event Broker
- Enabled client username and password
- Enabled guaranteed messaging support (needed for REST consumers)
- Client-profile enabled with guaranteed messaging permissions
-
The REST service is enabled and set to Messaging mode, allowing the VPN to act as a message broker
One simple way to get access to Solace messaging systems quickly is to create a messaging service in Solace Cloud as outlined here.
You can learn all about REST on a Solace Message VPN by referring to the Online REST Messaging Documentation.
Goals
The goal of this tutorial is to demonstrate the most basic messaging interaction using Solace. This tutorial will show you:
- How to send a message on a topic using the Solace REST messaging API
- How to receive a message using the Solace REST messaging API
Solace REST Messaging API Introduction
As outlined in the Online REST Messaging Documentation, the REST Messaging API enable users to send messages to, and asynchronously receive messages from a Solace Event Broker over HTTP using a RESTful API.
The Solace API uses HTTP POST requests to allow clients to publish message to a Message VPN. The Solace API follows the asynchronous notification pattern and uses an HTTP POST from a Message VPN to the client to deliver messages. This means that pub and sub messages are sent on different HTTP connections than they are received as shown in the following figure.
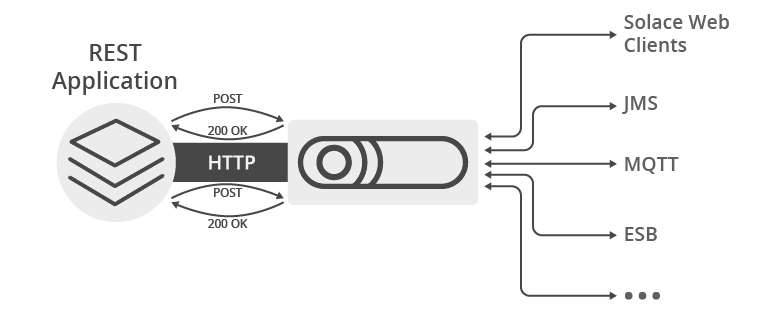
There are several benefits to this approach. First it removes the possibility of message loss which can exist when using HTTP GET requests to fetch messages without explicit acknowledgement. It also enables higher performance and overall message rate when multiple, parallel HTTP connections are used.
The Online REST Messaging Documentation explain the API in more detail:
- REST Messaging Introduction & REST Messaging Concepts which explains the API at an architectural level
- REST Messaging Protocol which explains the wireline details - like how to format the HTTP messages etc.,
The REST-based publish and subscribe actions are described in the late part of this tutorial.
Get Solace Messaging
This tutorial requires access Solace messaging and requires that you know several connectivity properties about your Solace messaging. Specifically you need to know the following:
| Resources | Value | Description |
|---|---|---|
| Host | String | This is the address clients use when connecting to the Solace messaging to send and receive messages. (Format: DNS_NAME:Port or IP:Port) |
| Message VPN | String | The Solace message router Message VPN that this client should connect to. |
| Client Username | String | The client username. (See Notes below) |
| Client Password | String | The client password. (See Notes below) |
There are several ways you can get access to Solace Messaging and find these required properties.
Option 1: Use Solace Cloud
-
Follow these instructions to quickly spin up a cloud-based Solace messaging service for your applications.
-
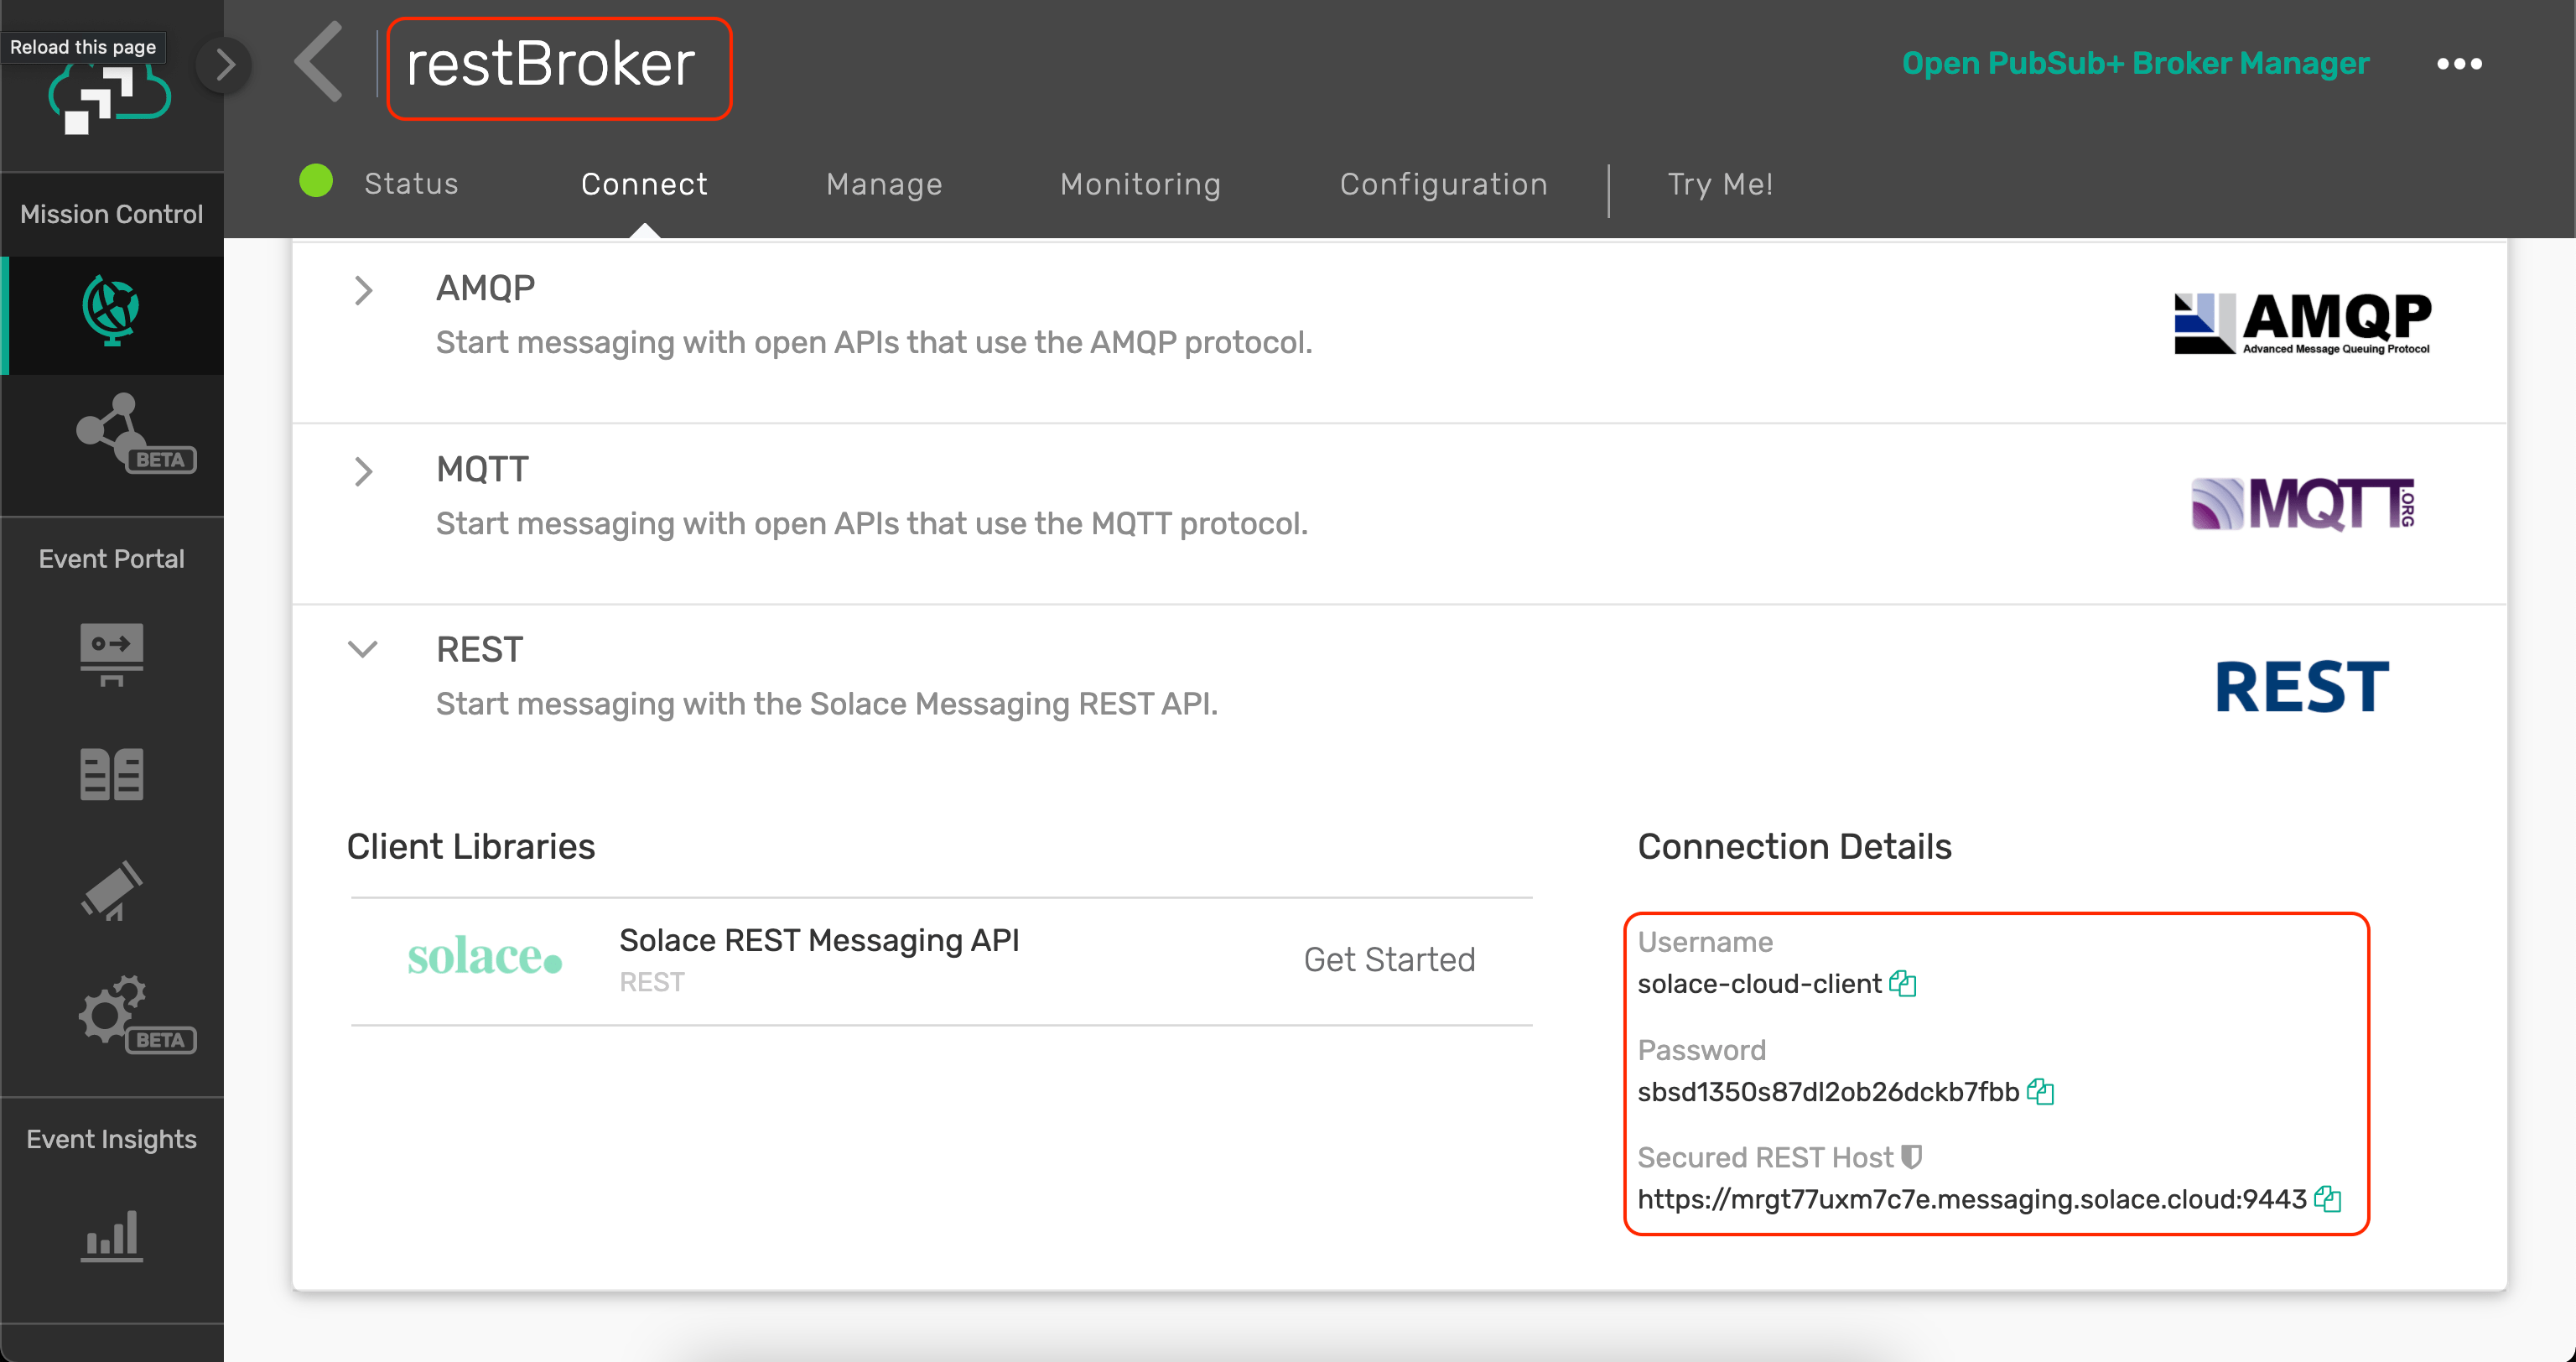
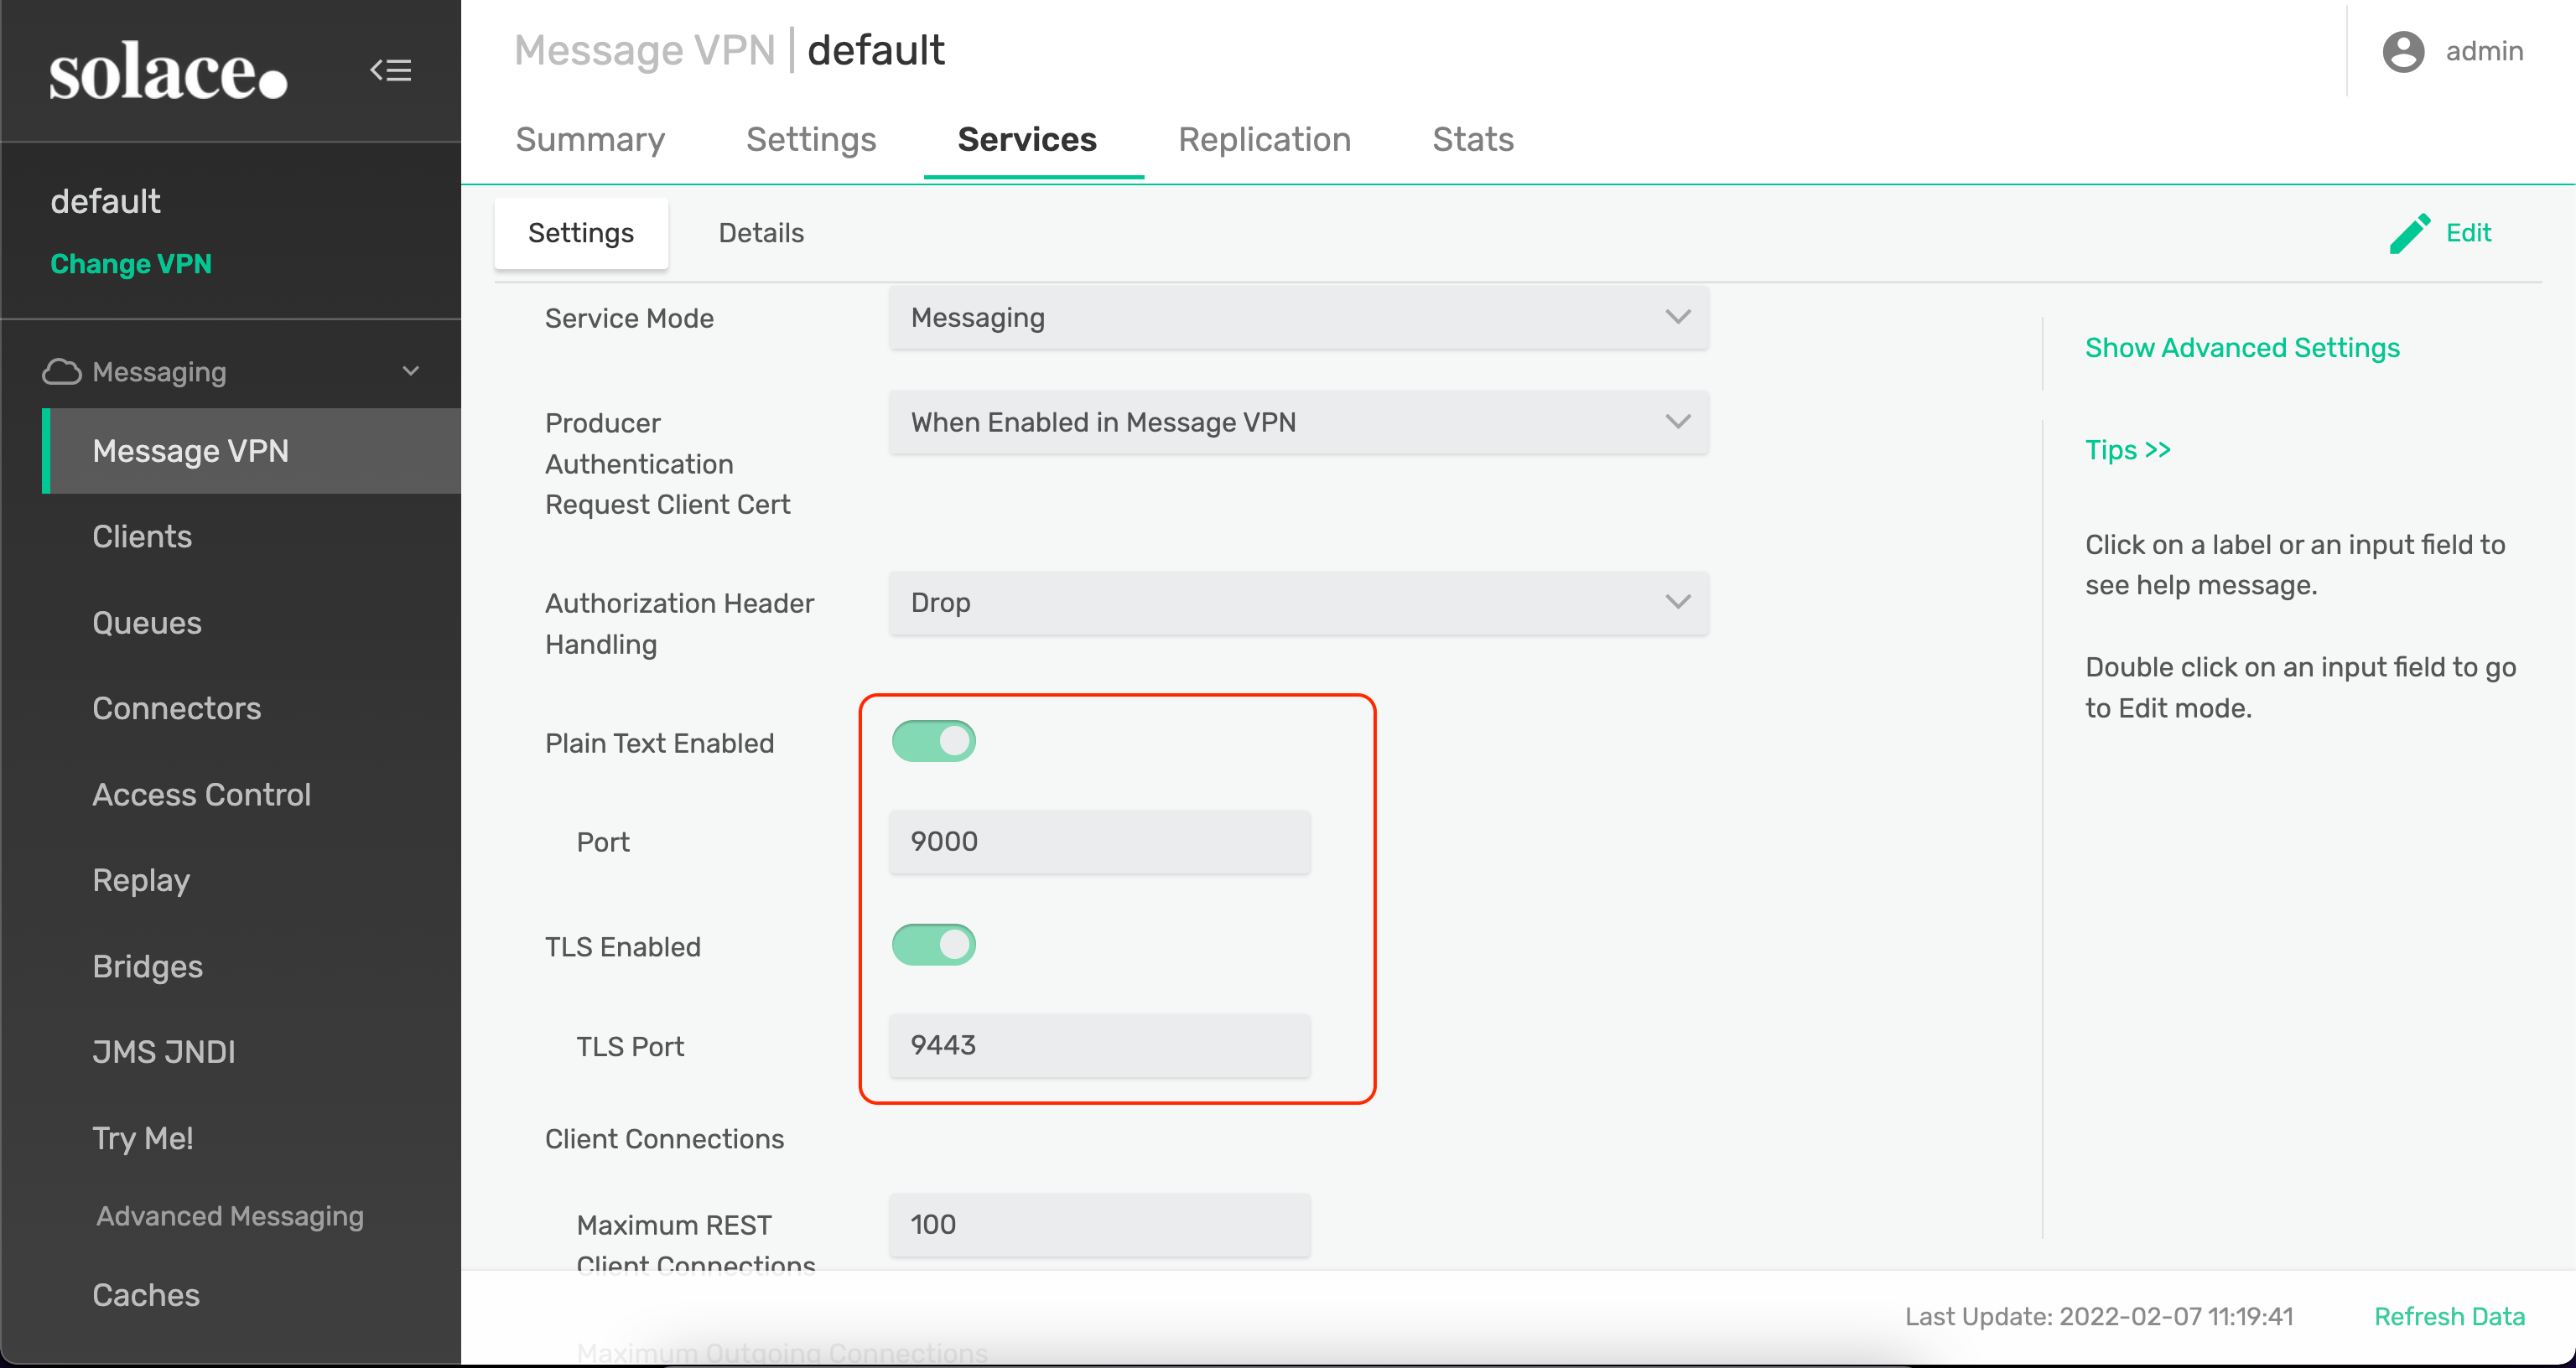
The messaging connectivity information is found in the service details in the connectivity tab (shown below). You will need:
- Host:Port (use the SMF URI)
- Message VPN
- Client Username
- Client Password
Option 2: Start a Solace Event Broker Software
-
Follow these instructions to start the Solace Event Broker Software in leading Clouds, Container Platforms or Hypervisors. The tutorials outline where to download and how to install the Solace Event Broker Software.
-
The messaging connectivity information are the following:
-
Host: <public_ip> (IP address assigned to the VMR in tutorial instructions)
-
Message VPN: default
-
Client Username: sampleUser (can be any value)
-
Client Password: samplePassword (can be any value)
Note: By default, the Solace Event Broker Software "default" message VPN has authentication disabled.
-
Option 3: Get access to a Solace Event Broker Appliance
-
Contact your Solace Event Broker Appliance administrators and obtain the following:
- A Solace Message-VPN where you can produce and consume direct and persistent messages
- The host name or IP address of the Solace appliance hosting your Message-VPN
- A username and password to access the Solace appliance
Obtaining the Solace API
There is no API to obtain. The Solace REST messaging API is a wireline RESTful HTTP protocol. The details are outlined in REST Messaging Protocol.
Receiving a message
Since Solace is a multi-protocol translation broker, messages can be received using any of the other Solace APIs (e.g., JMS or MQTT) which would be a lot less complicated to use when compared to REST Deliver point based setup.
In this tutorial will show how to setup a subscriber to receive published messages.

On the consumer side, the Solace REST messaging API depends on a guaranteed messaging queue. As such it is a requirement for REST consumers that Solace Event Broker support guaranteed messaging and have this feature configured as outlined in the Assumptions section above.
In order to receive REST messages from Solace Message VPN, you must configure a Guaranteed messaging queue and a REST delivery point. The queue is used to attract messages to the consumer application. The REST delivery point is the Solace message router component that delivers the messages from the queue to the consumer application asynchronously through HTTP POST requests. This is explained in detail in the REST Messaging Concepts. This tutorial will walk you through the required Solace Message VPN configuration required to create a queue and REST delivery point to connect to your REST consumer application.
A Simple REST Consumer
First you need a REST consuming application ready to receive HTTP connections from Solace Message VPN. This can be any HTTP server. This tutorial will demonstrate this using Node.js HTTP server. Solace REST Messaging uses standard HTTP, so use your favorite HTTP server.
Create a file named NodeRestServer.js with the following contents.
var http = require('http');

http.createServer(function (req, res) {
    console.log('Received message: ' + req.url);
    res.writeHead(200);
    res.end();
}).listen(RC_PORT, RC_HOST);
console.log('Server running at http://' + RC_HOST + ':' + RC_PORT + '/');In the above code, you need to update RC_HOST and RC_PORT to capture the HOST and PORT that your REST consumer application will be listening on. This HTTP server listens for incoming requests and for each request it will print the URL of the request and respond with a 200 OK response. The 200 OK response indicates to Solace Message VPN that the message has been successfully processed, and it can be removed from Solace Message VPN queue.
Start your REST consumer using Node.js. For example:
$ node NodeRestServer.js
Server running at http://<RC_HOST>:<RC_PORT>/
Again in your environment, the RC_HOST and RC_PORT will be the host/IP and port that your server is listening on. For example http://49.210.148.187 :10000/ or with a public DNS name http://myhost.mydomain.com:10000 (for example).
If running Solace Event Broker locally, a “localhost” or a local DHCP IP for host name won’t work, since the Solace Event Broker is usually run on a different subnet. You have to use your computer’s actual (local) IP address.
Note: Even though this tutorial is illustrating how to publish direct messages, for REST delivery points, the messages are always consumed from a queue. Direct messages get promoted in the queue, and are delivered to the REST consumer as Guaranteed messages. For more information on this see the Features – Topic Matching and Message Delivery Modes.
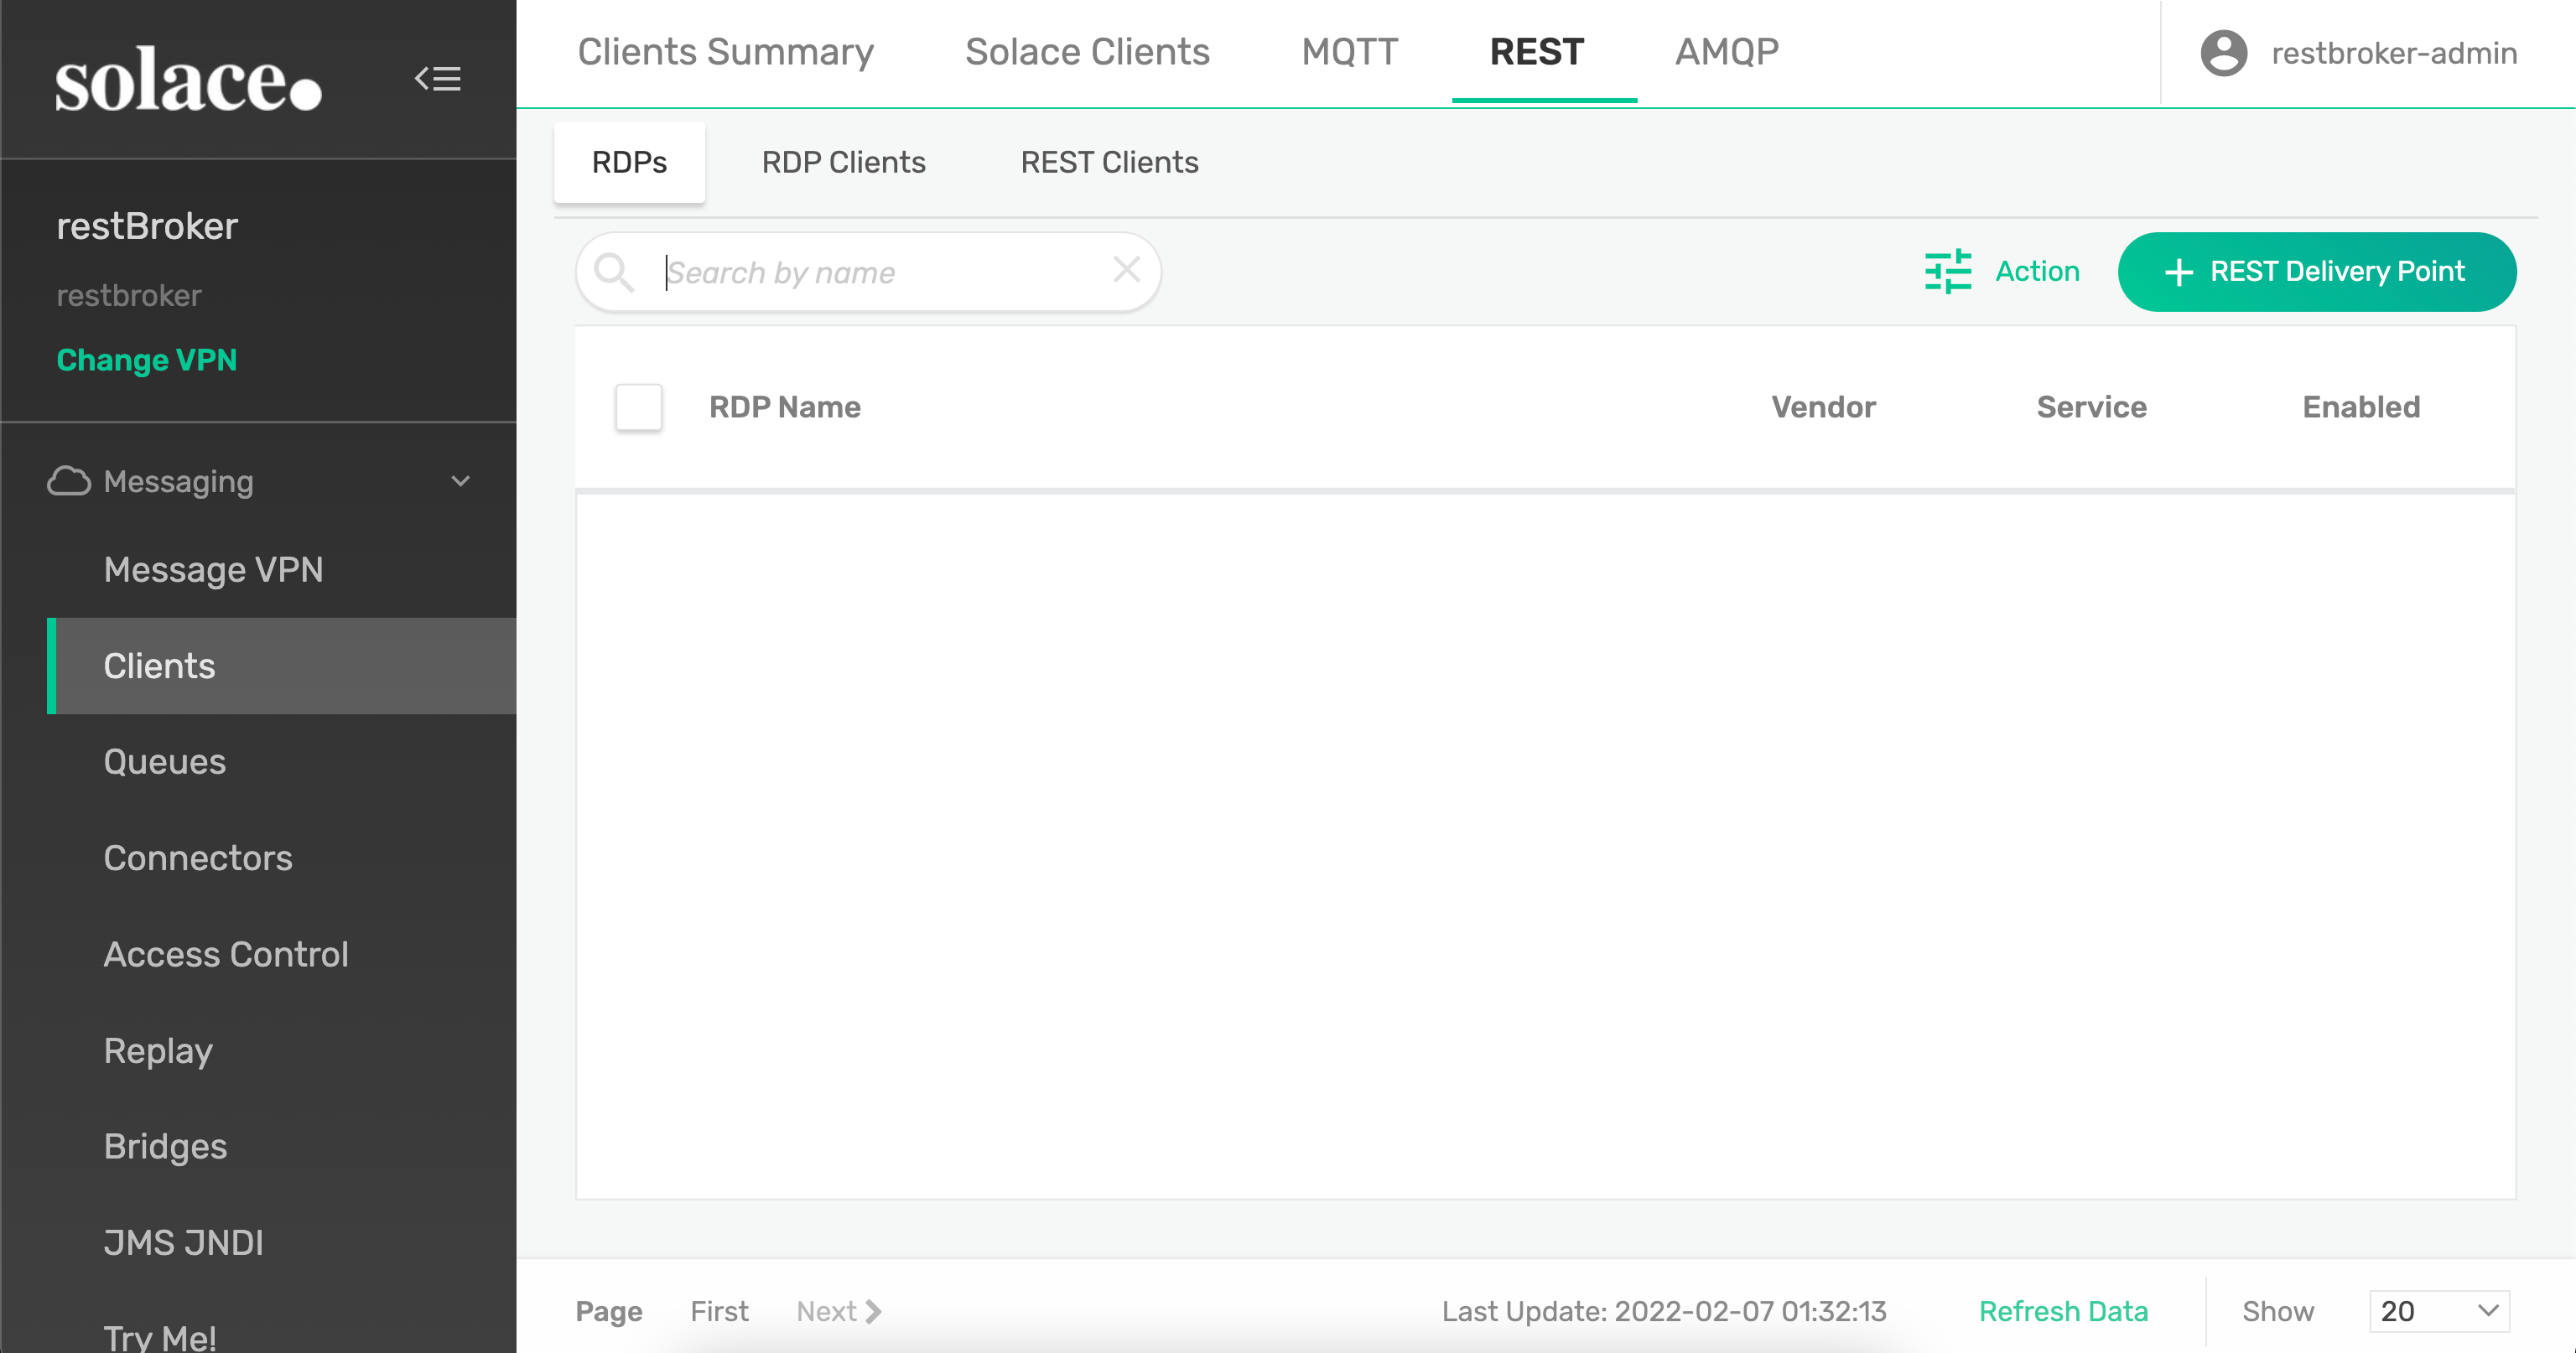
Configuring a REST Delivery Point
Next, you must configure a queue and a REST delivery point on Solace Message VPN.
| Resource | Value |
|---|---|
| Queue | Q/rdp1/input |
| Pub/Sub Topic | solace/samples/rest |
| REST Delivery Point | rdp1 |
| Queue Binding | Q/rdp1 |
| POST Request Target | /rest/tutorials |
| REST Consumer | rc1 |
| Remote Host | RC_HOST – Update to match REST consumer application. |
| Remote Port | RC_PORT – Update to match REST consumer application. |
Update RC_HOST and RC_PORT to capture the HOST and PORT that your REST consumer application will be listening on.
You can learn more about each of these components here - Features – REST Introduction.
In the script below, update VPNNAME to match that of your Solace Message VPN, and the RC_HOST and RC_PORT to match your REST consumer application.
The REST Delivery Point configuration can be affected on a Message VPN in different ways. Here is the list of options available for us.
Option 1: Using Solace Event Broker Manager
Option 2: Using SEMP and Postman
Option 3: Using SEMP and curl
Option 4: Using Solace CLI
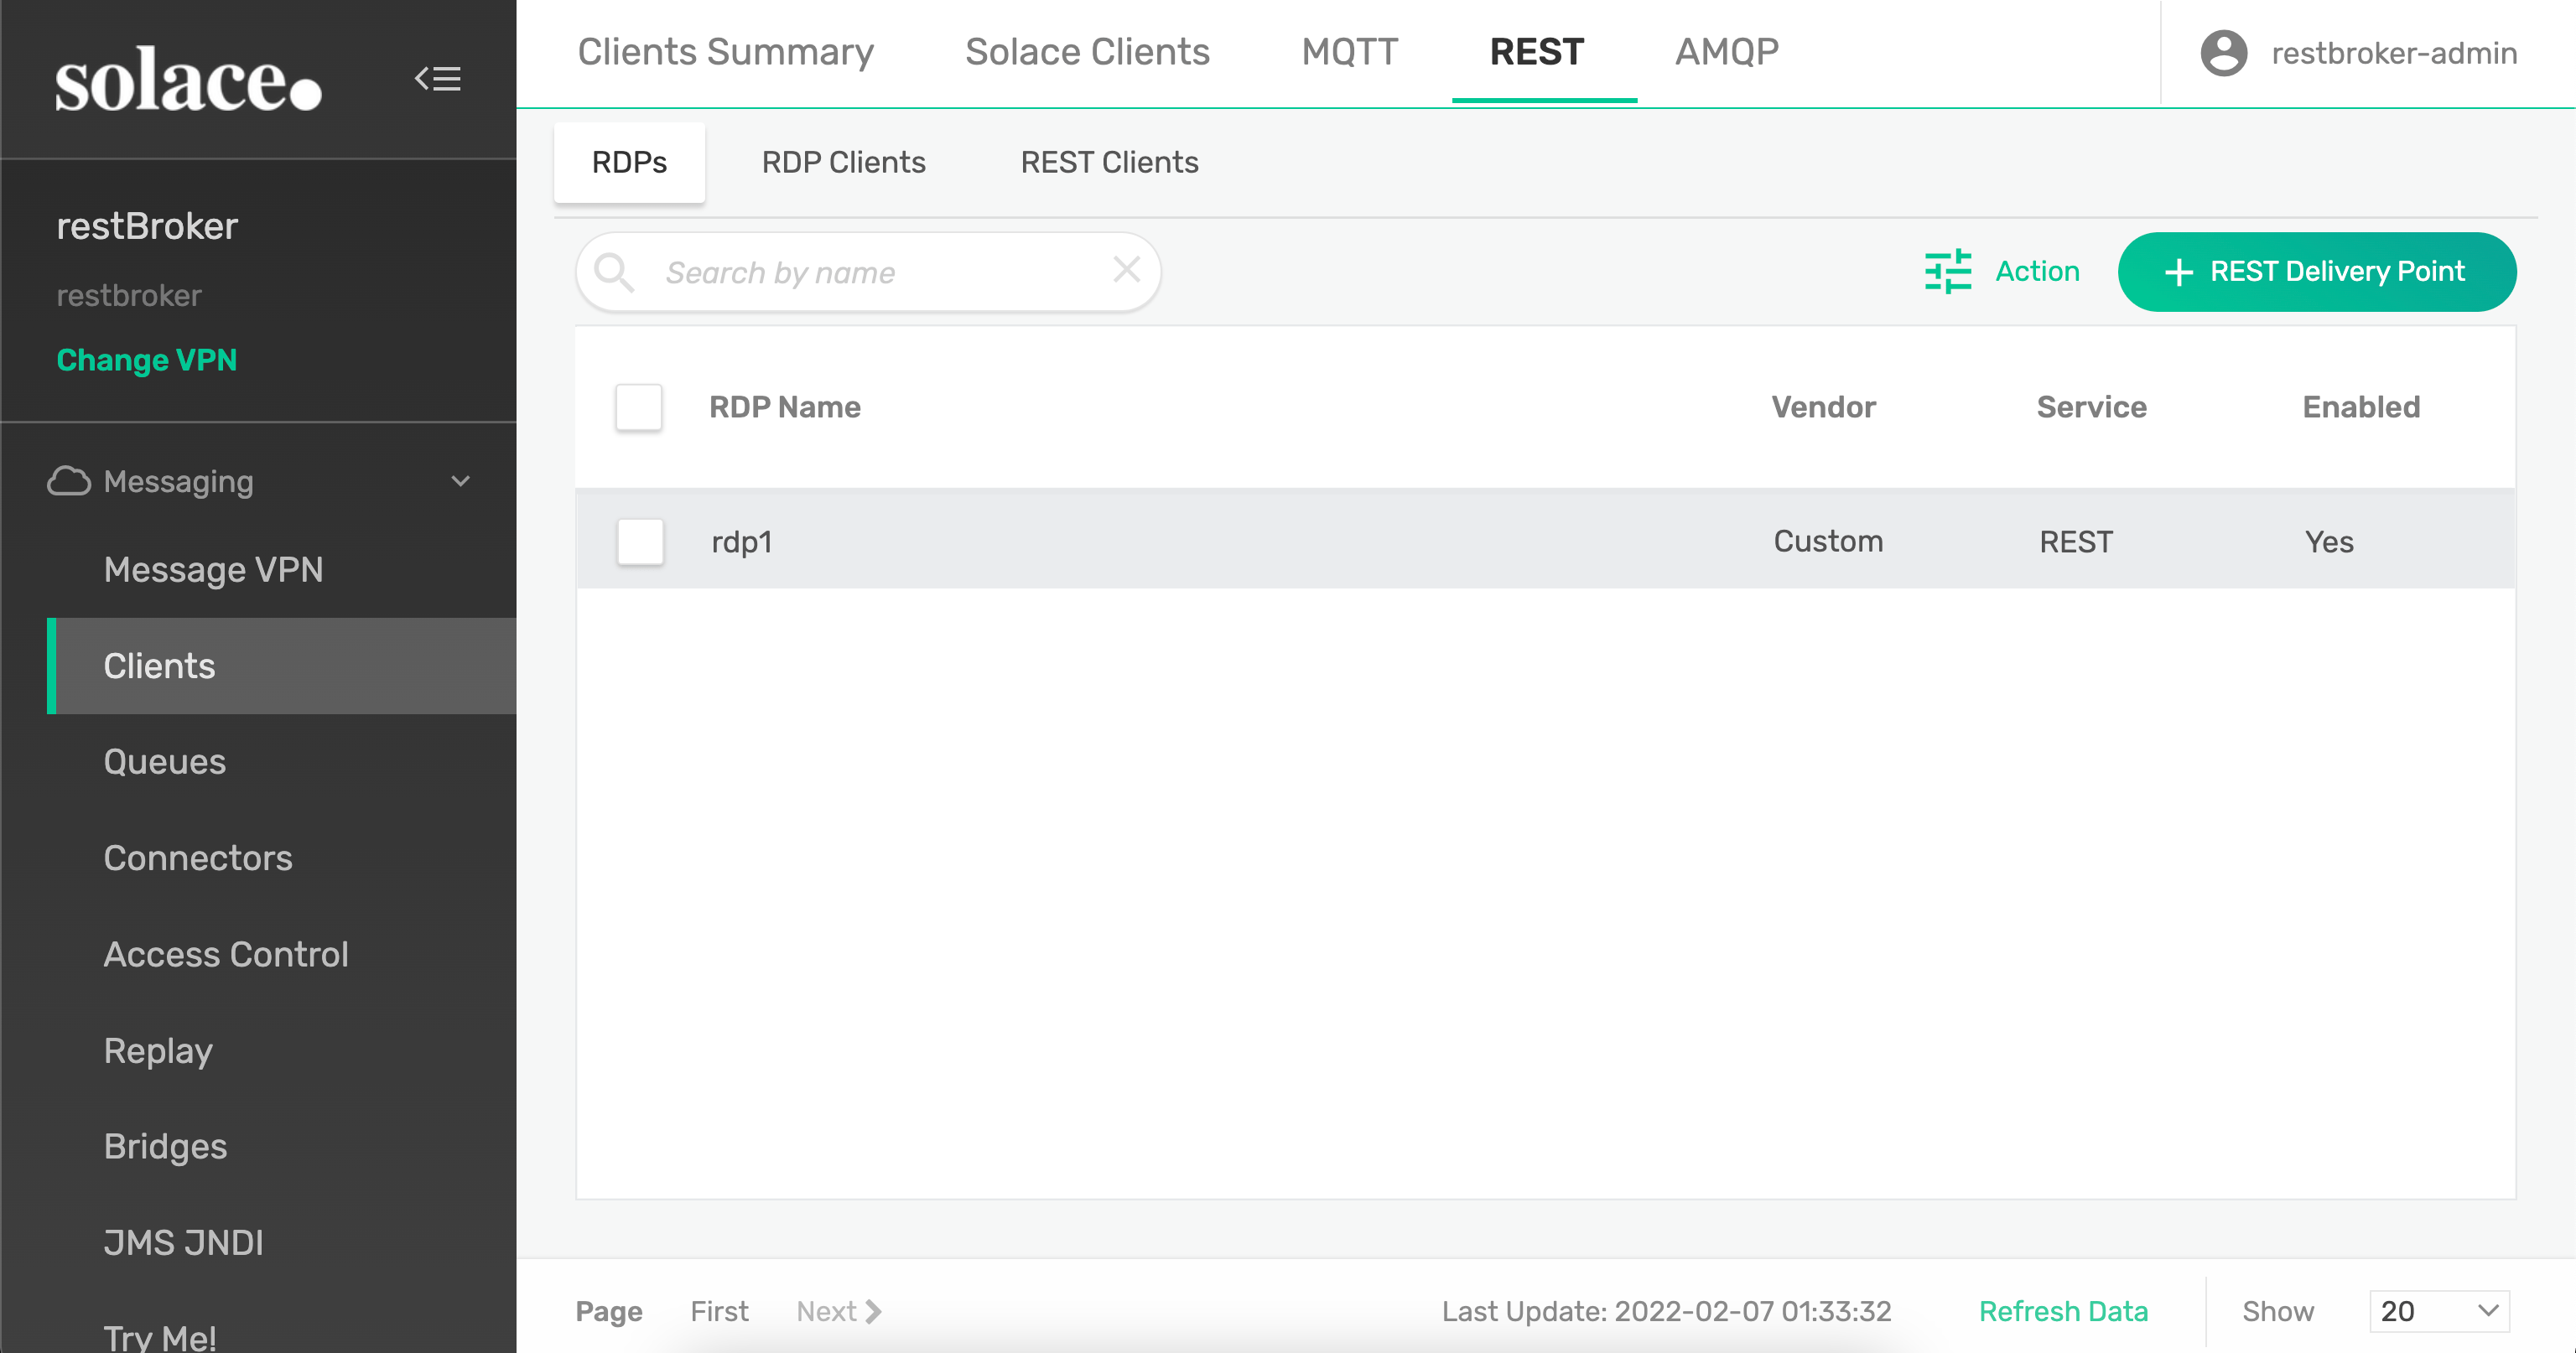
Option 1: Using Solace Event Broker Manager
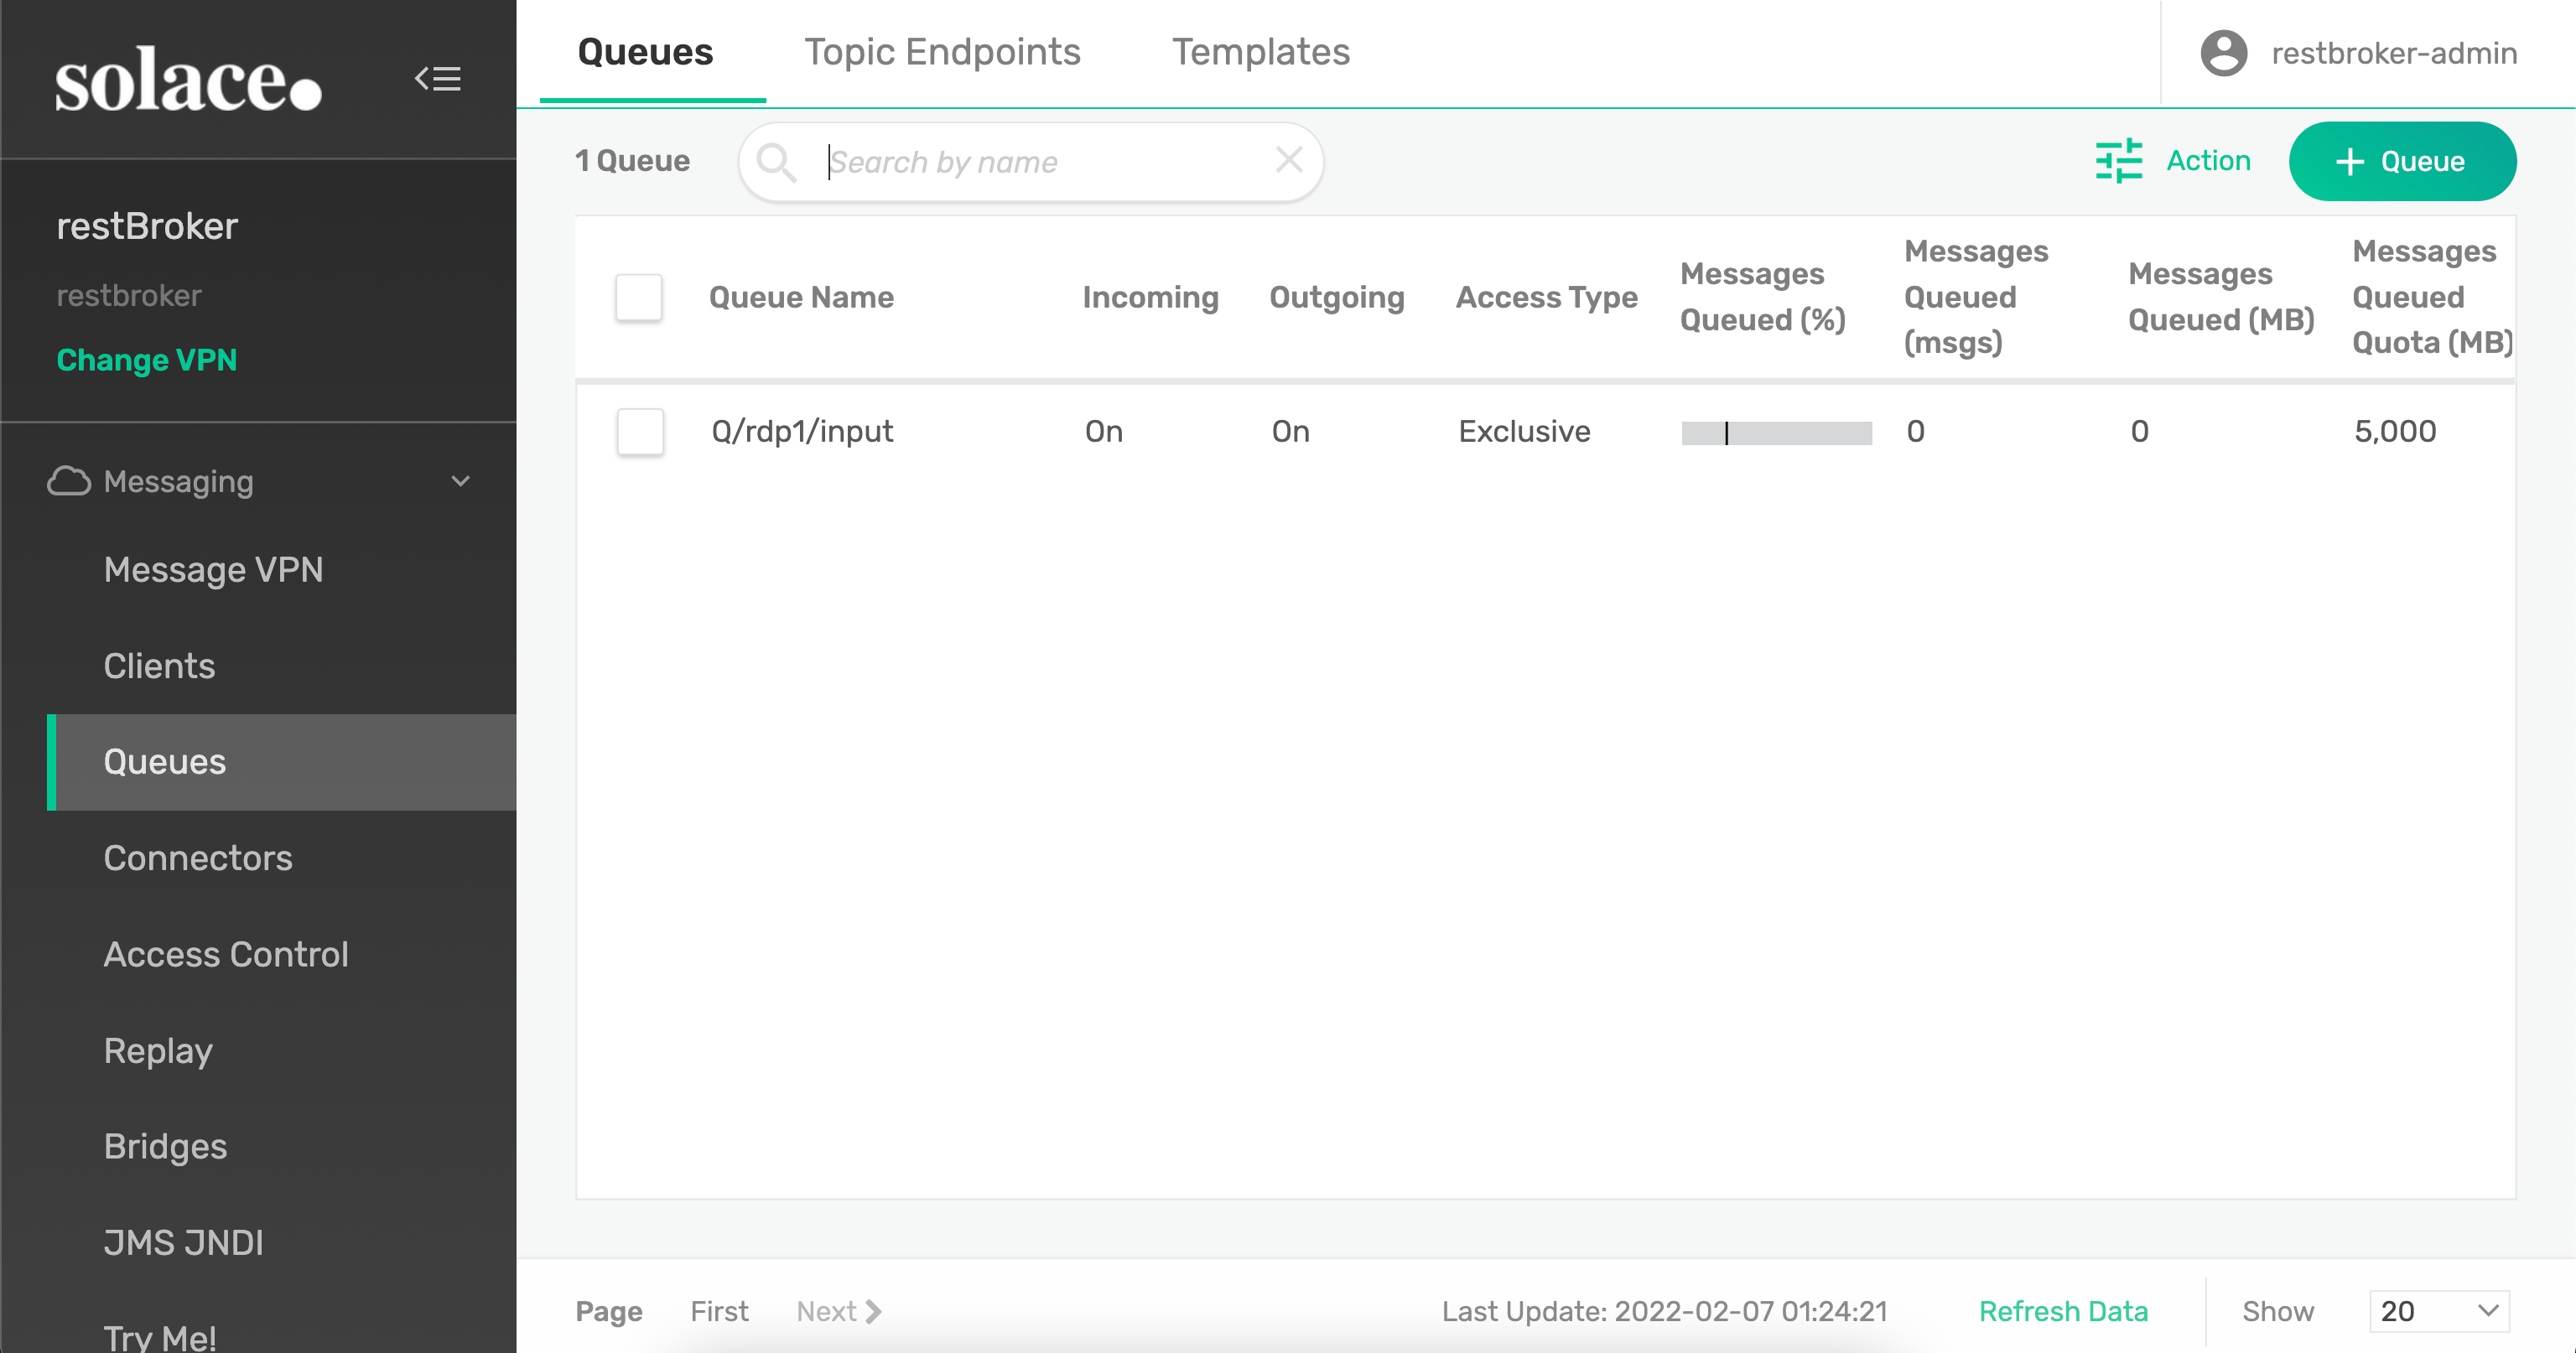
- Create a Queue by name Q/rdp1/input
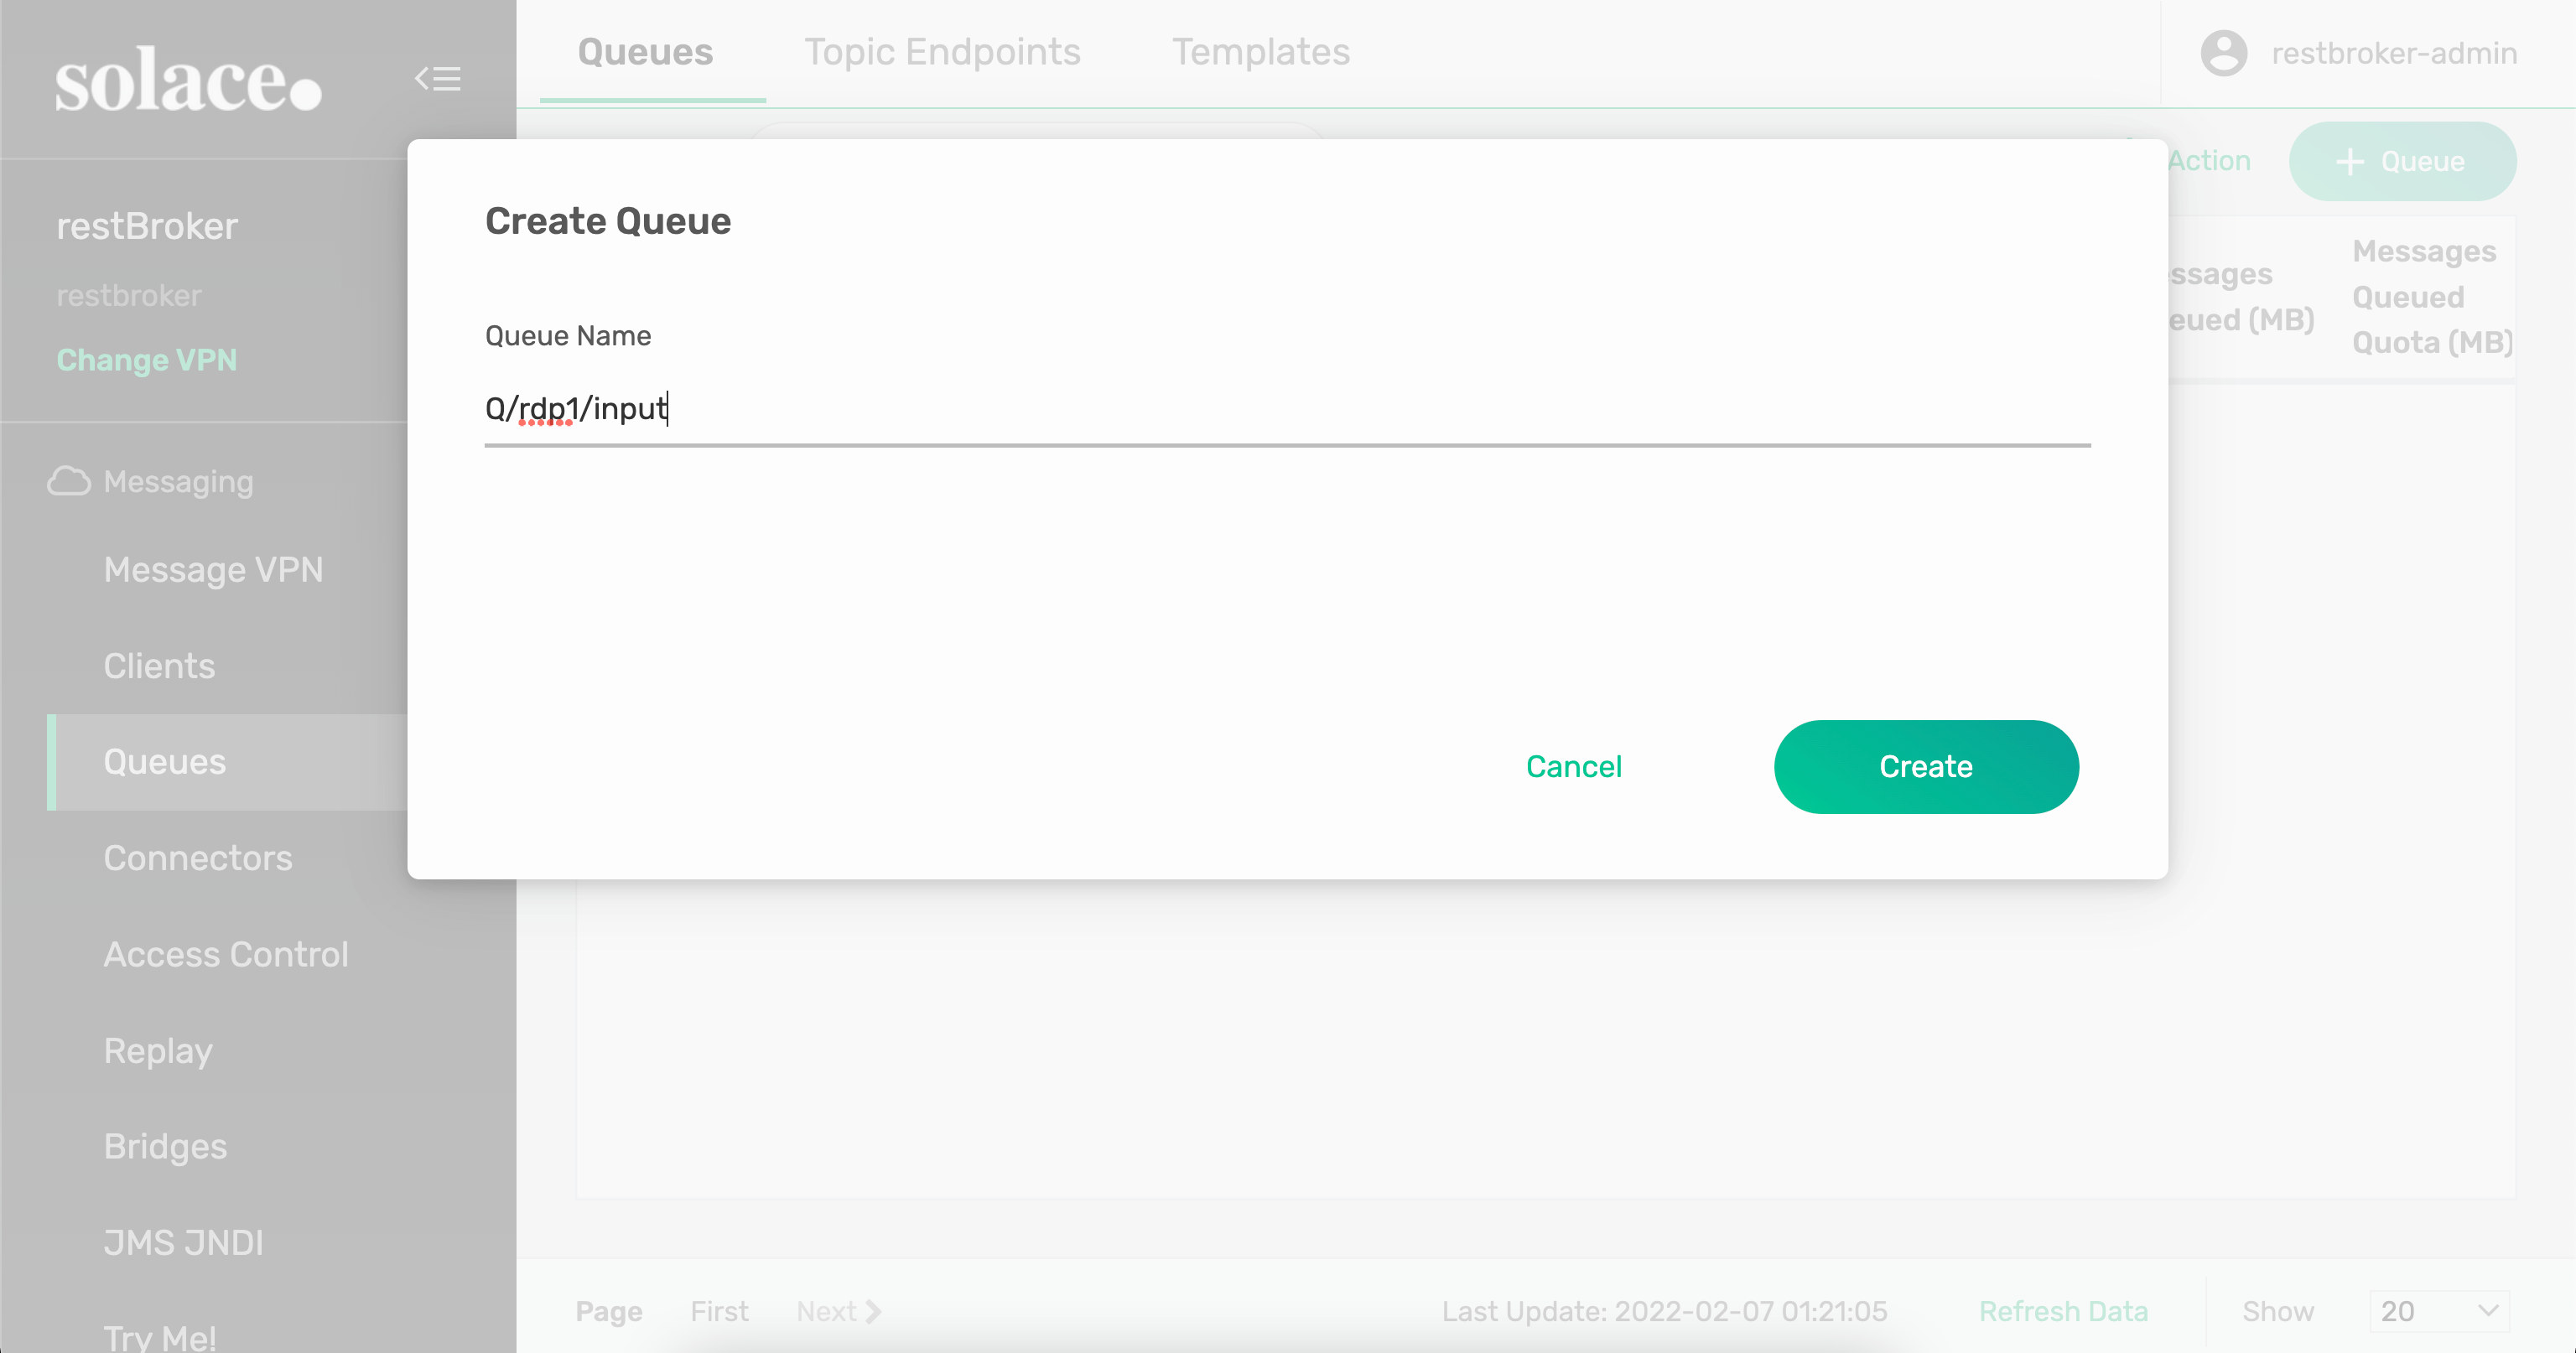
Enable both incoming and outgoing configuration
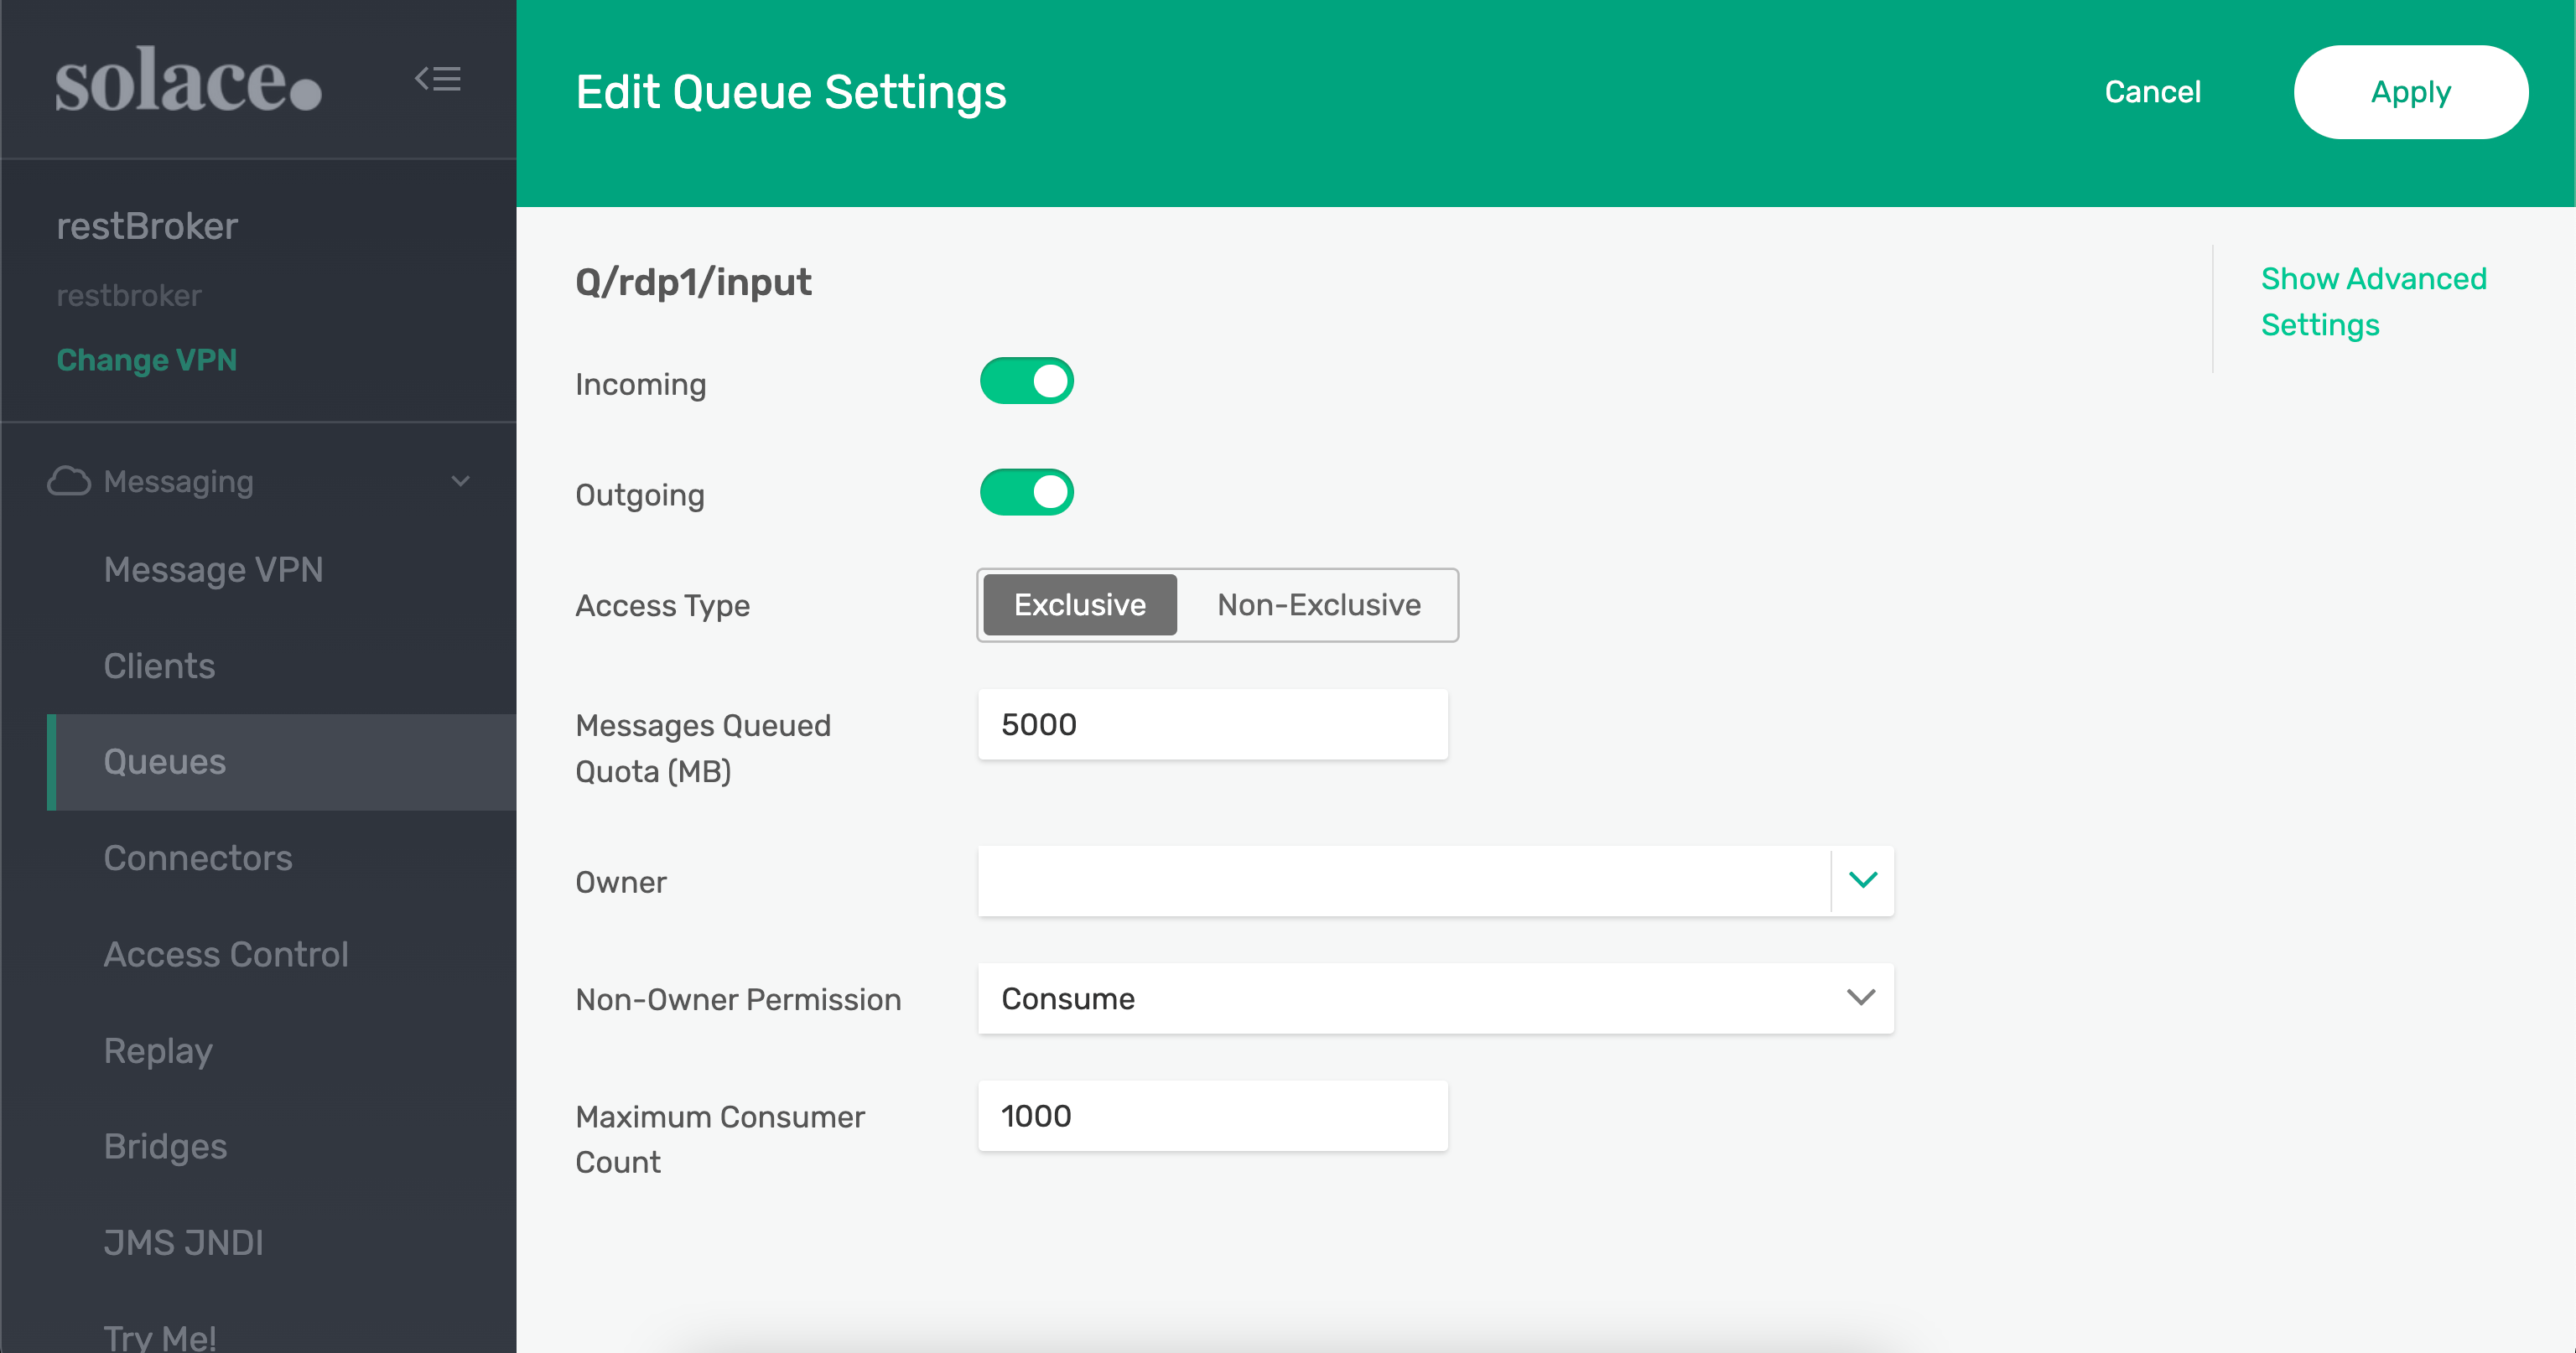
Queue successfully created
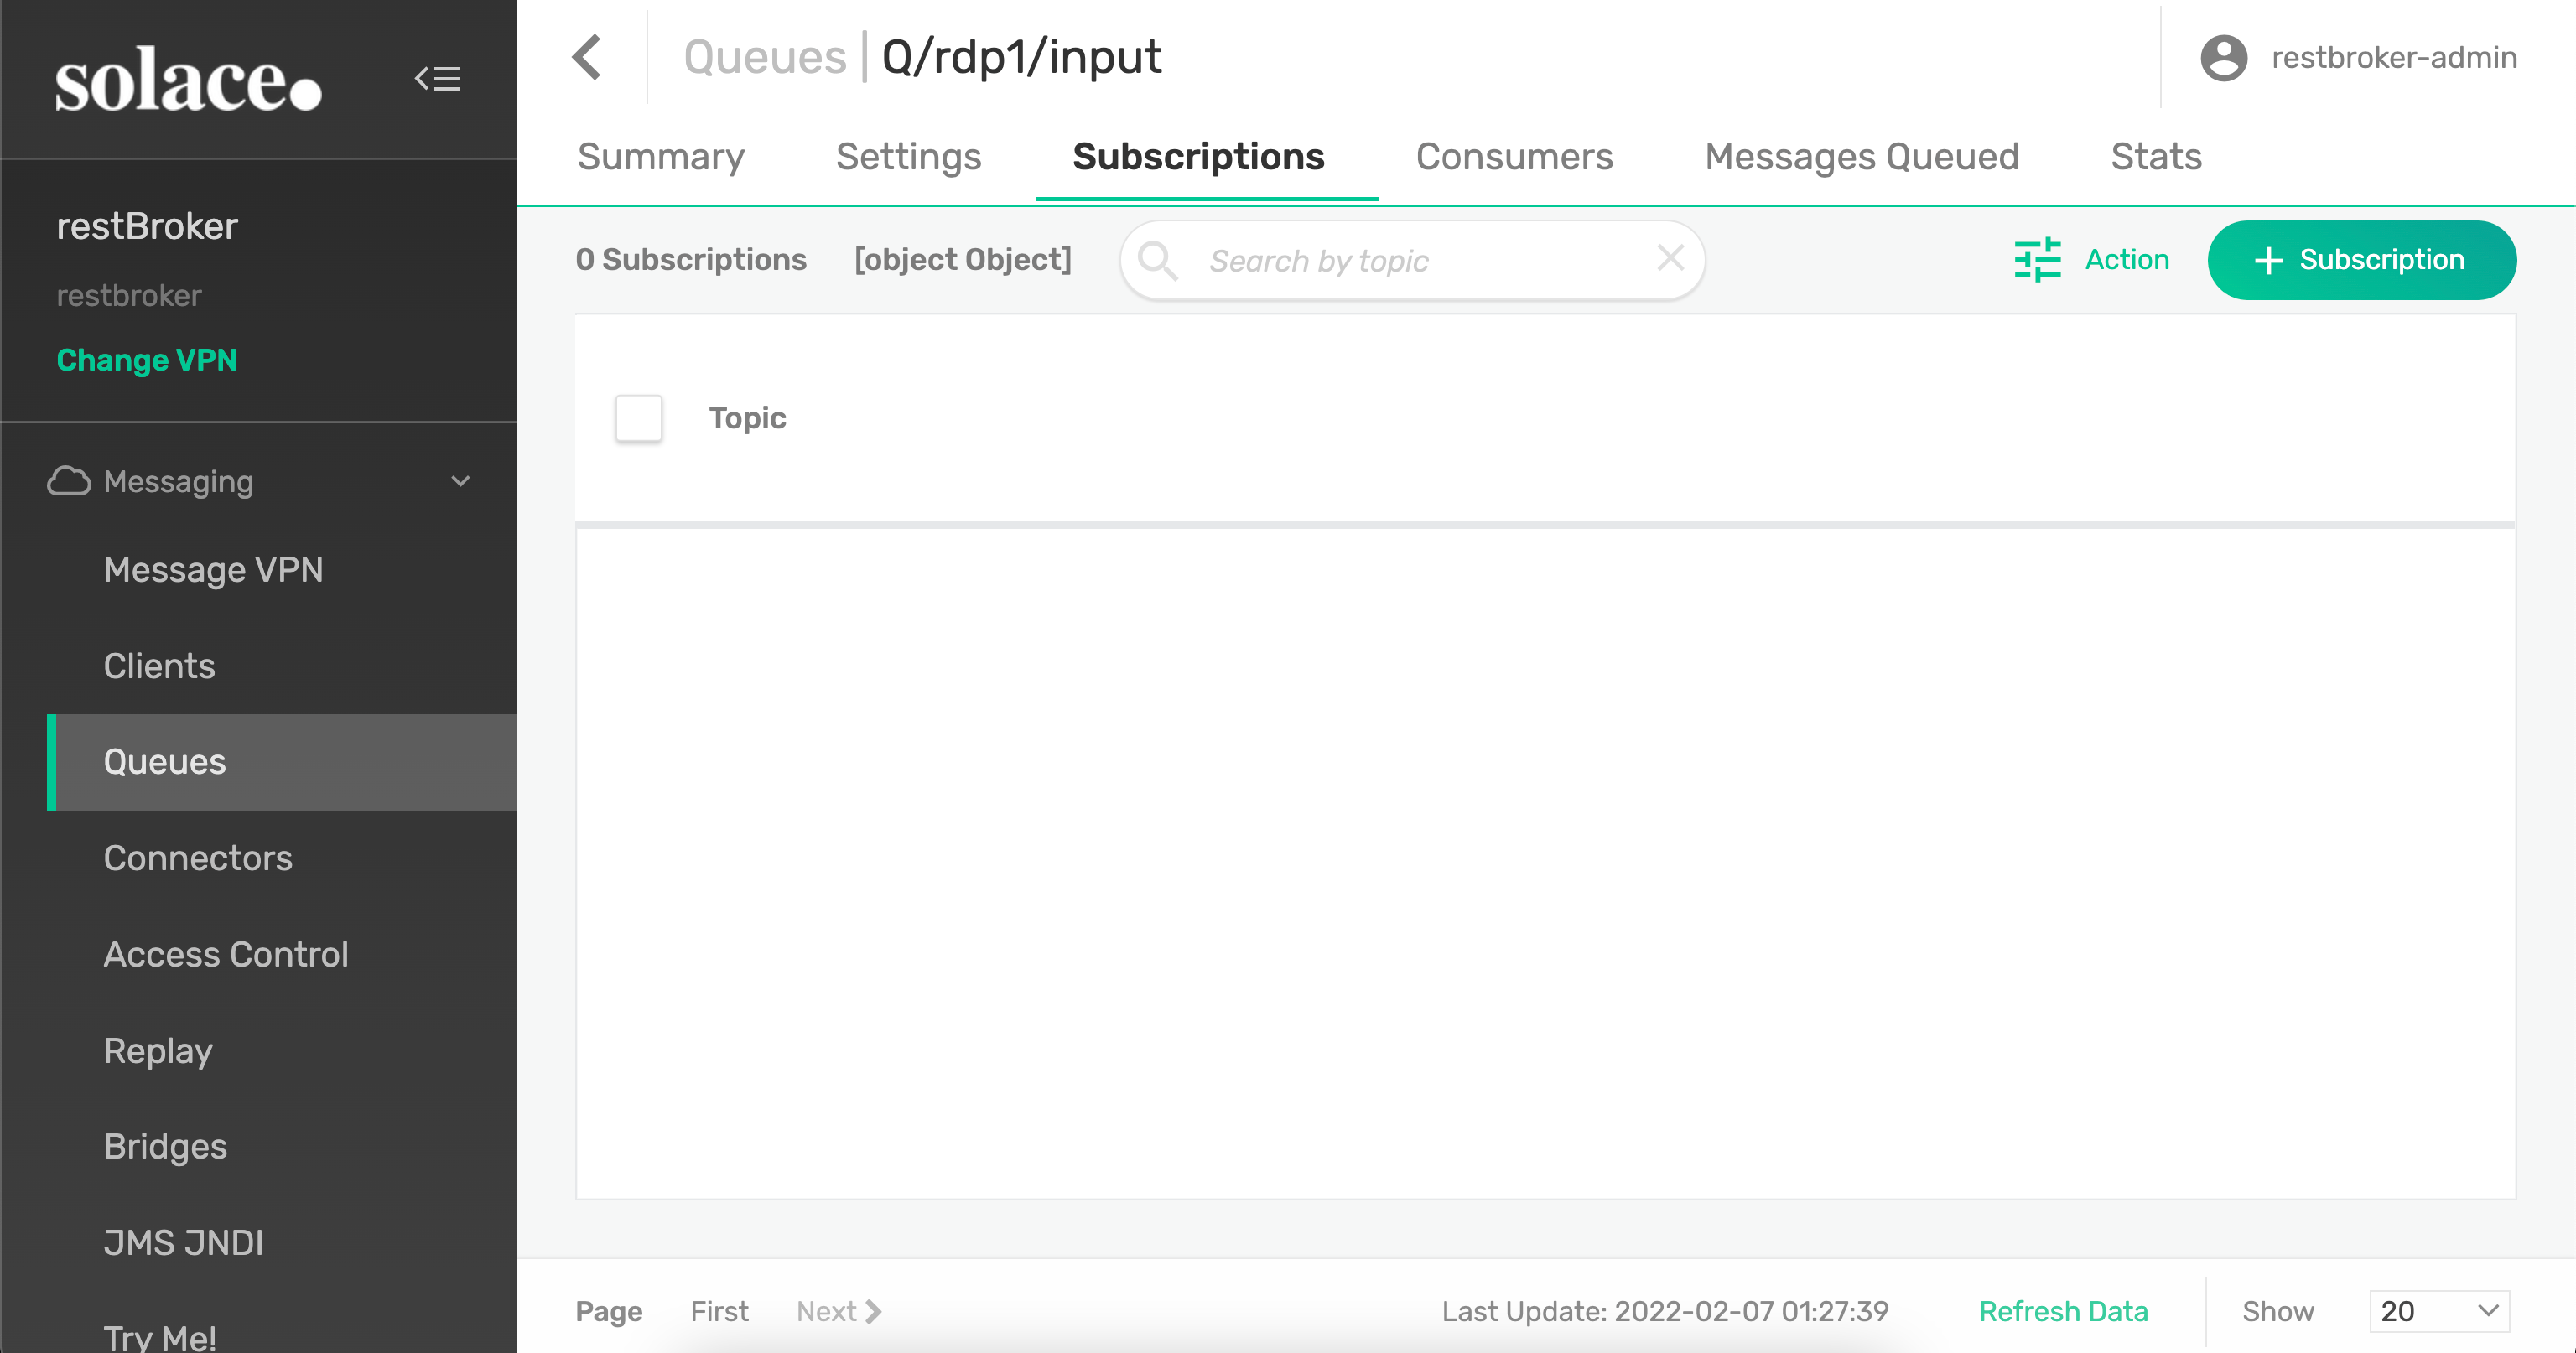
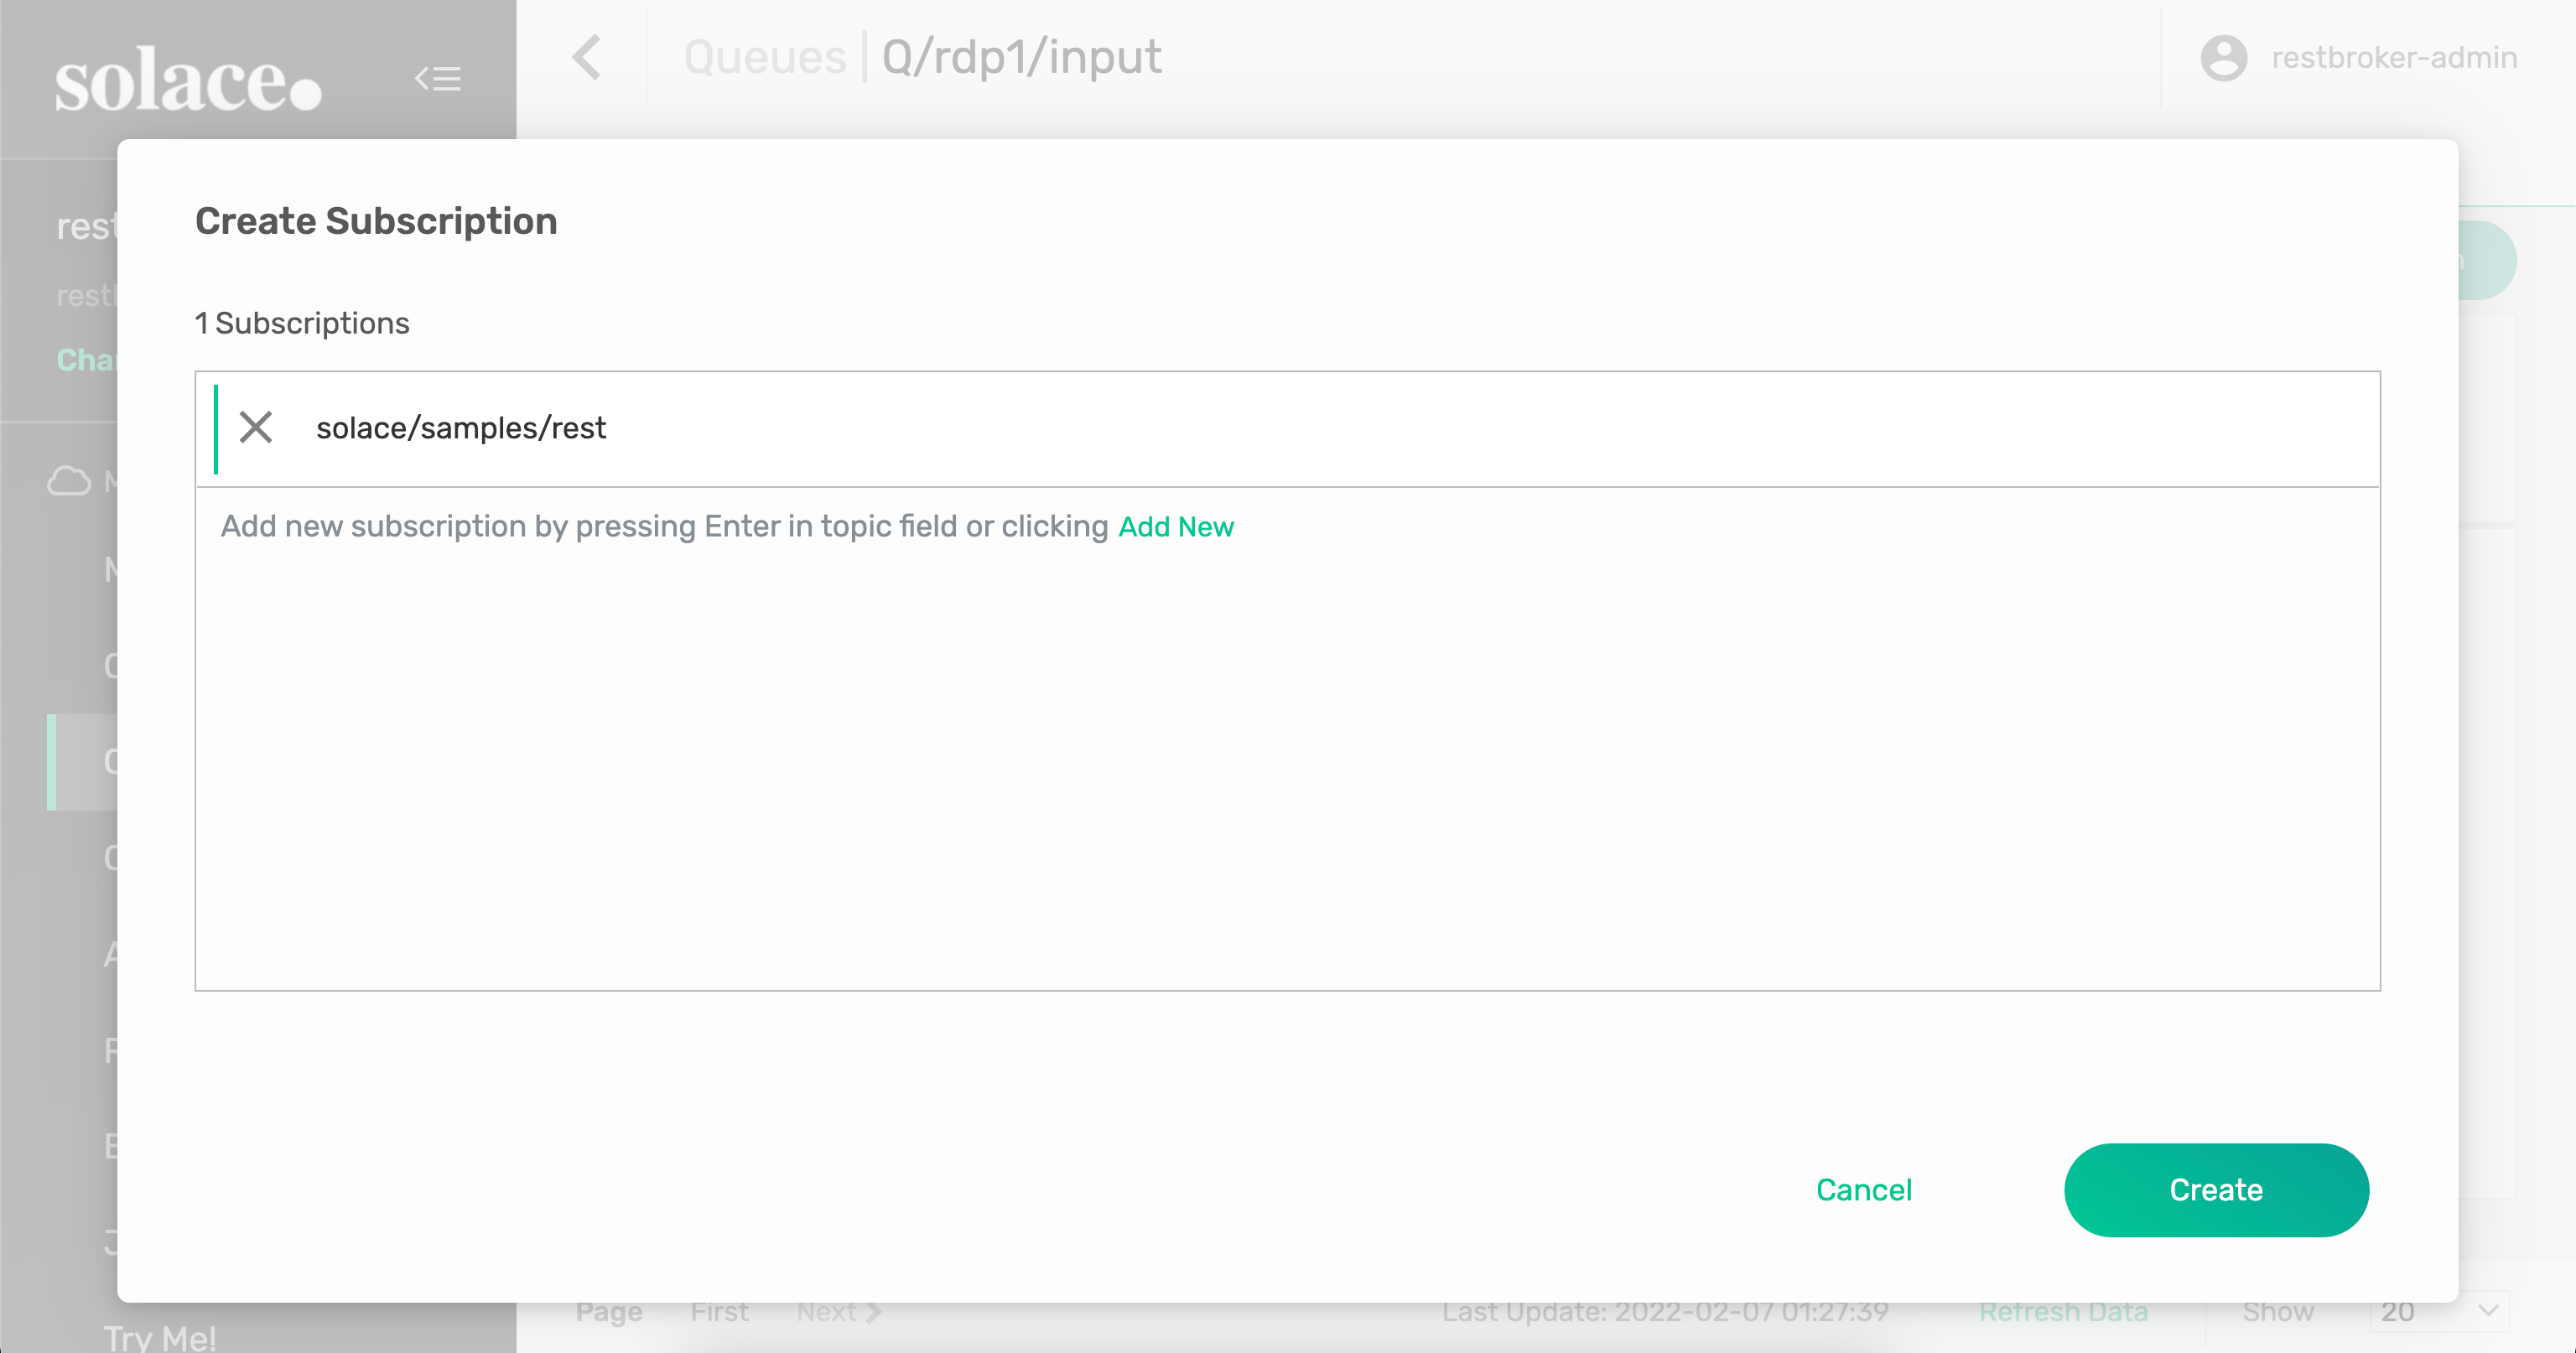
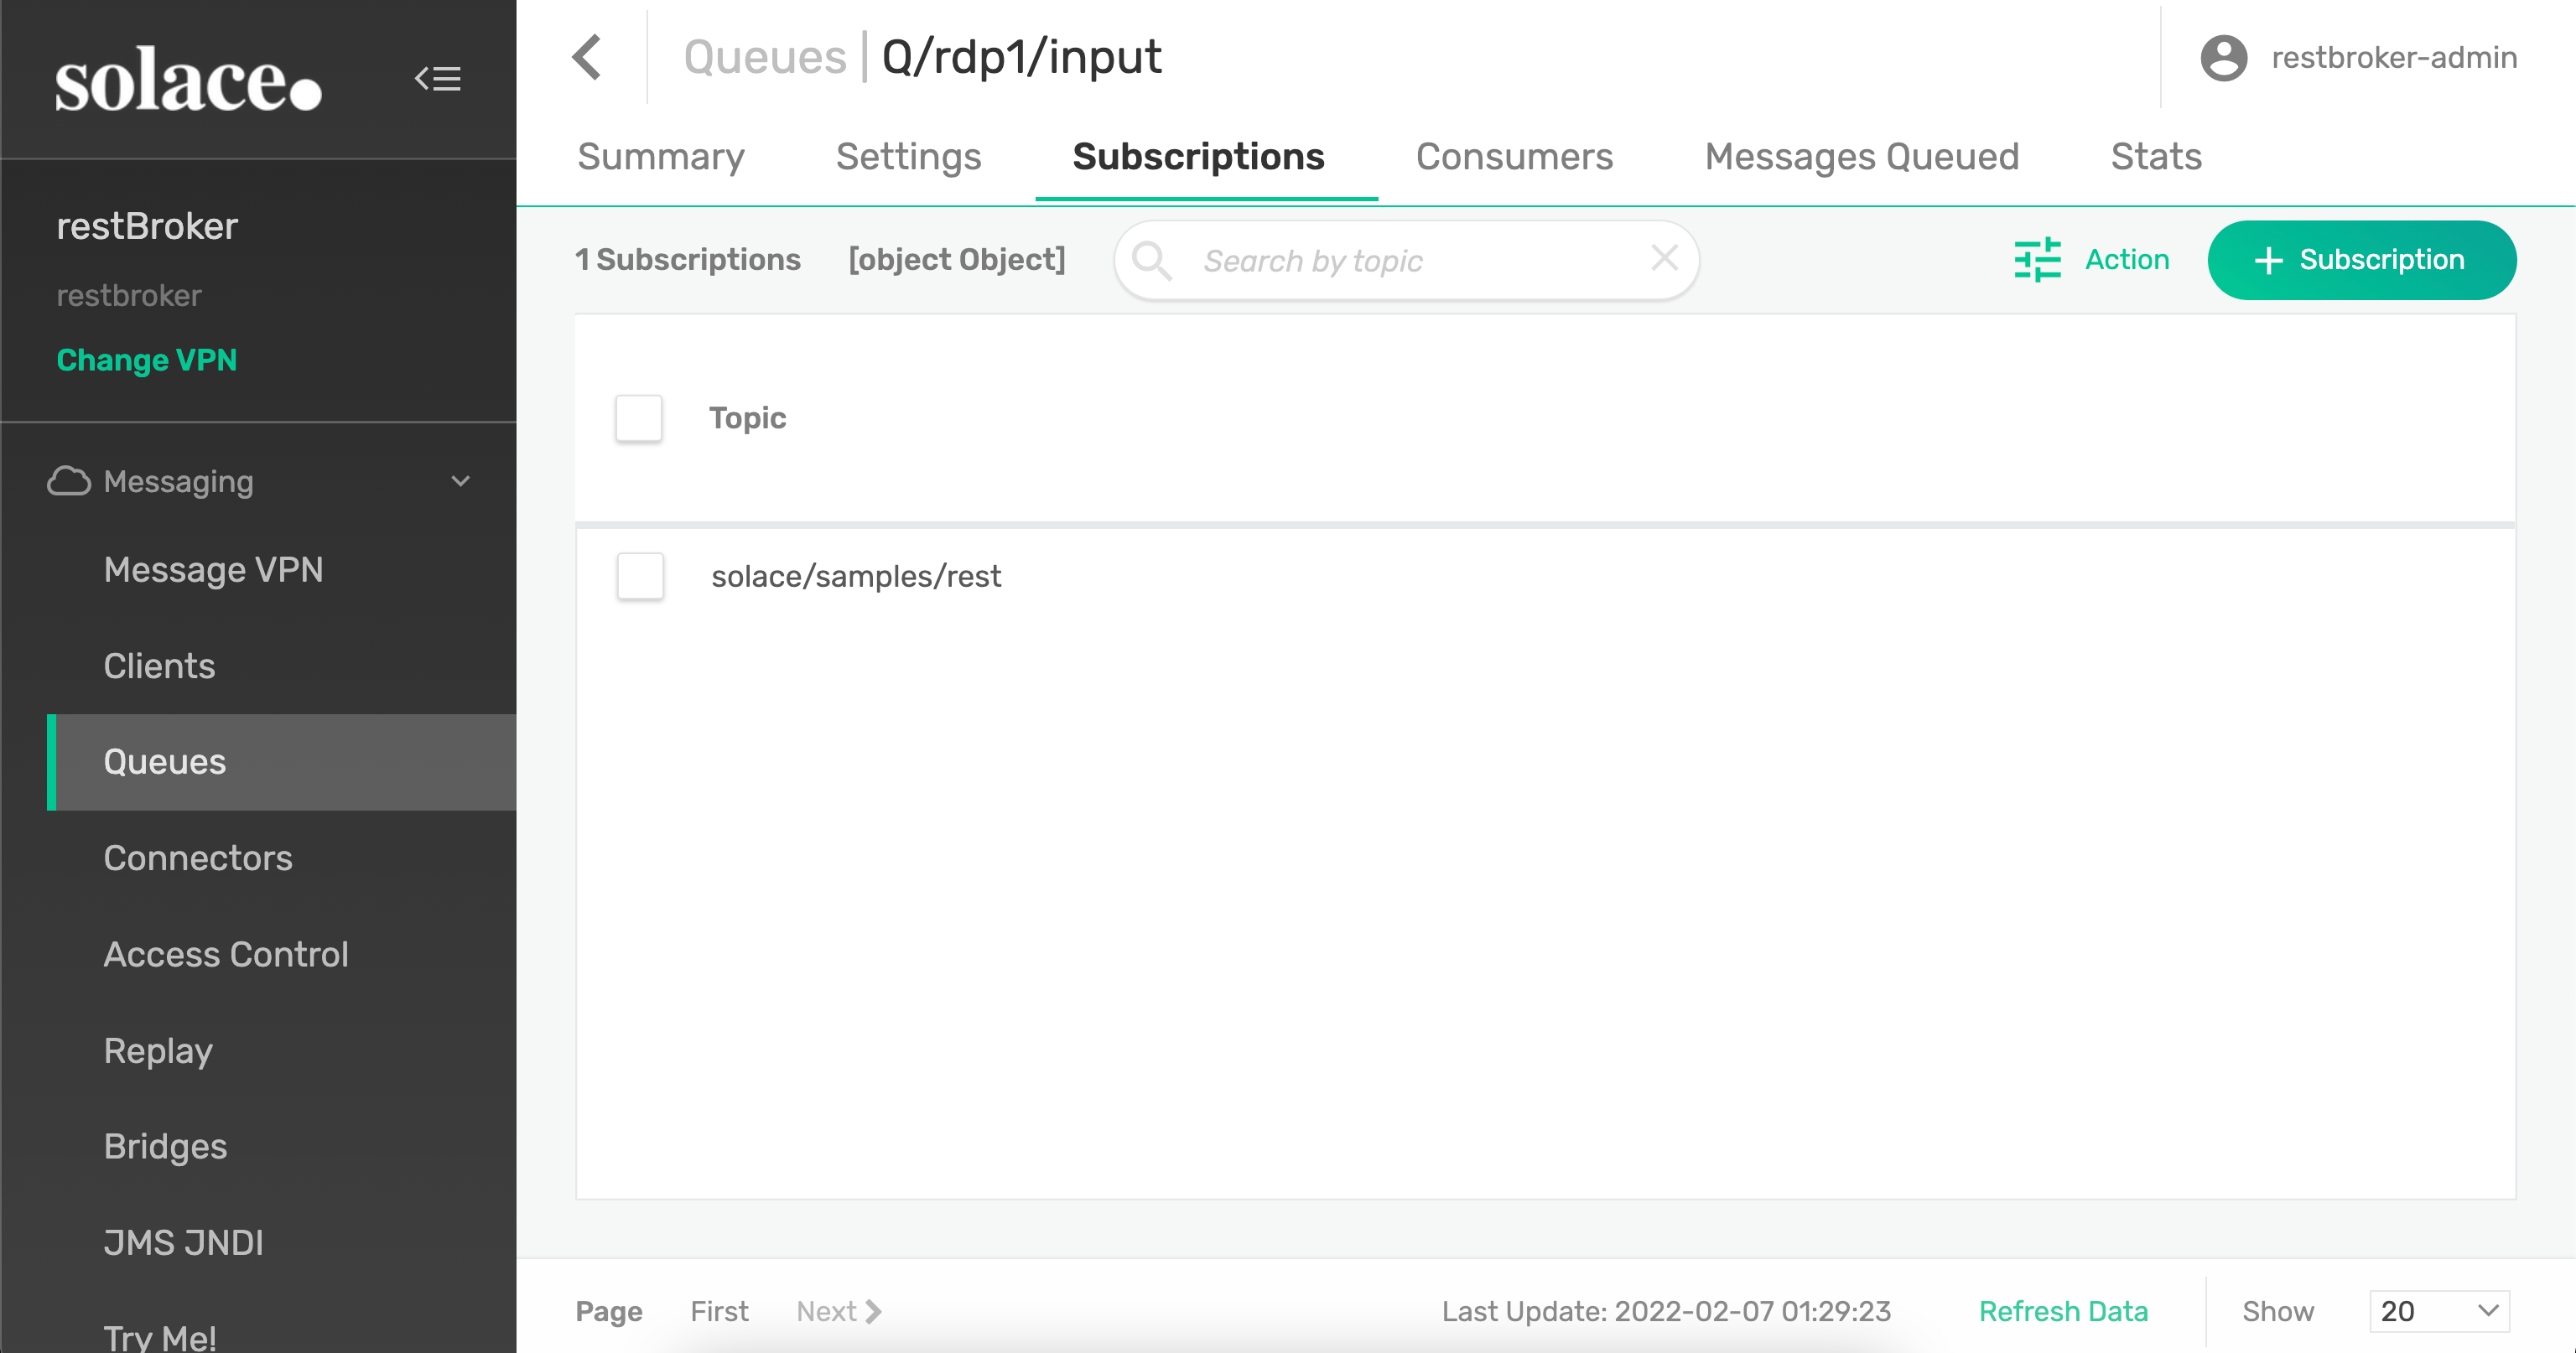
- Add a Topic Subscription to the queue
Add a Topic Subscription - solace/samples/rest
Topic Subscription successfully created
- Create a REST Delivery Point object
Create a REST Delivery Point - rdp1

Configure the REST Delivery Point

REST Delivery Point successfully created
- Create a Queue Binding object
Create a queue binding to the queue you created previously. This will tell the RDP where to fetch messages from. Note that REST Delivery Points (RDPs) can be bound to multiple queues.
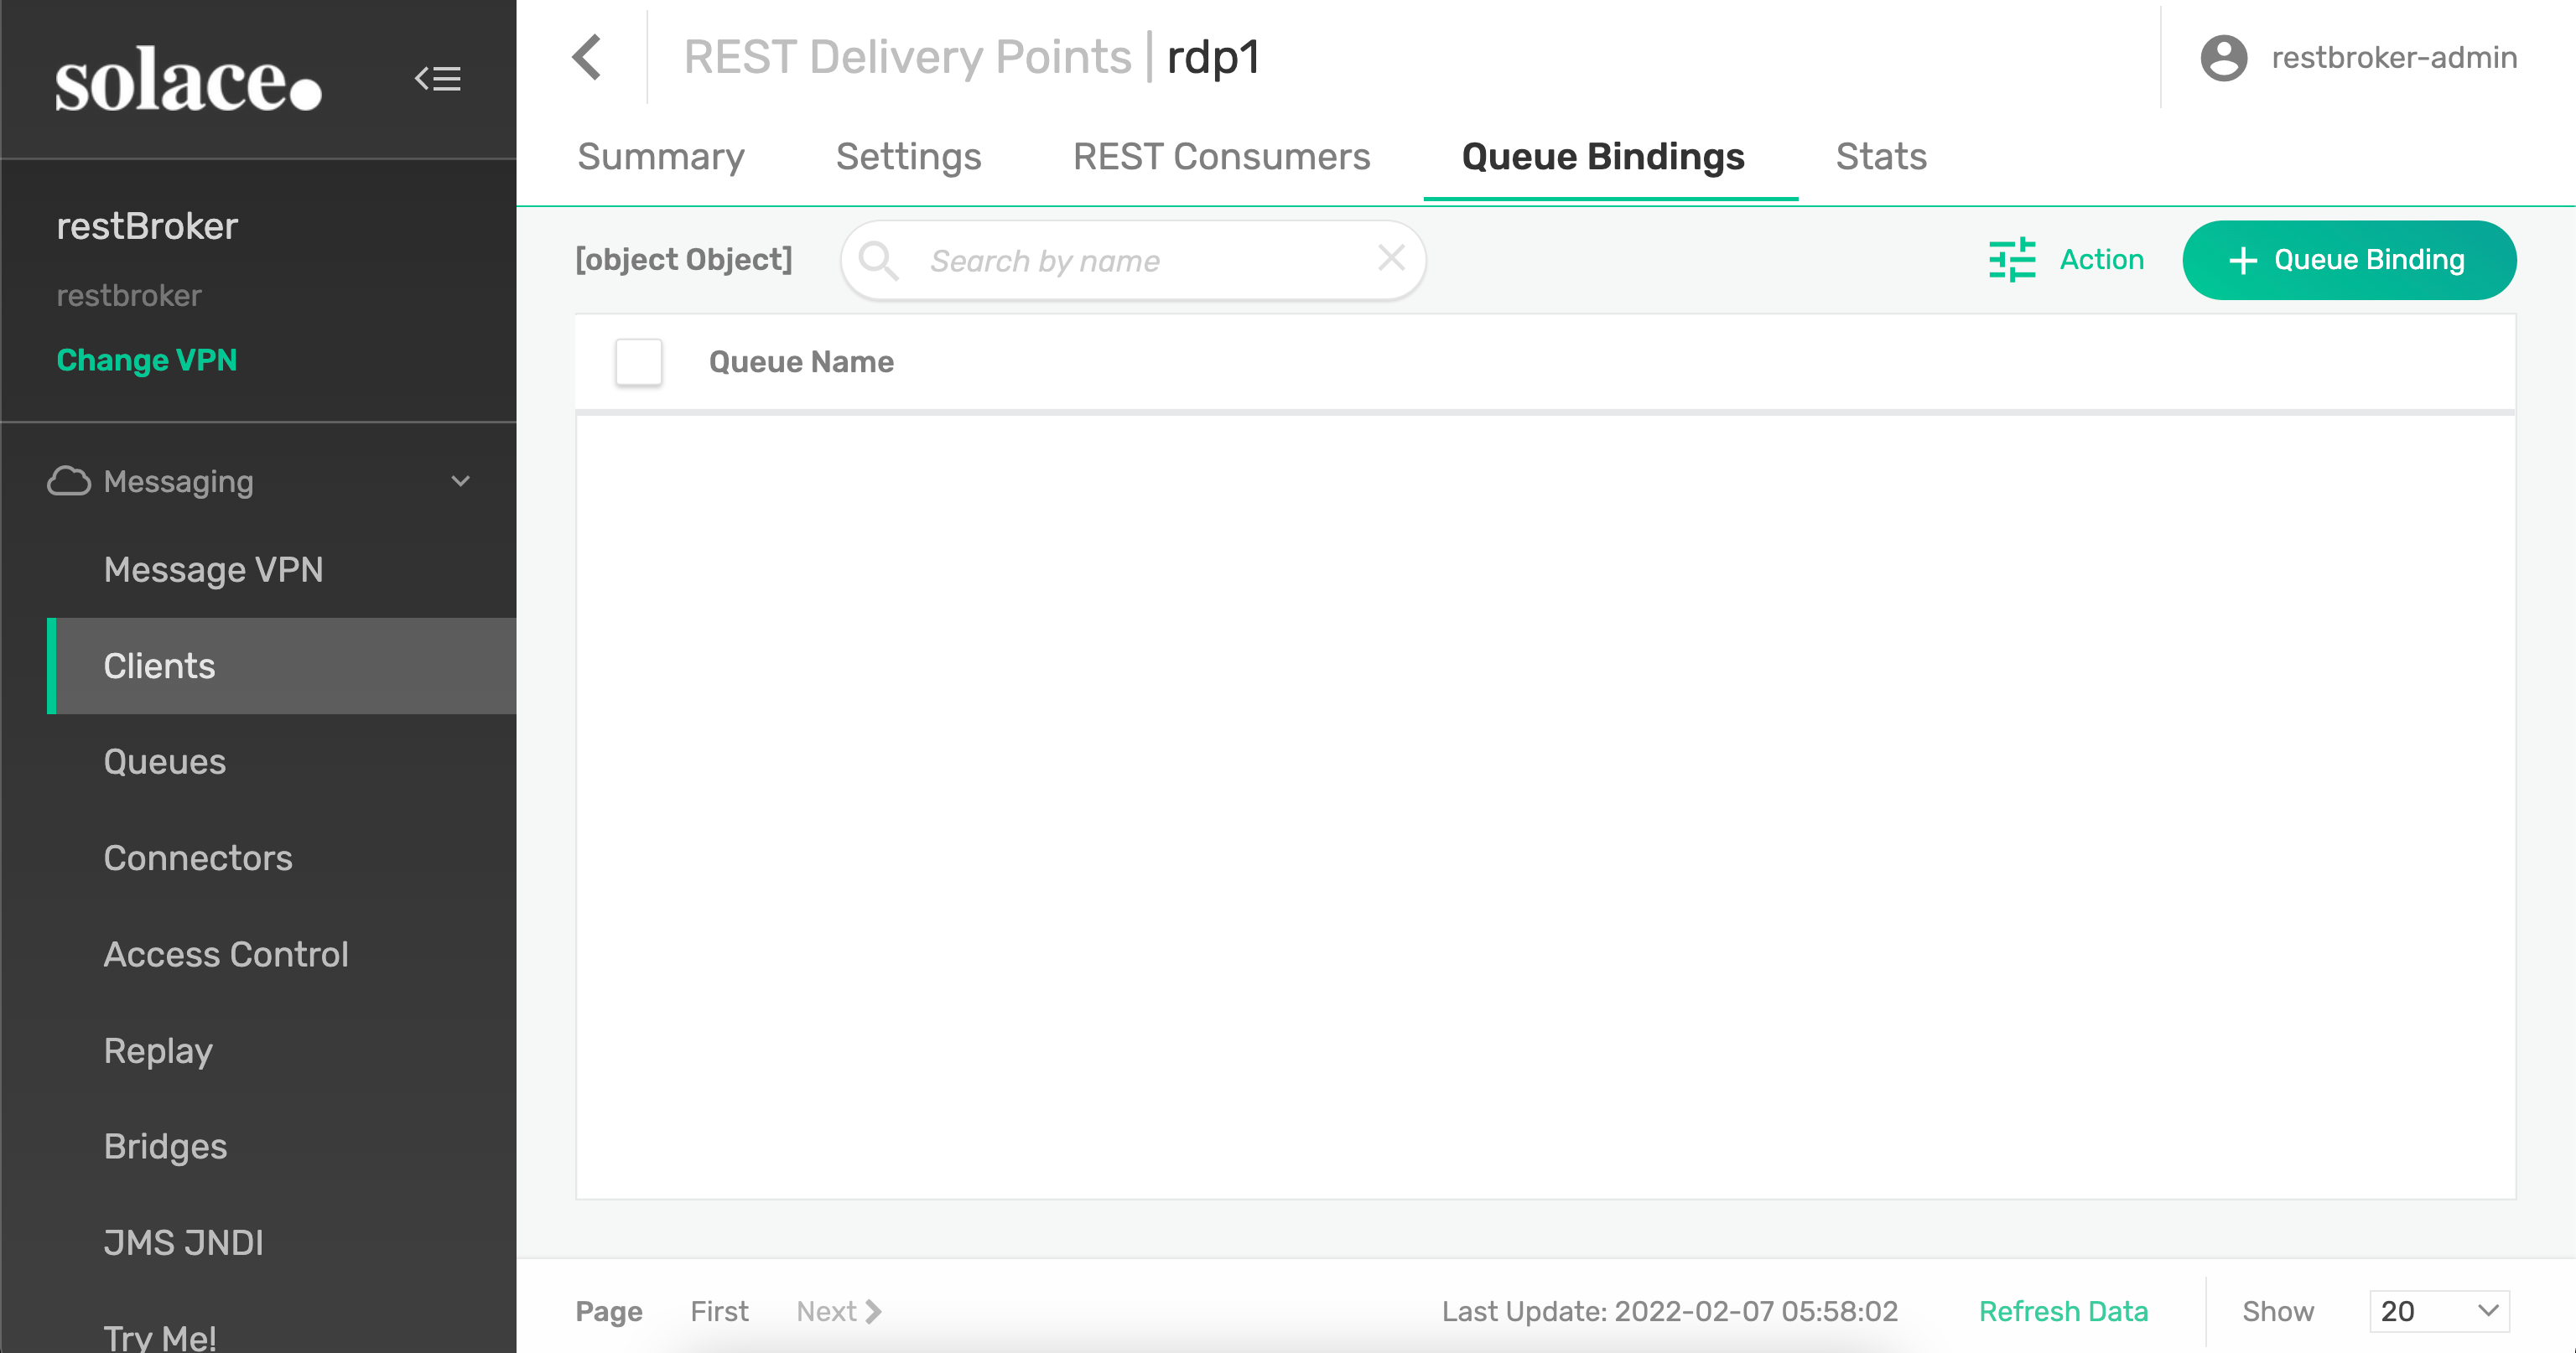
Create a queue binding - Q/rdp1/input
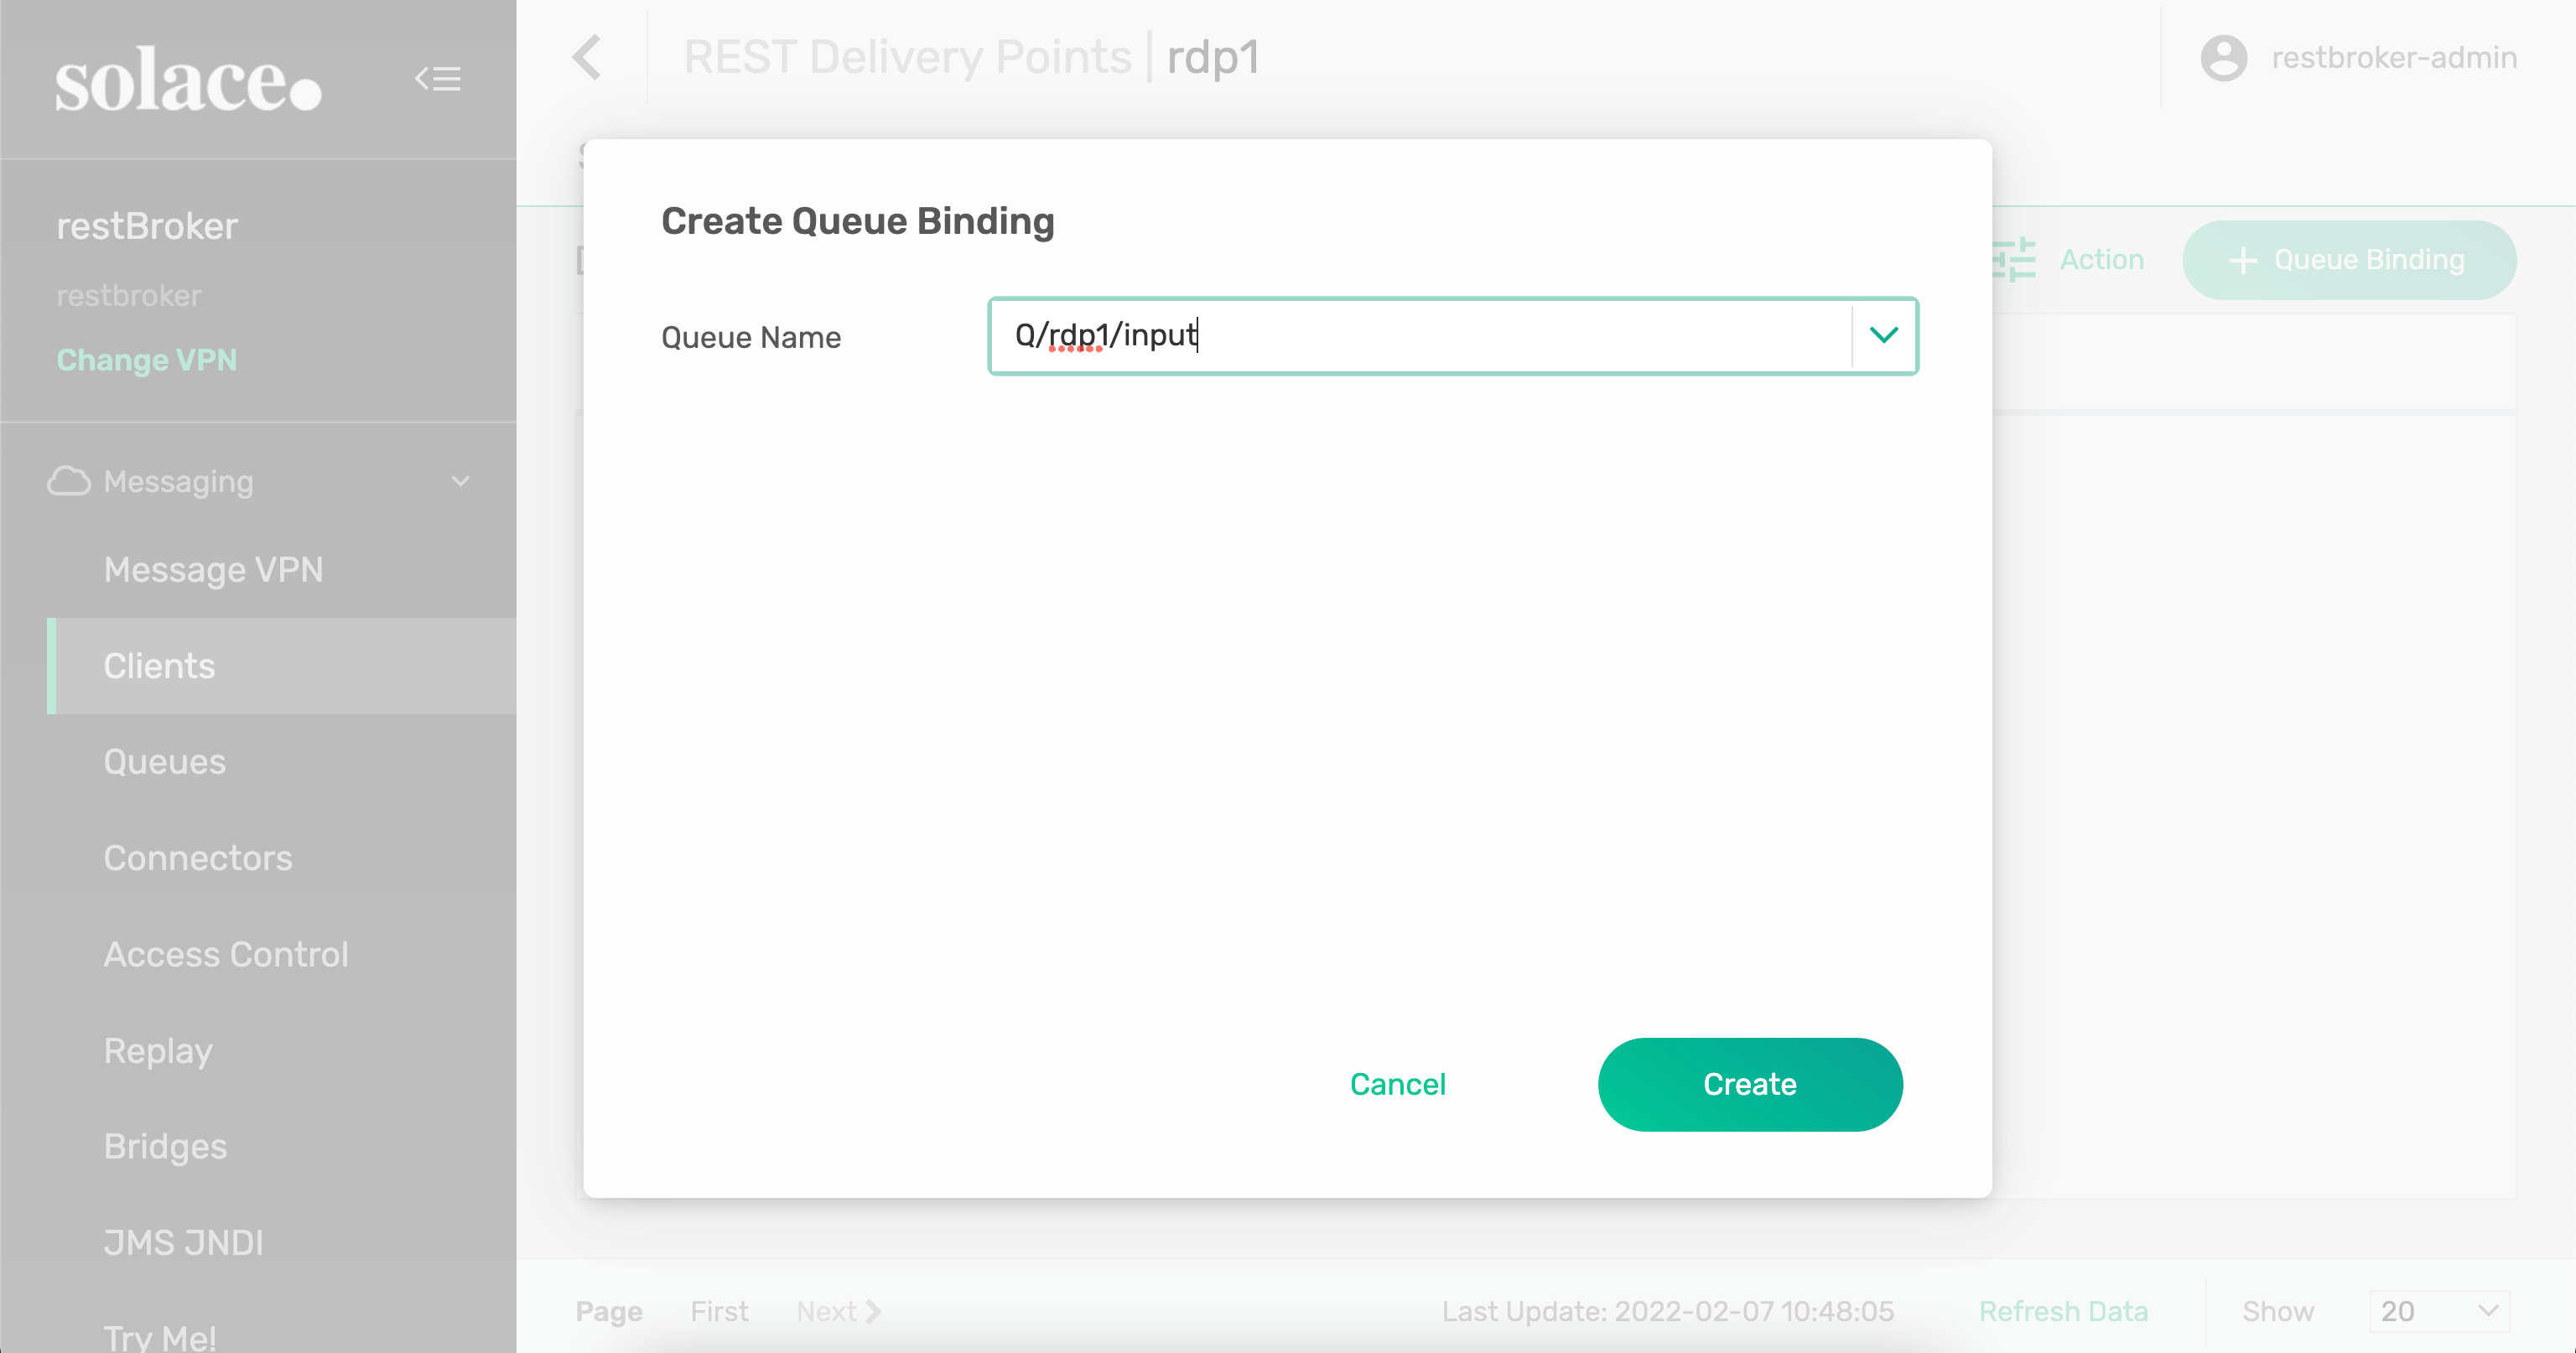
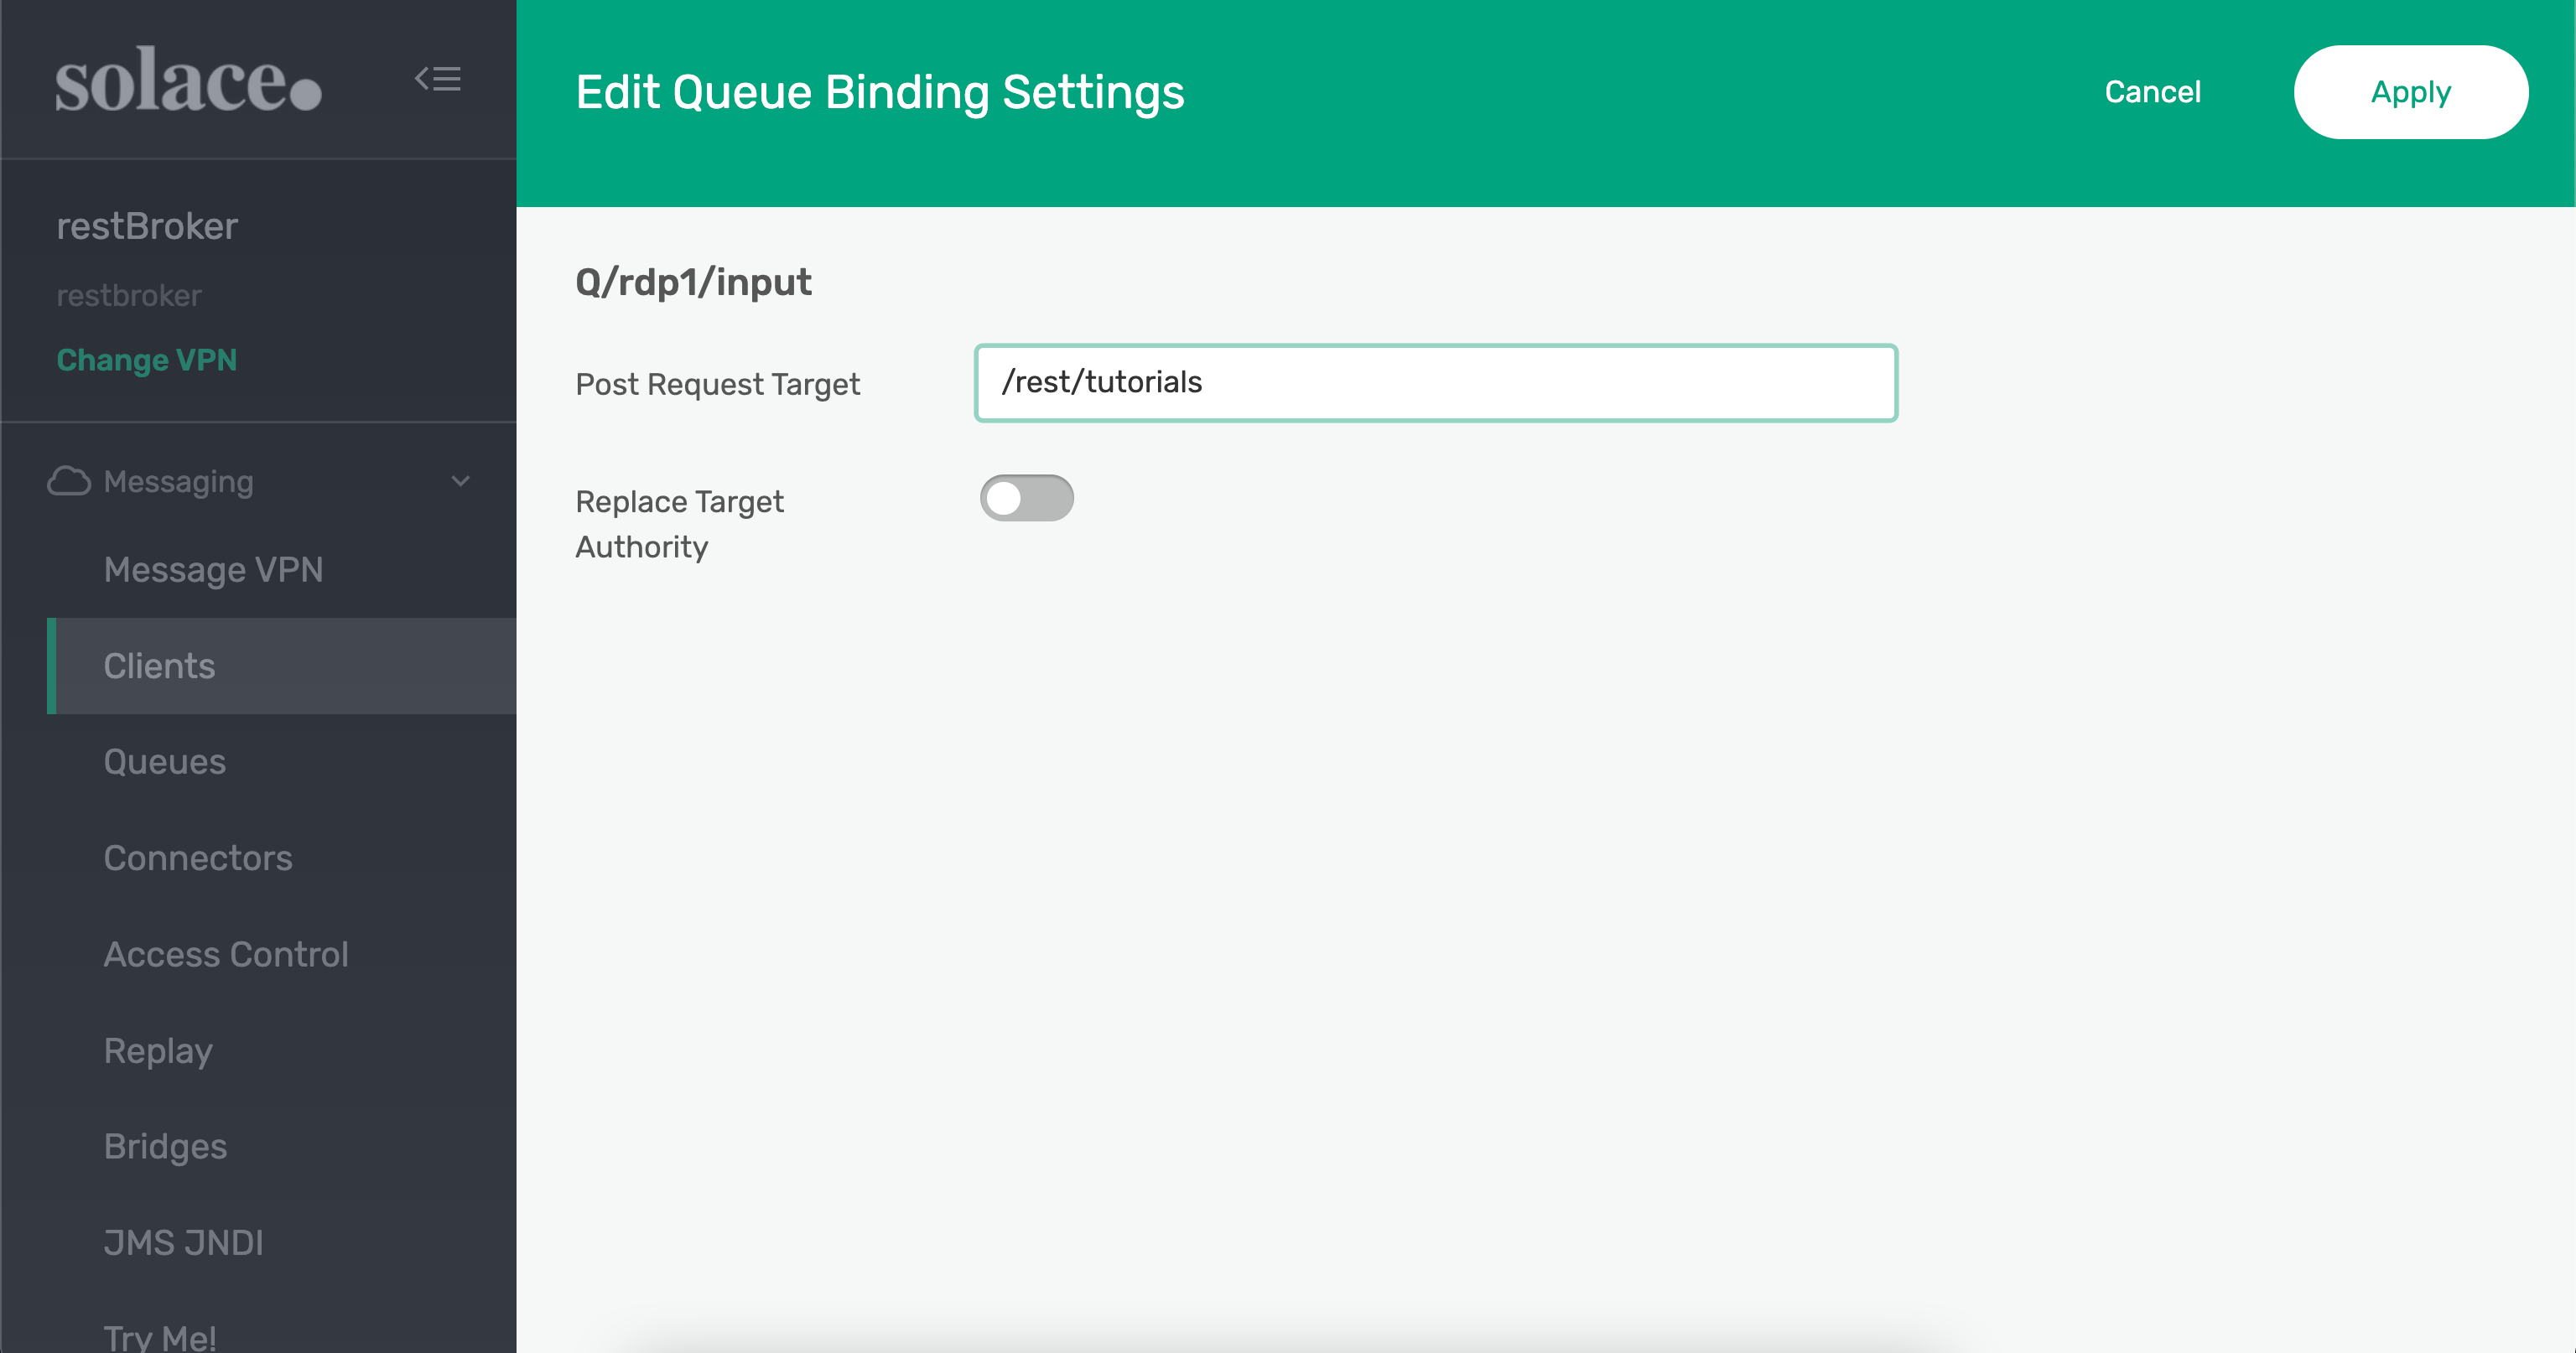
Set the POST target where the requests would be sent - /rest/tutorials
Note that the RDP is down - it will automatically start up when a REST consumer makes a connection to the RDP.
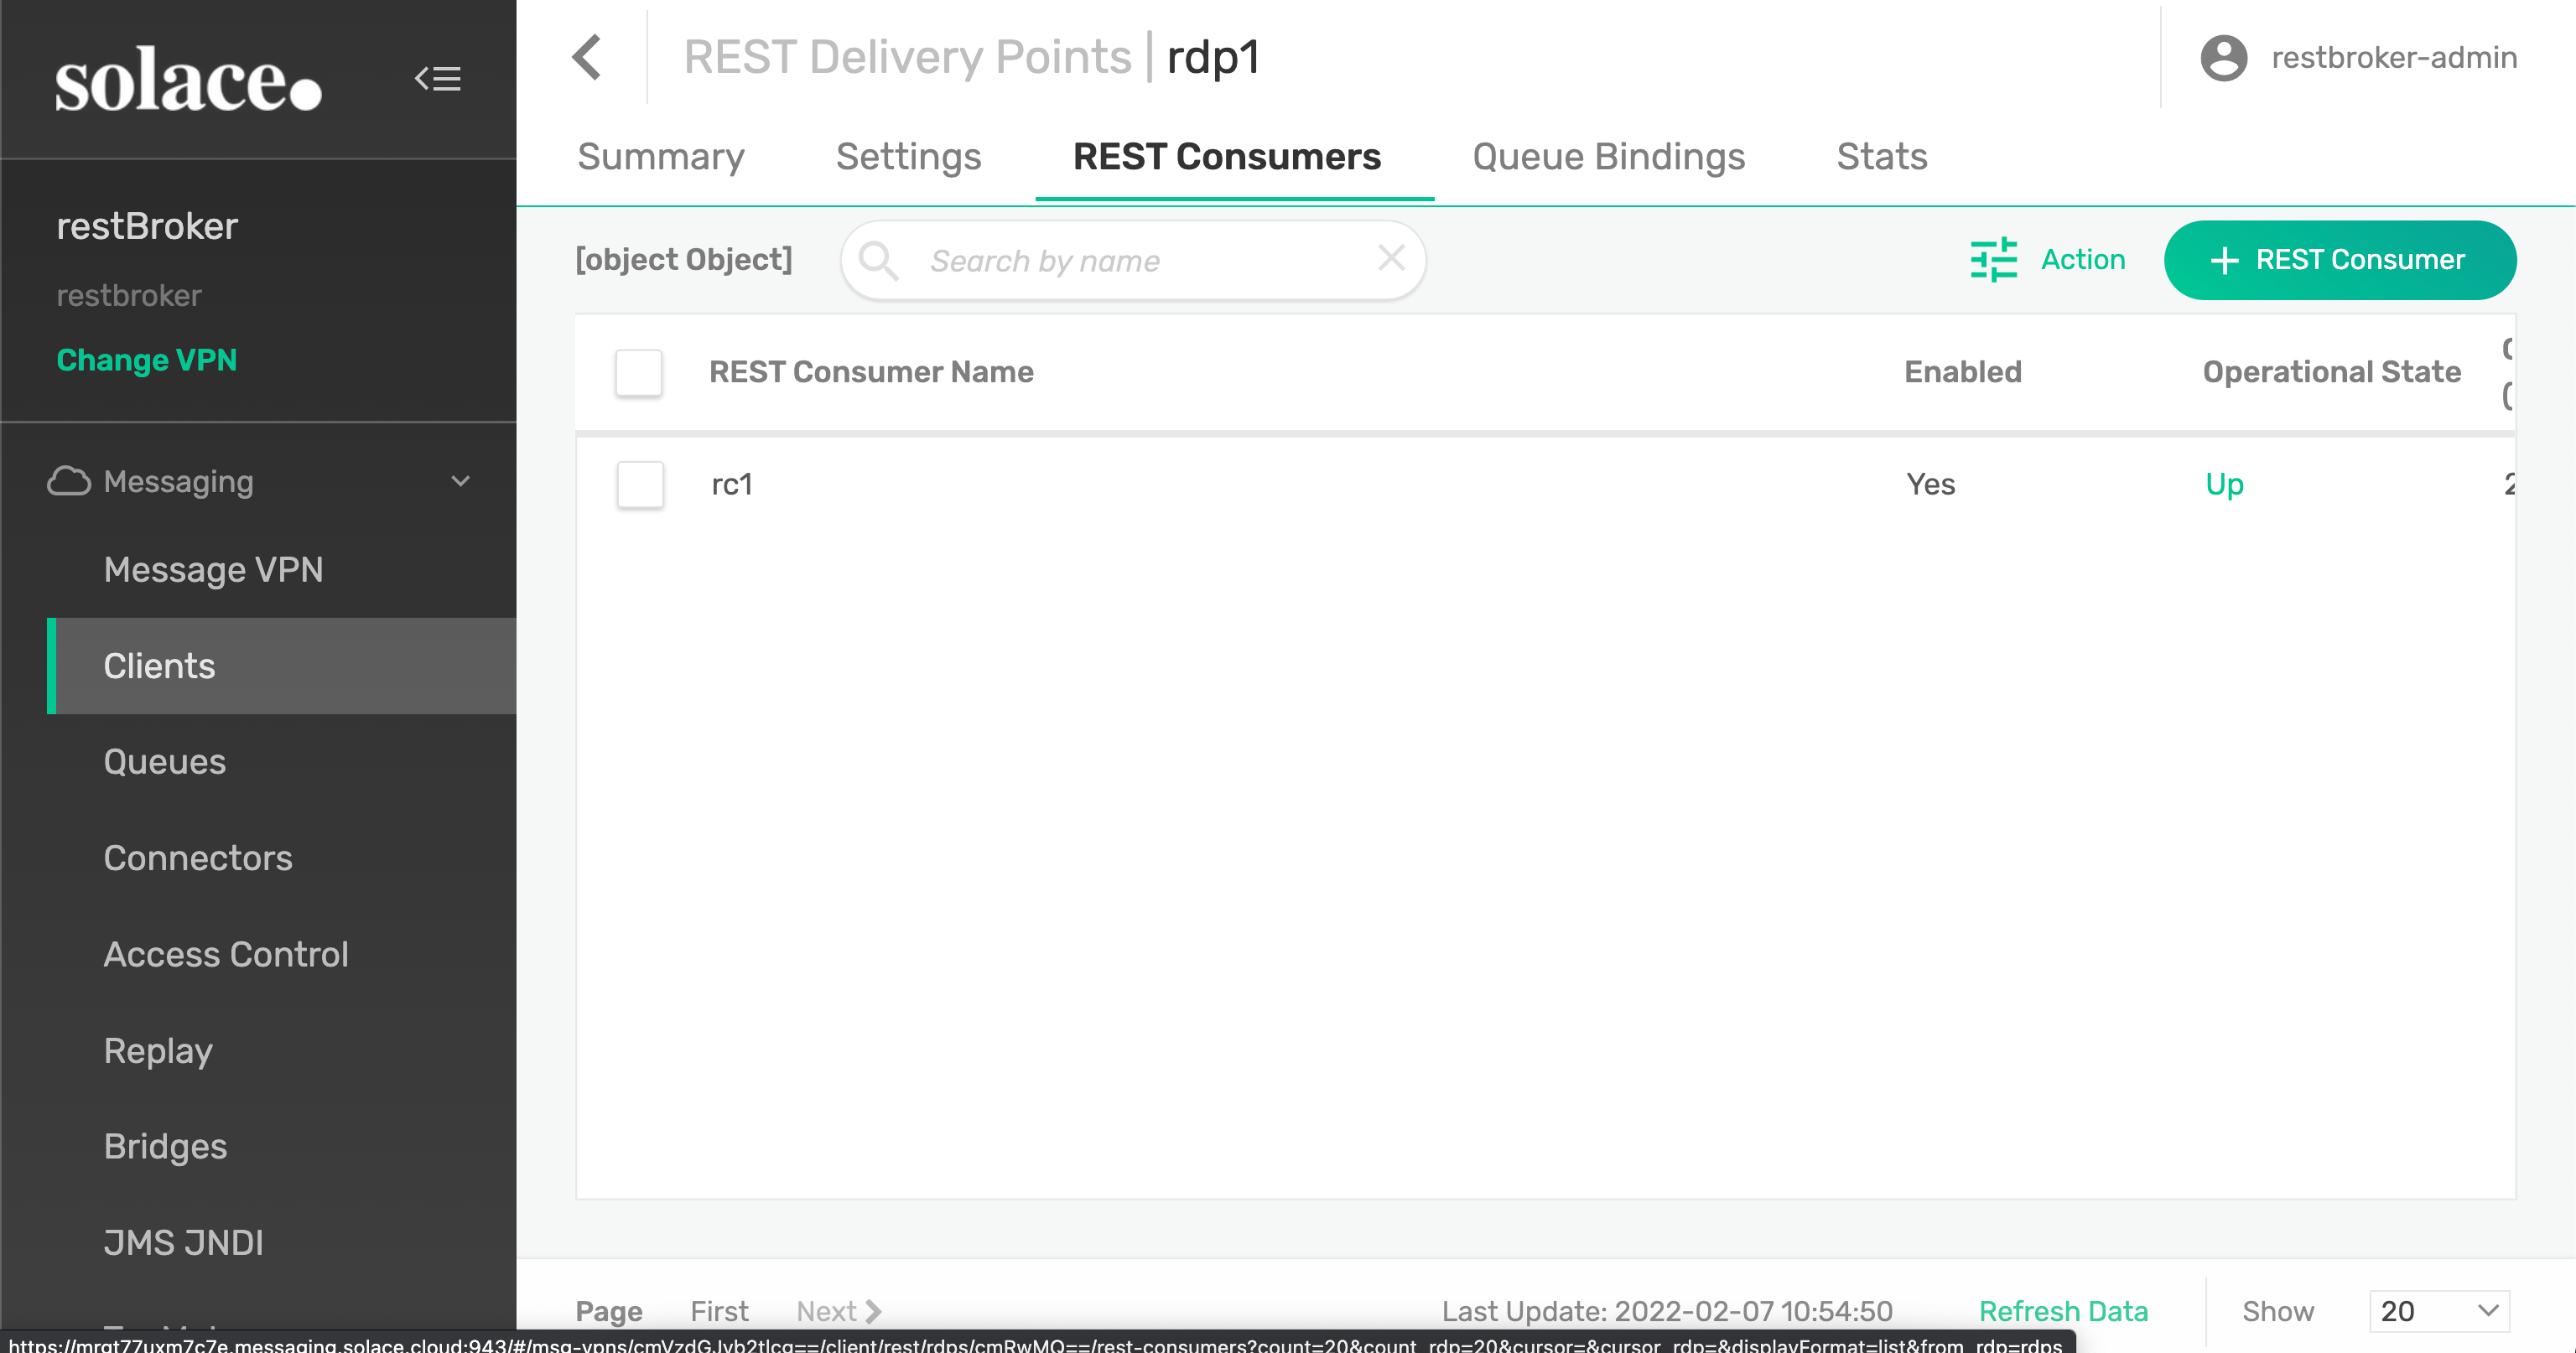
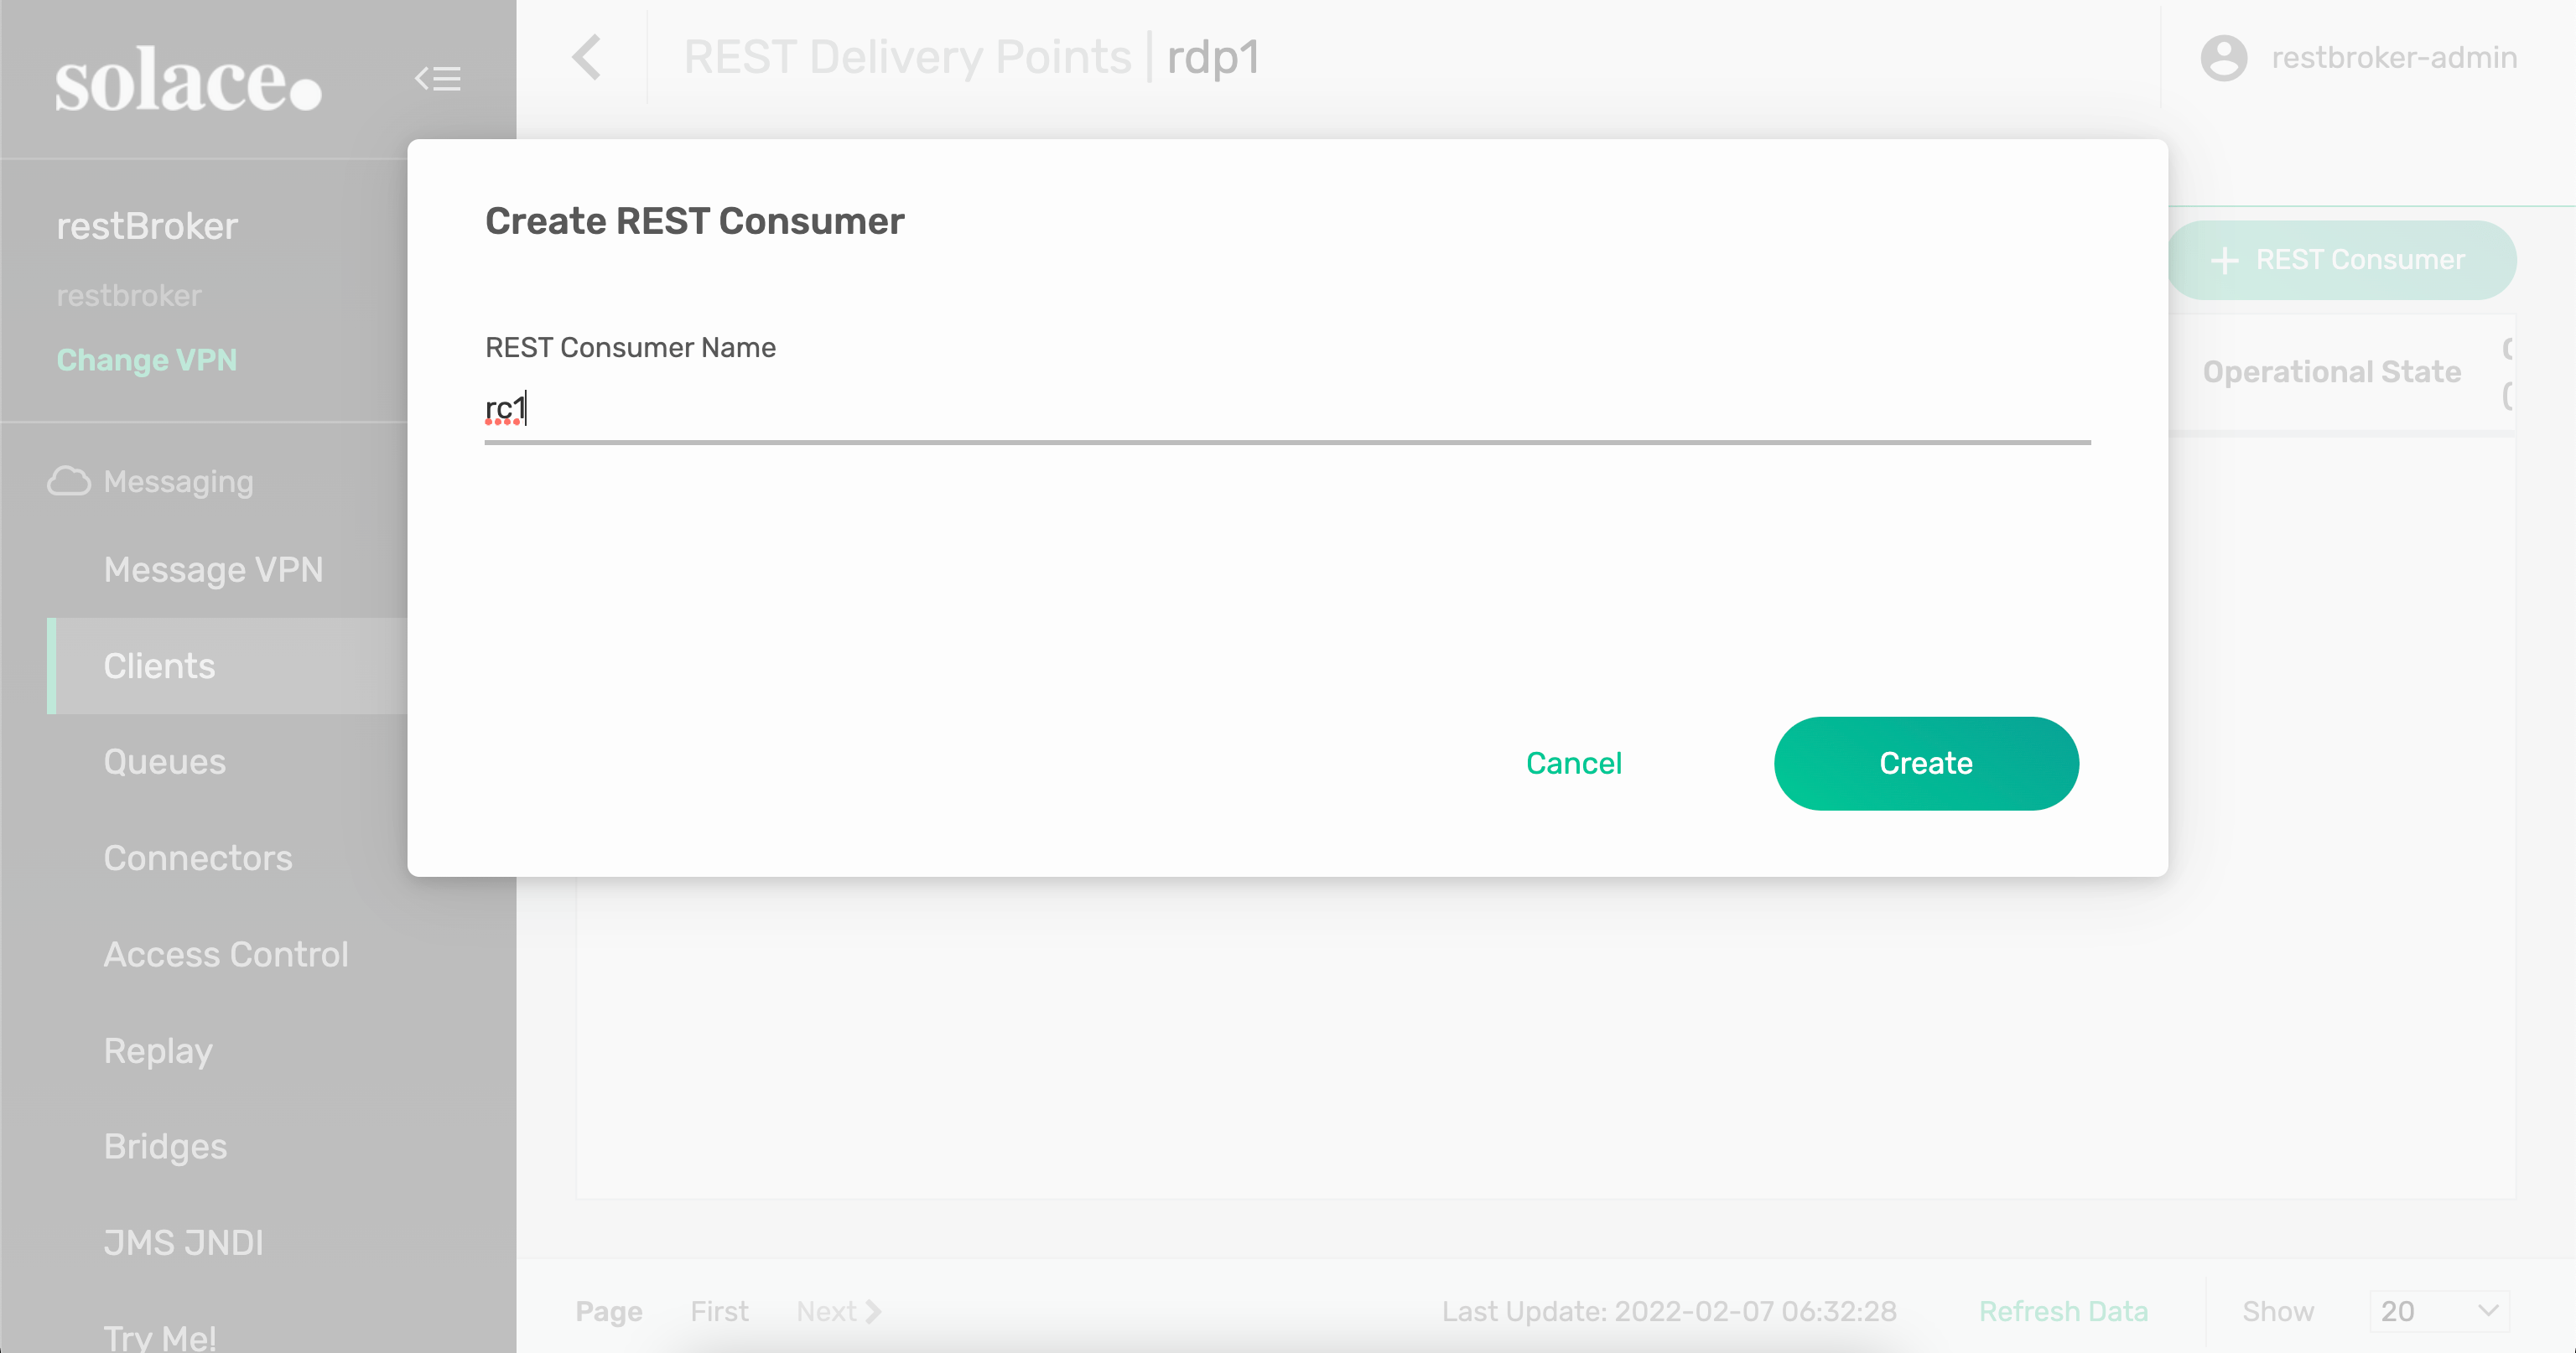
- Create a REST Consumer object
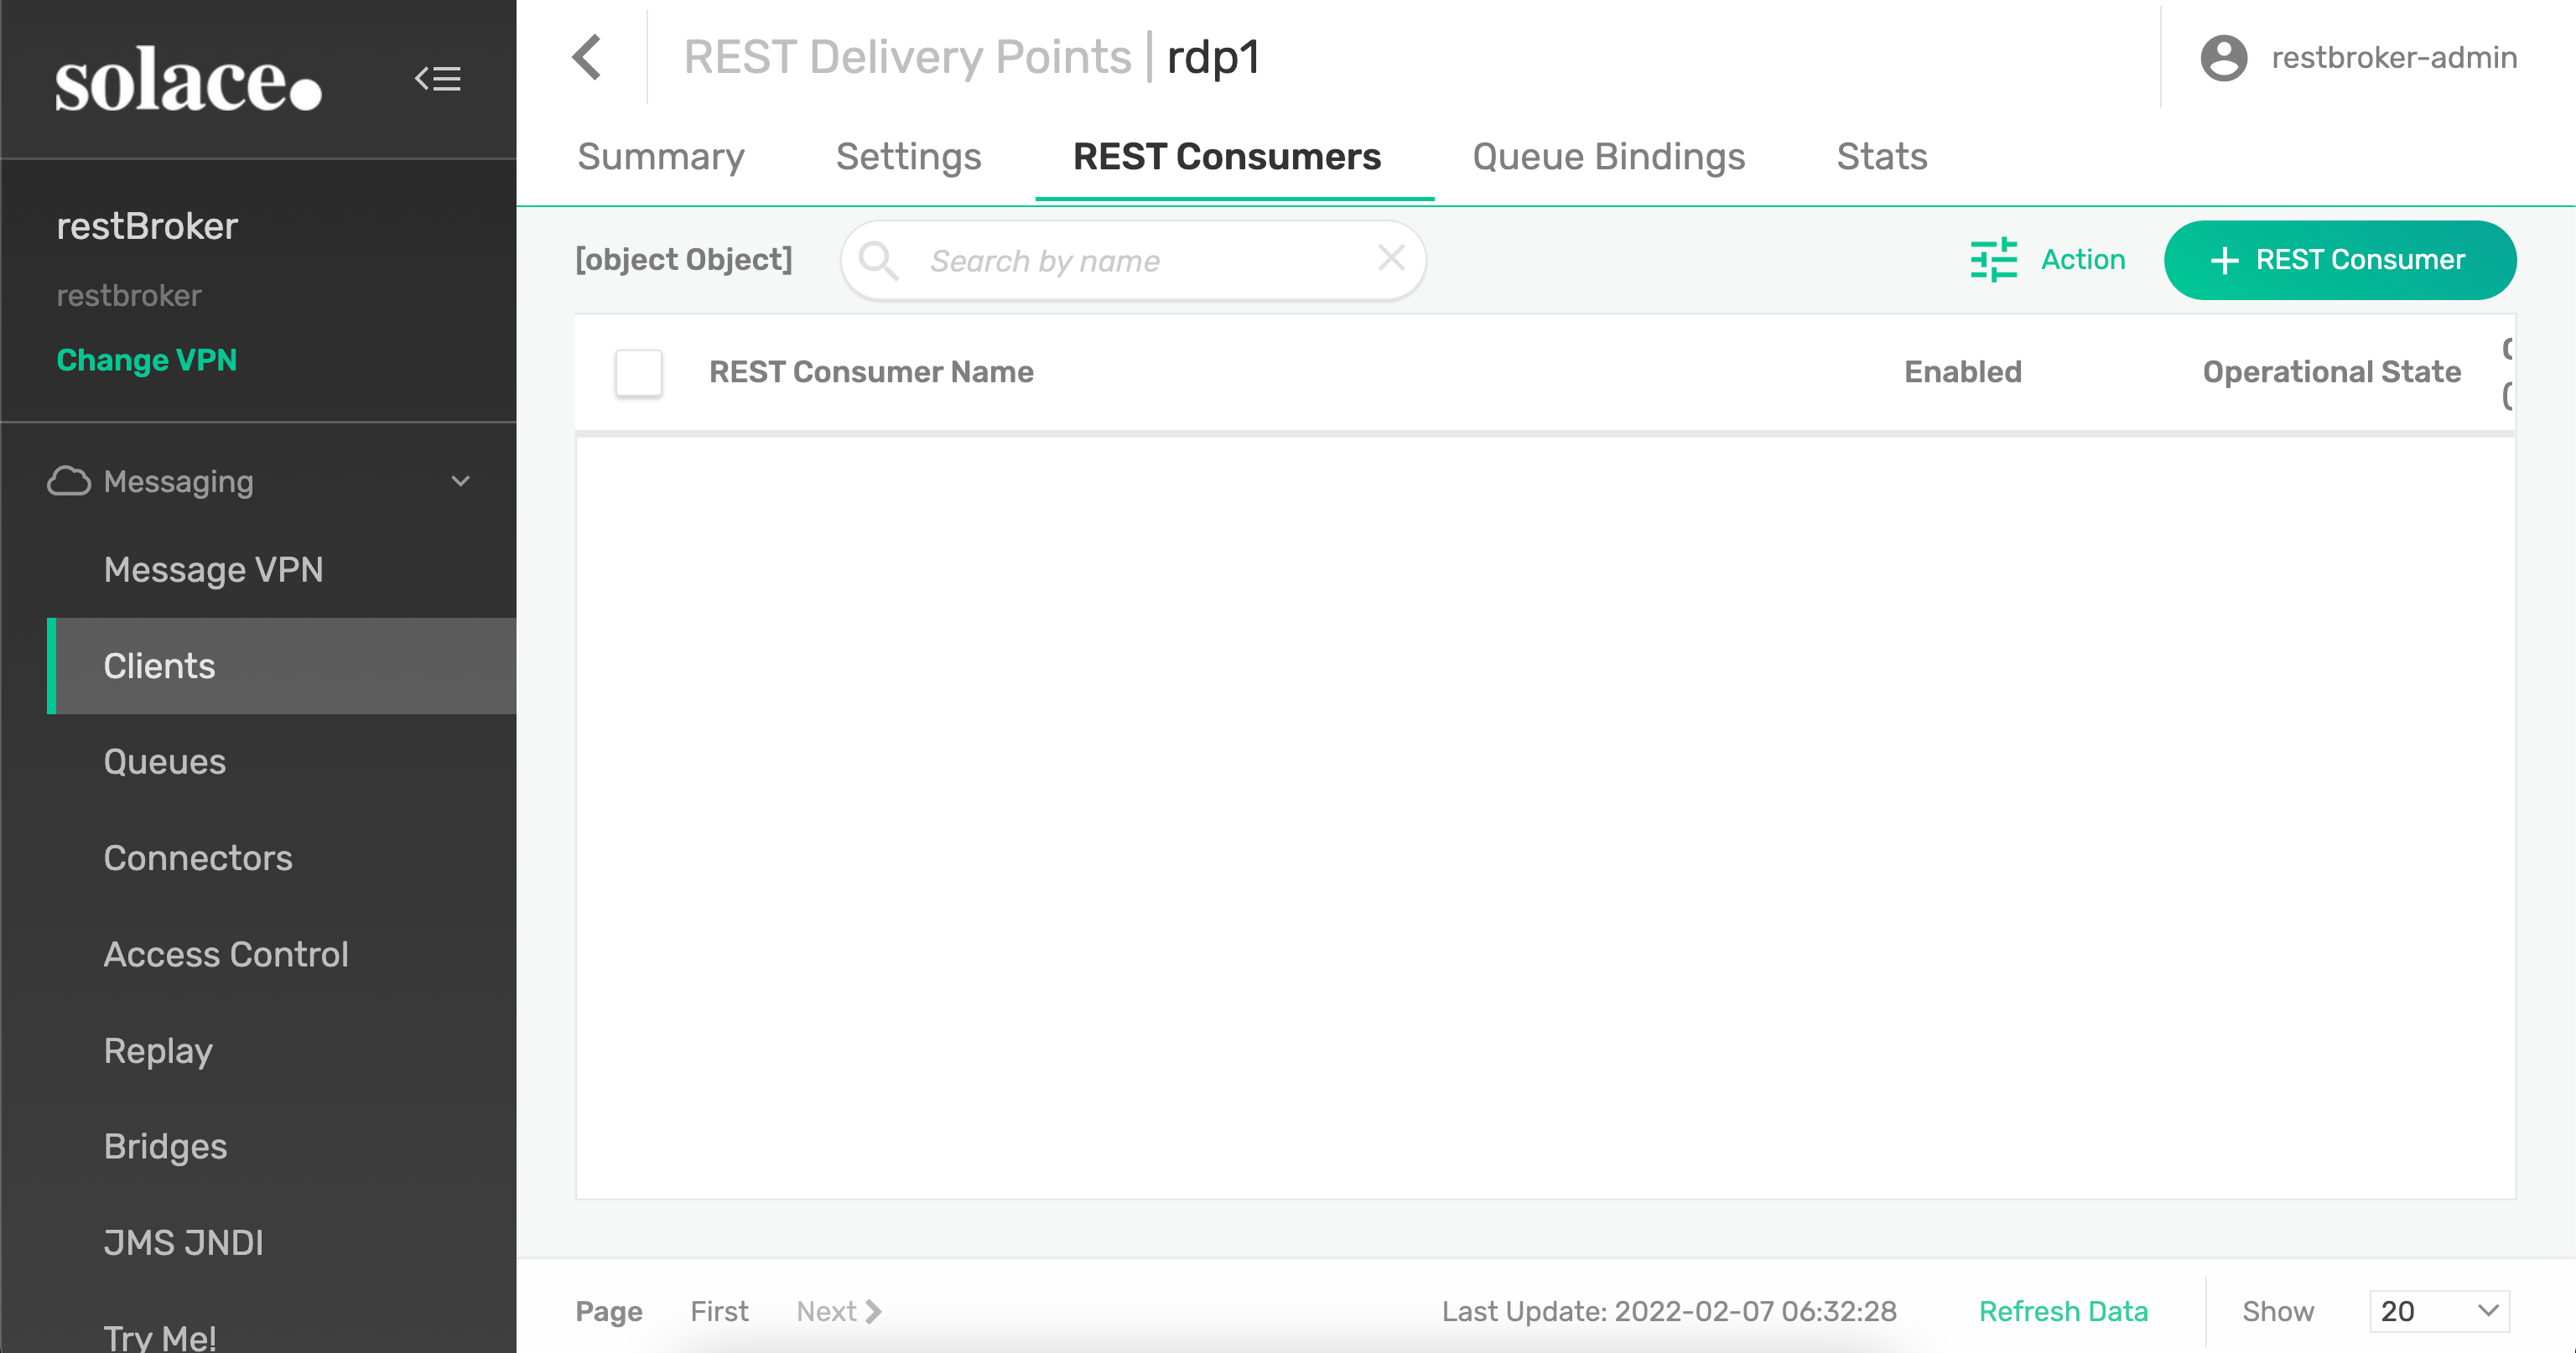
Create a REST Consumer - rc1
Enable the REST Consumer and set HOST:PORT details of the message HTTP listener
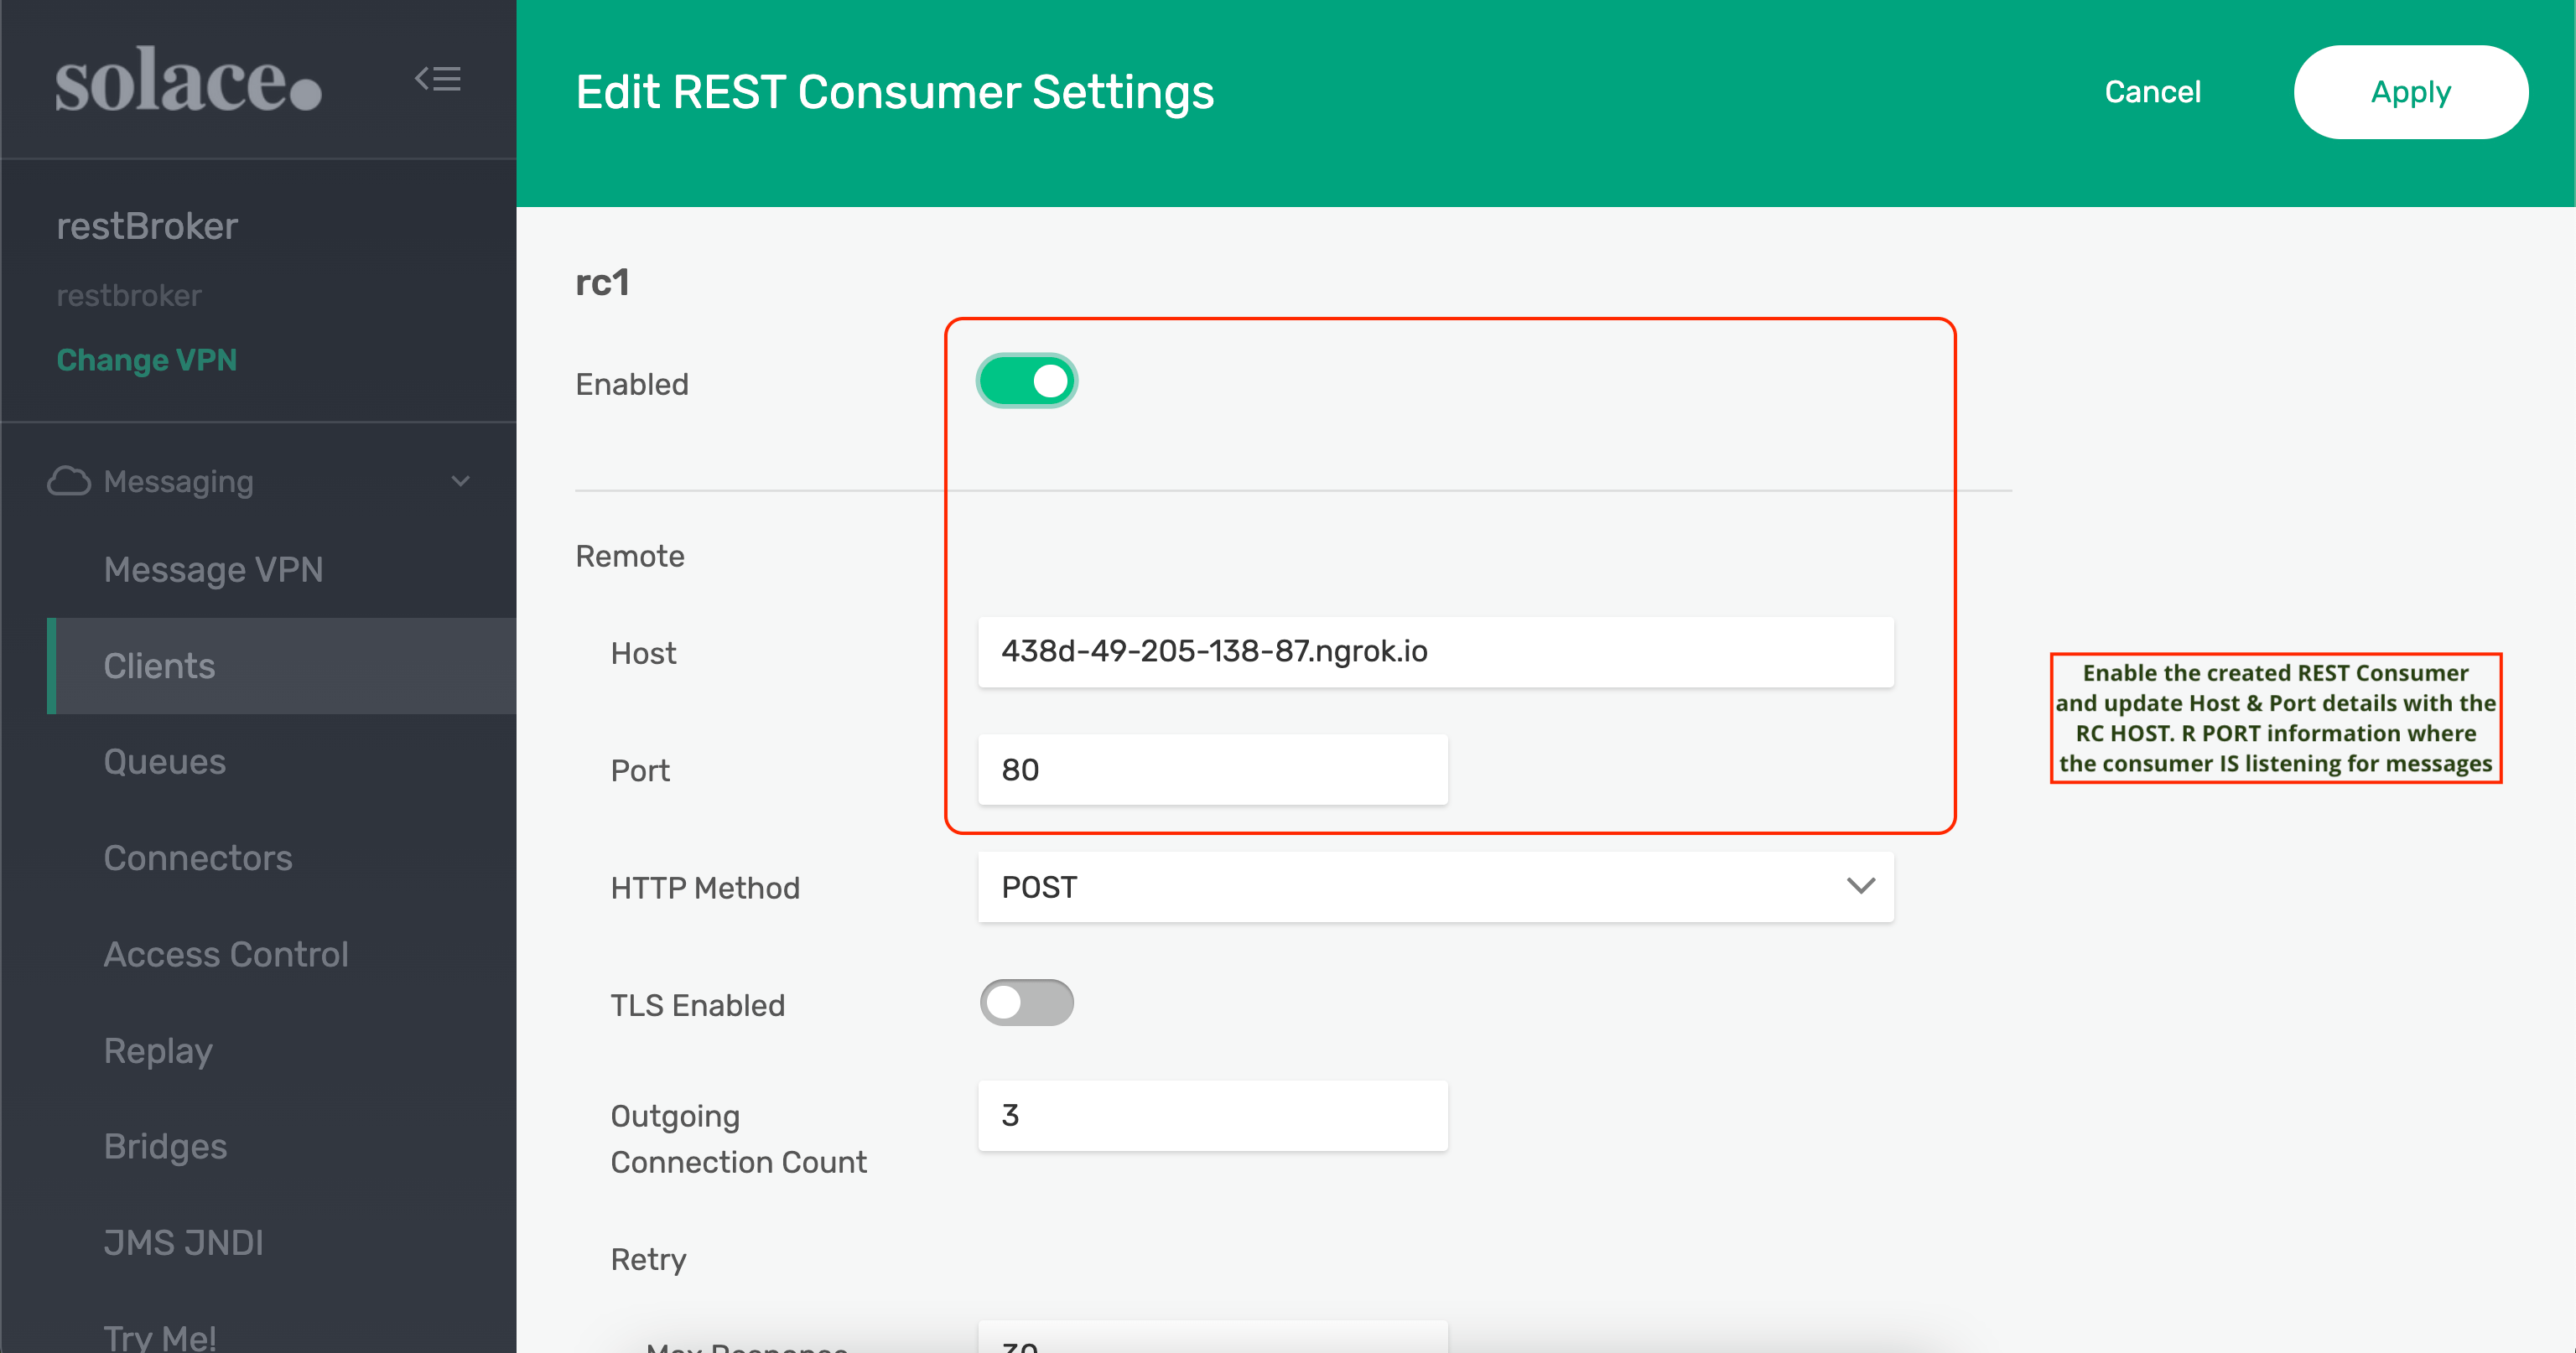
To use ngrok for this purpose:
-
Download and install ngrok from https://ngrok.com/download
-
Run the ngrok command from the terminal or command window:
ngrok protocol portnumber
The first parameter is the protocol and second parameter is the port number on which the local listener is running.
For example to expose a web server on port 1000 of your local machine to the internet, you can run the following command.
ngrok http 10000
Upon start, the ngrok utility will open tunnels for plain and secured connections.
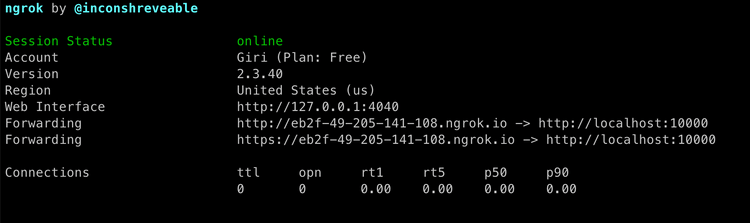
Now the local service is available for access from the net via host eb2f-49-205-141-108.ngrok.io and port 80 or 443
REST Consumer successfully created
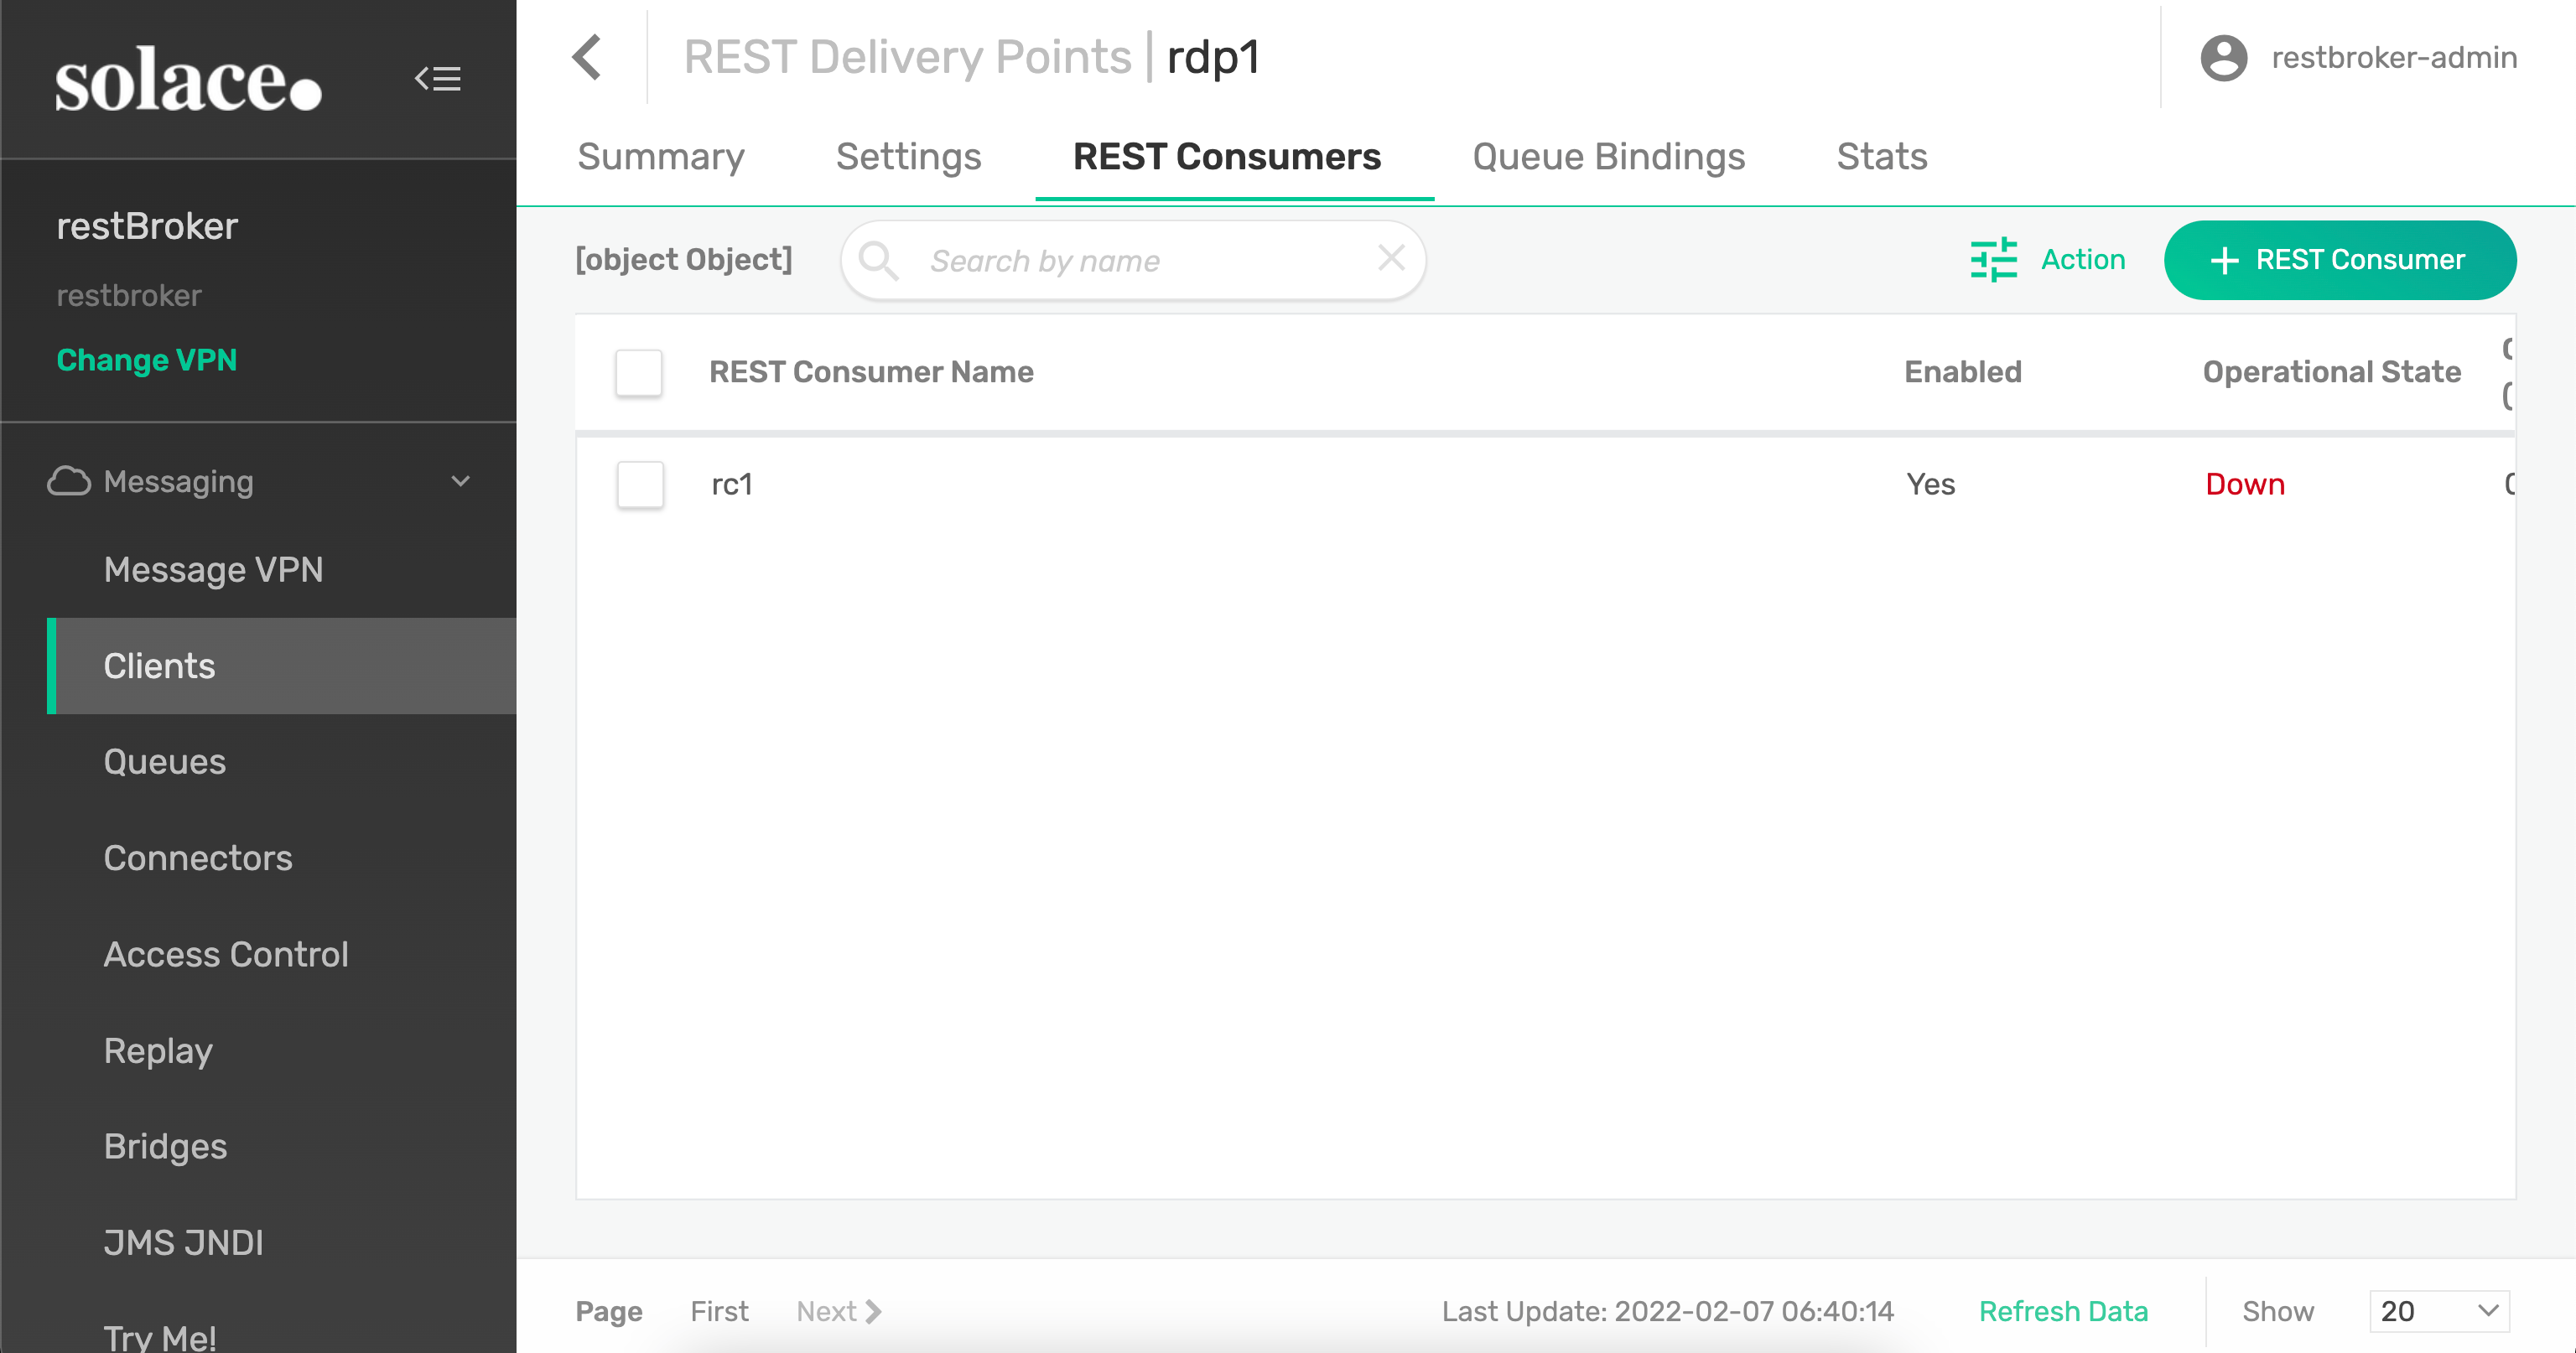
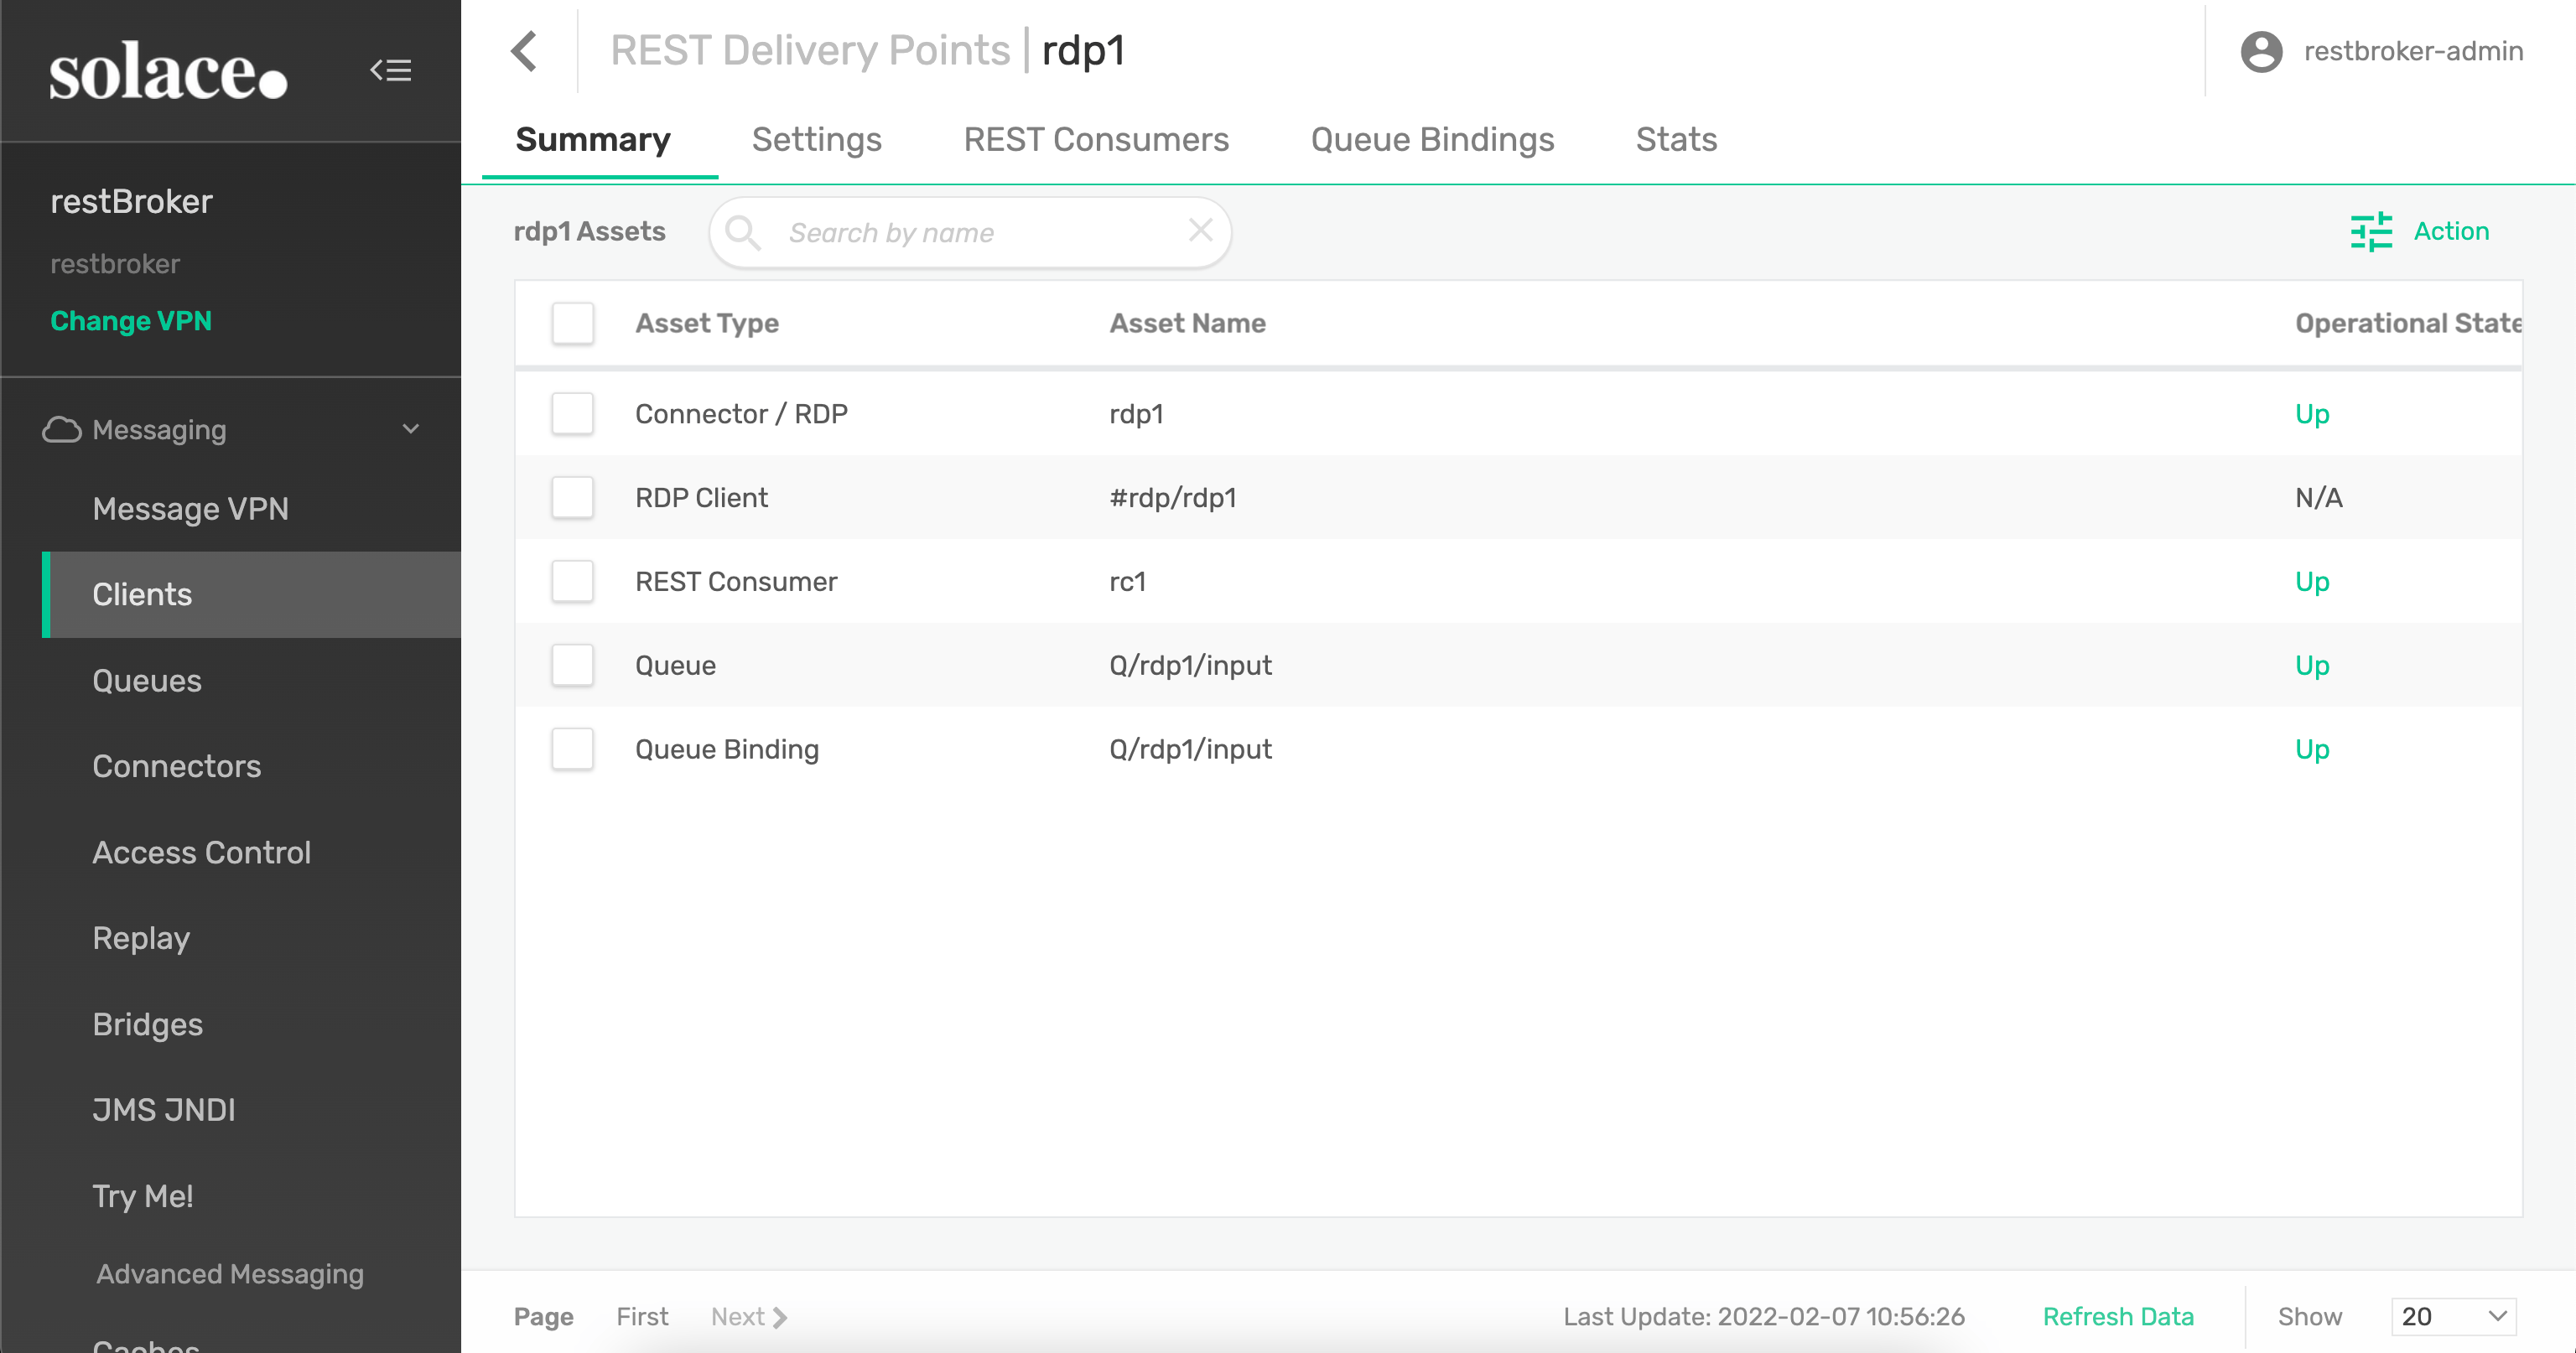
A final, configured RDP settings would look like this.
To know more about Solace Event Broker Manager check out Solace Event Broker Manager overview.
Option 2: Using SEMP and Postman
Solace Element Management Protocol version 2 (SEMP v2) is a RESTful API that you can use to configure Solace event brokers. It complements Solace's CLI and Broker Manager, and provides a programmable way to configure Solace event brokers.
- Download SEMP v2 specification
Alternately, you can download from the following URLs:
http://<SOFTWARE_BROKER_HOST>:8080/SEMP/v2/config/specWhere the SOFTWARE_BROKER_HOST is the host name where the Software Broker is running.
or
https://CLOUD_BROKER_HOST:943/SEMP/v2/config/specWhere the CLOUD_BROKER_HOST is the host name of where the Cloud Broker is running.
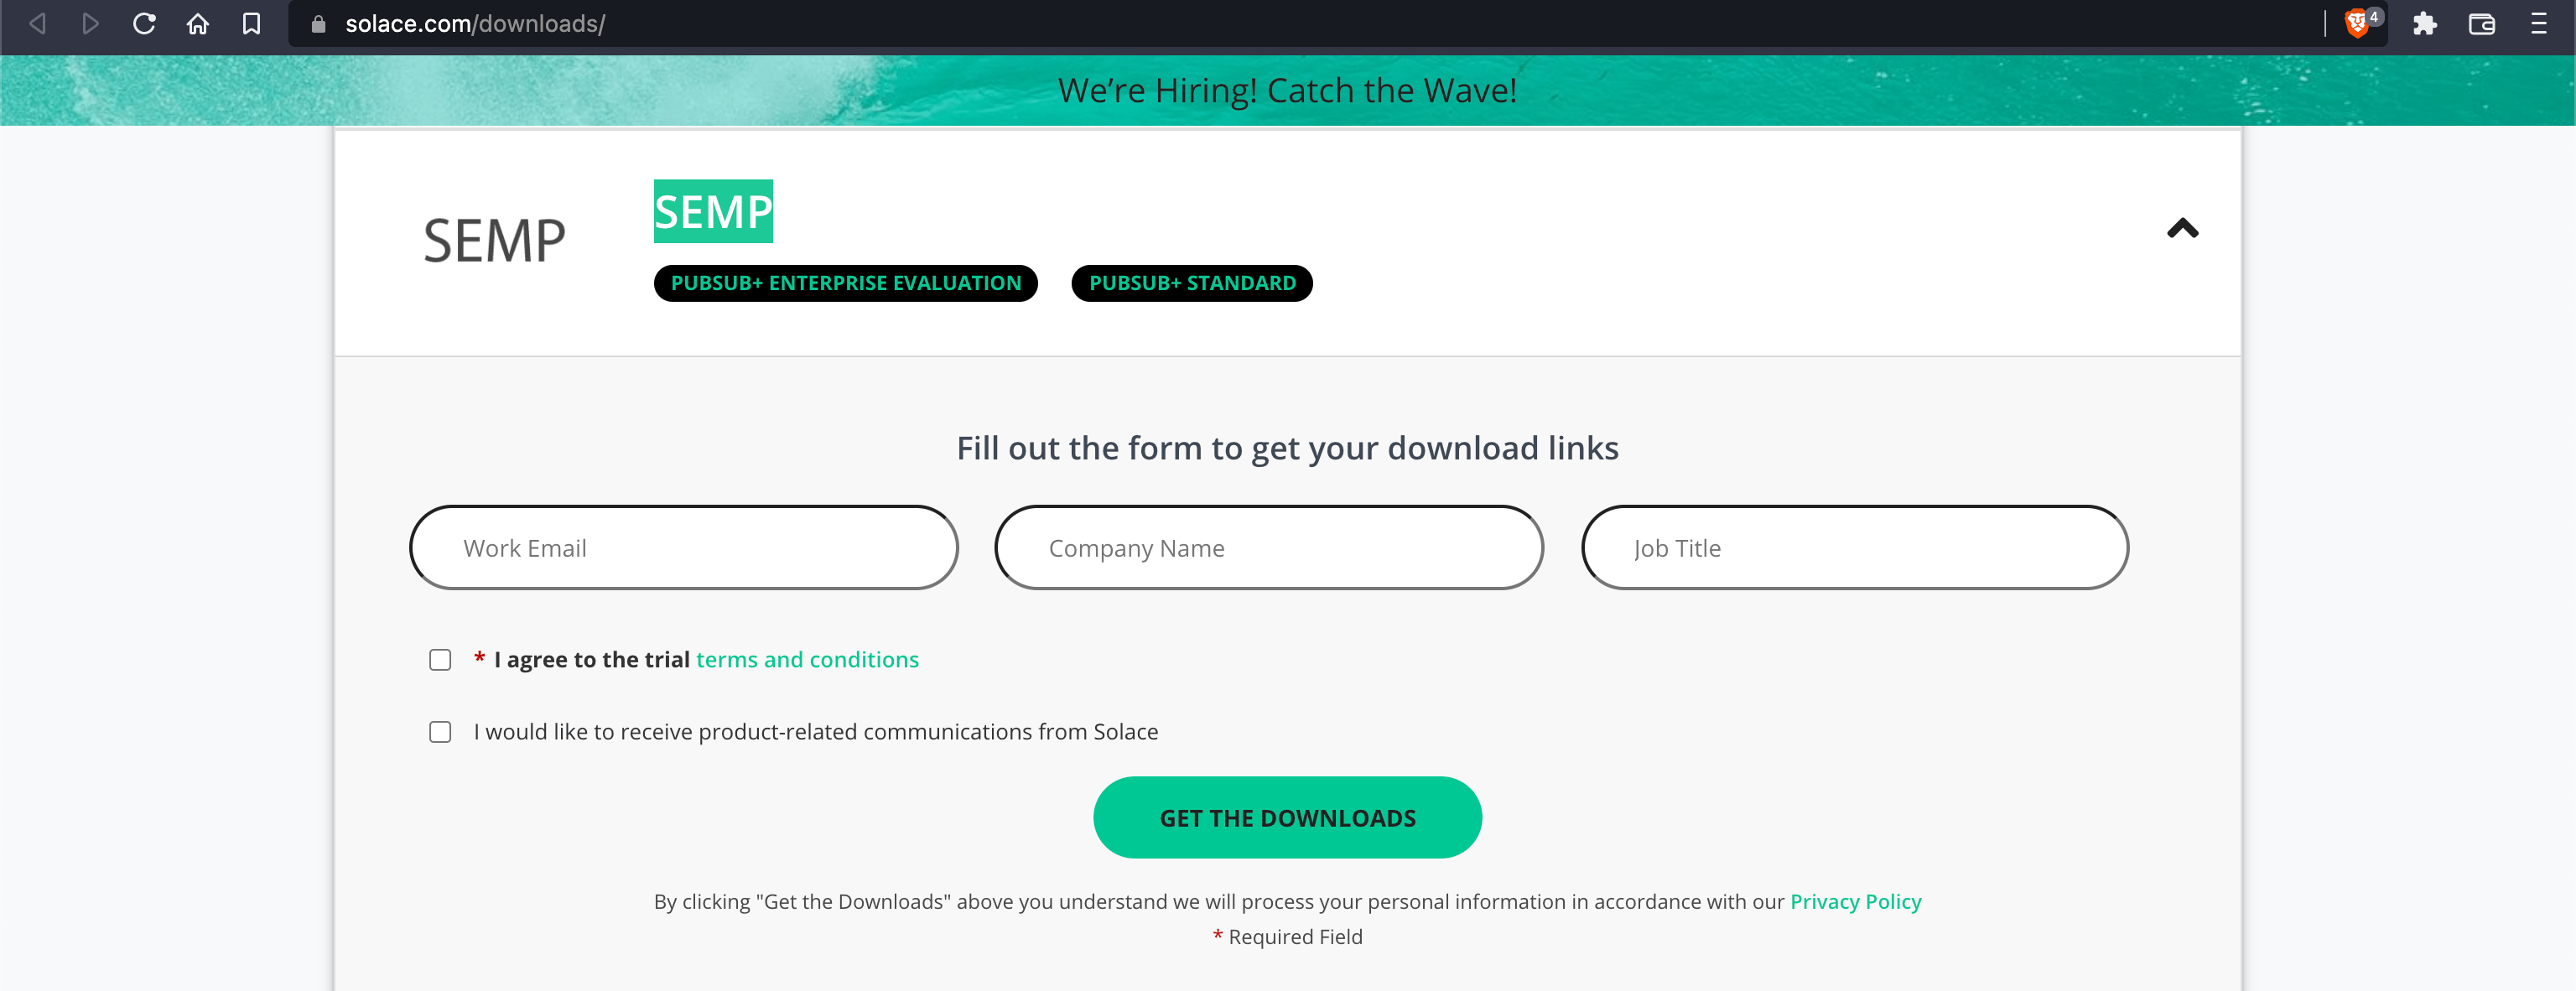
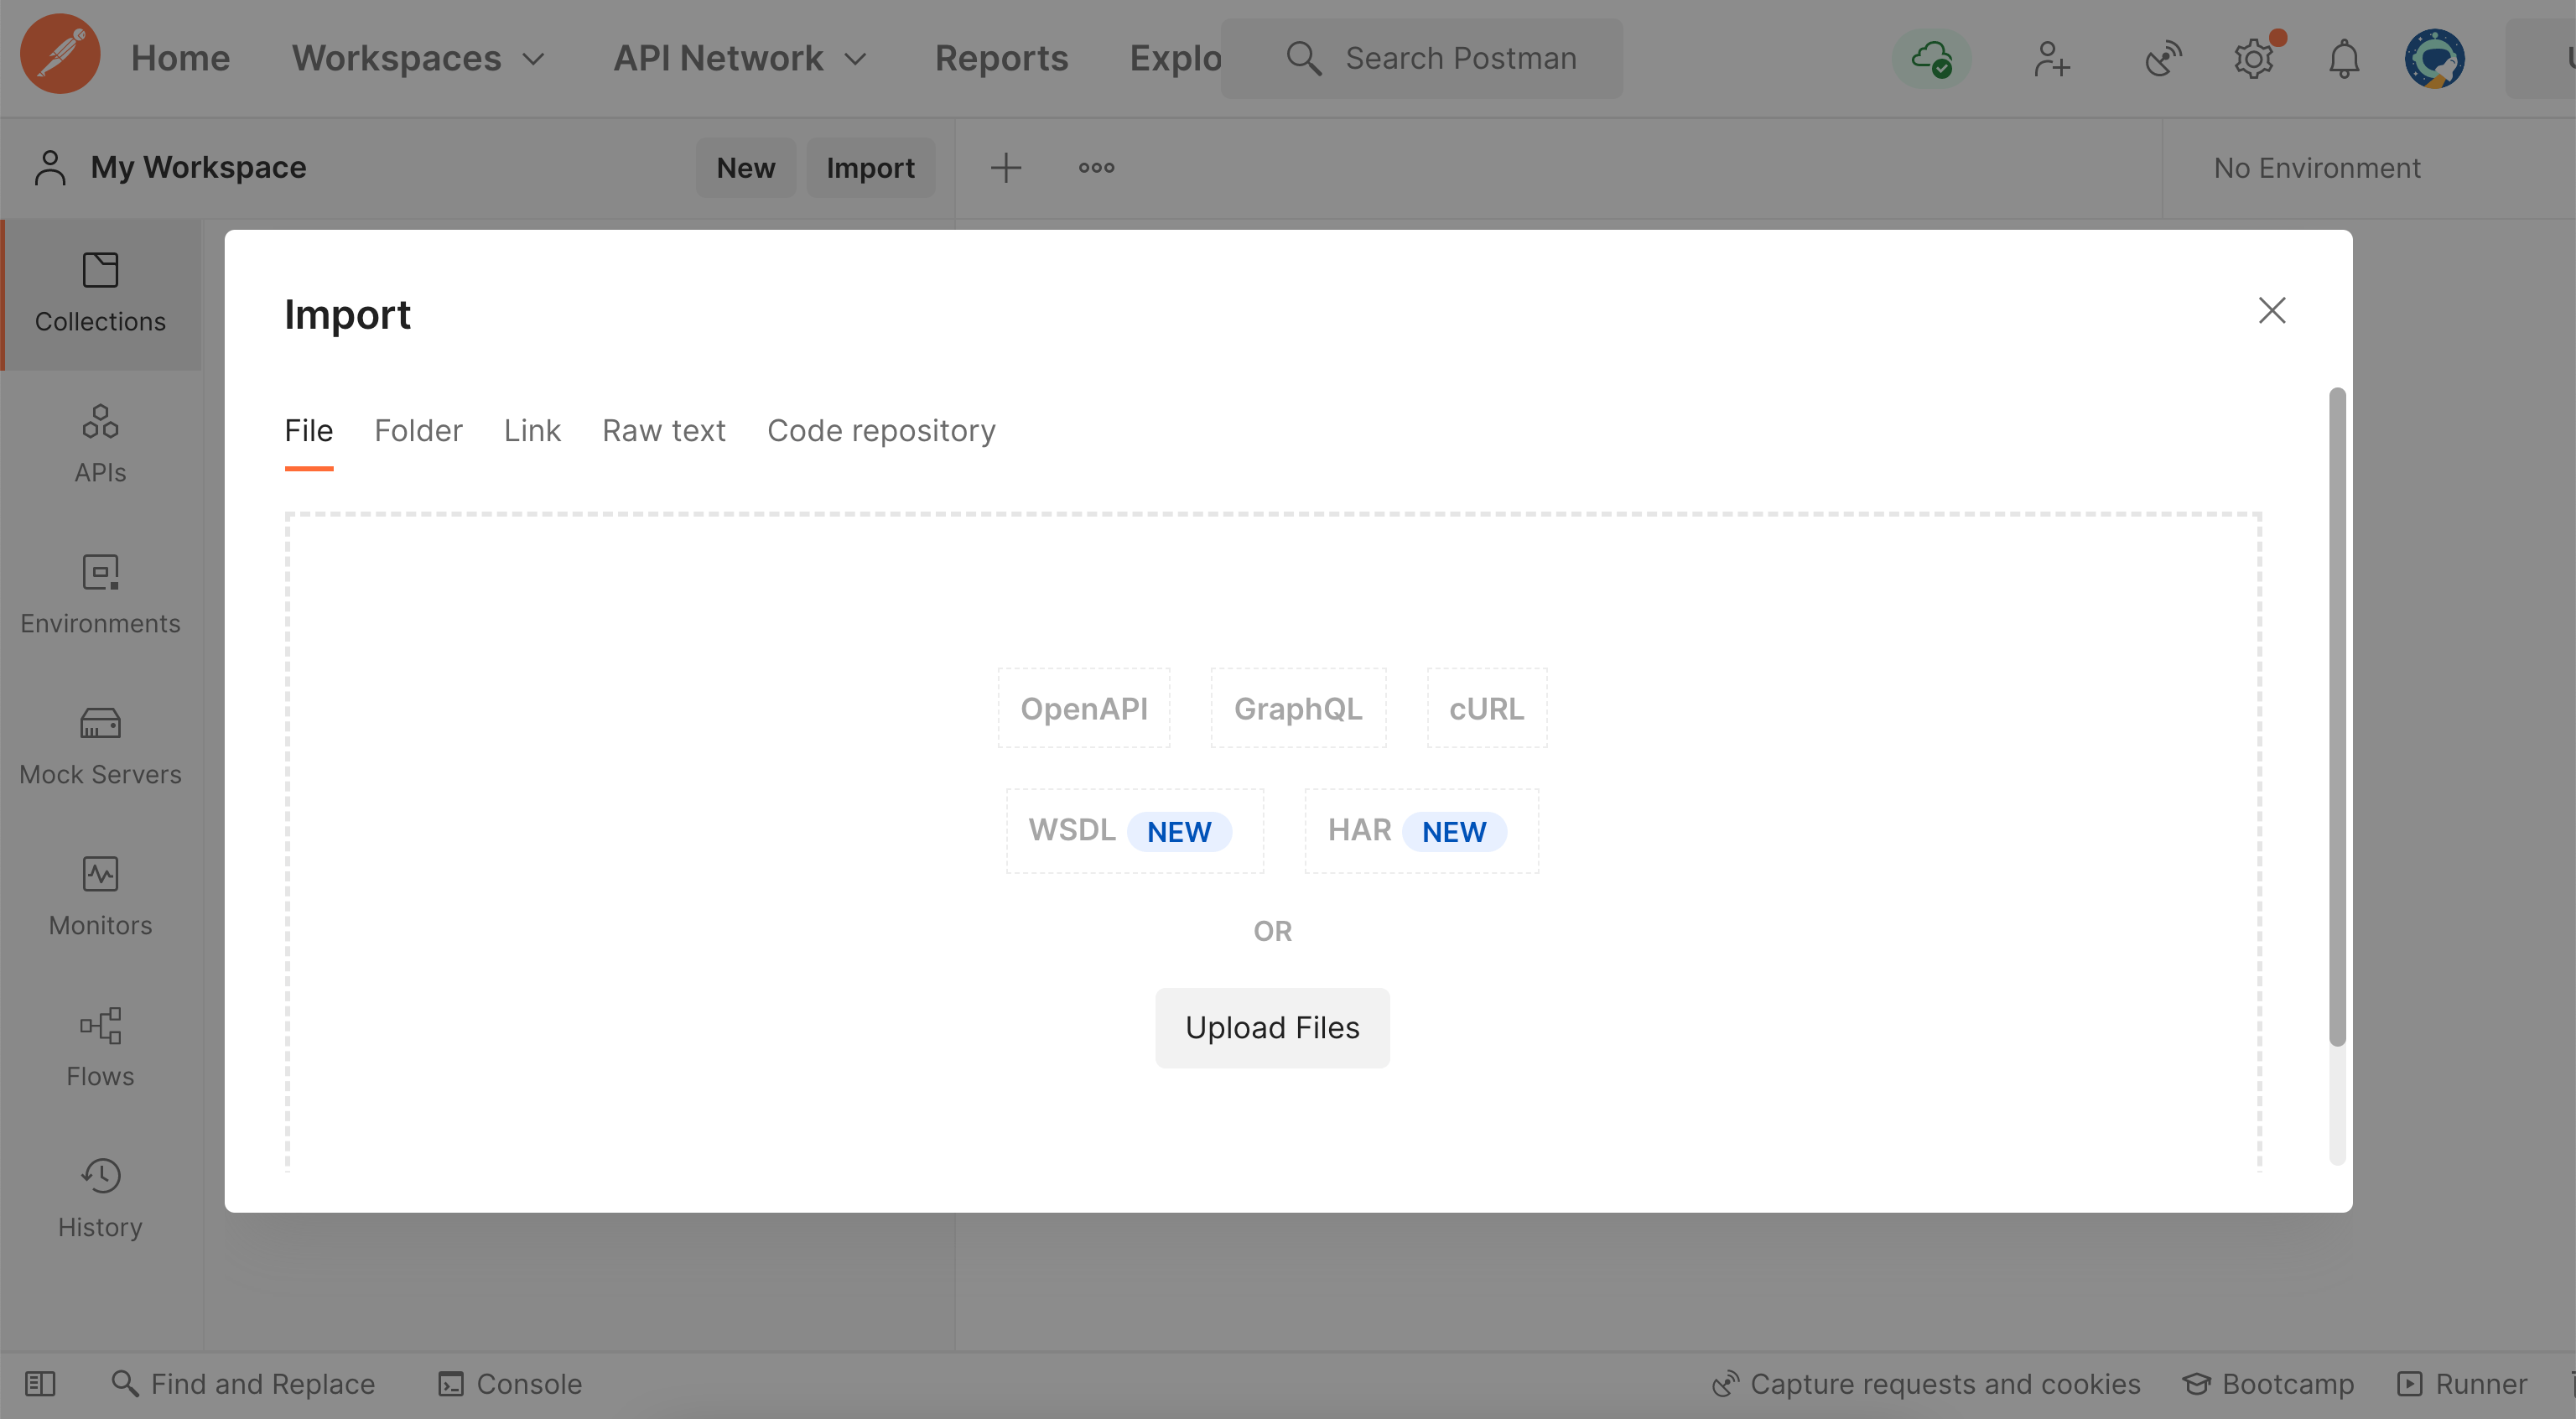
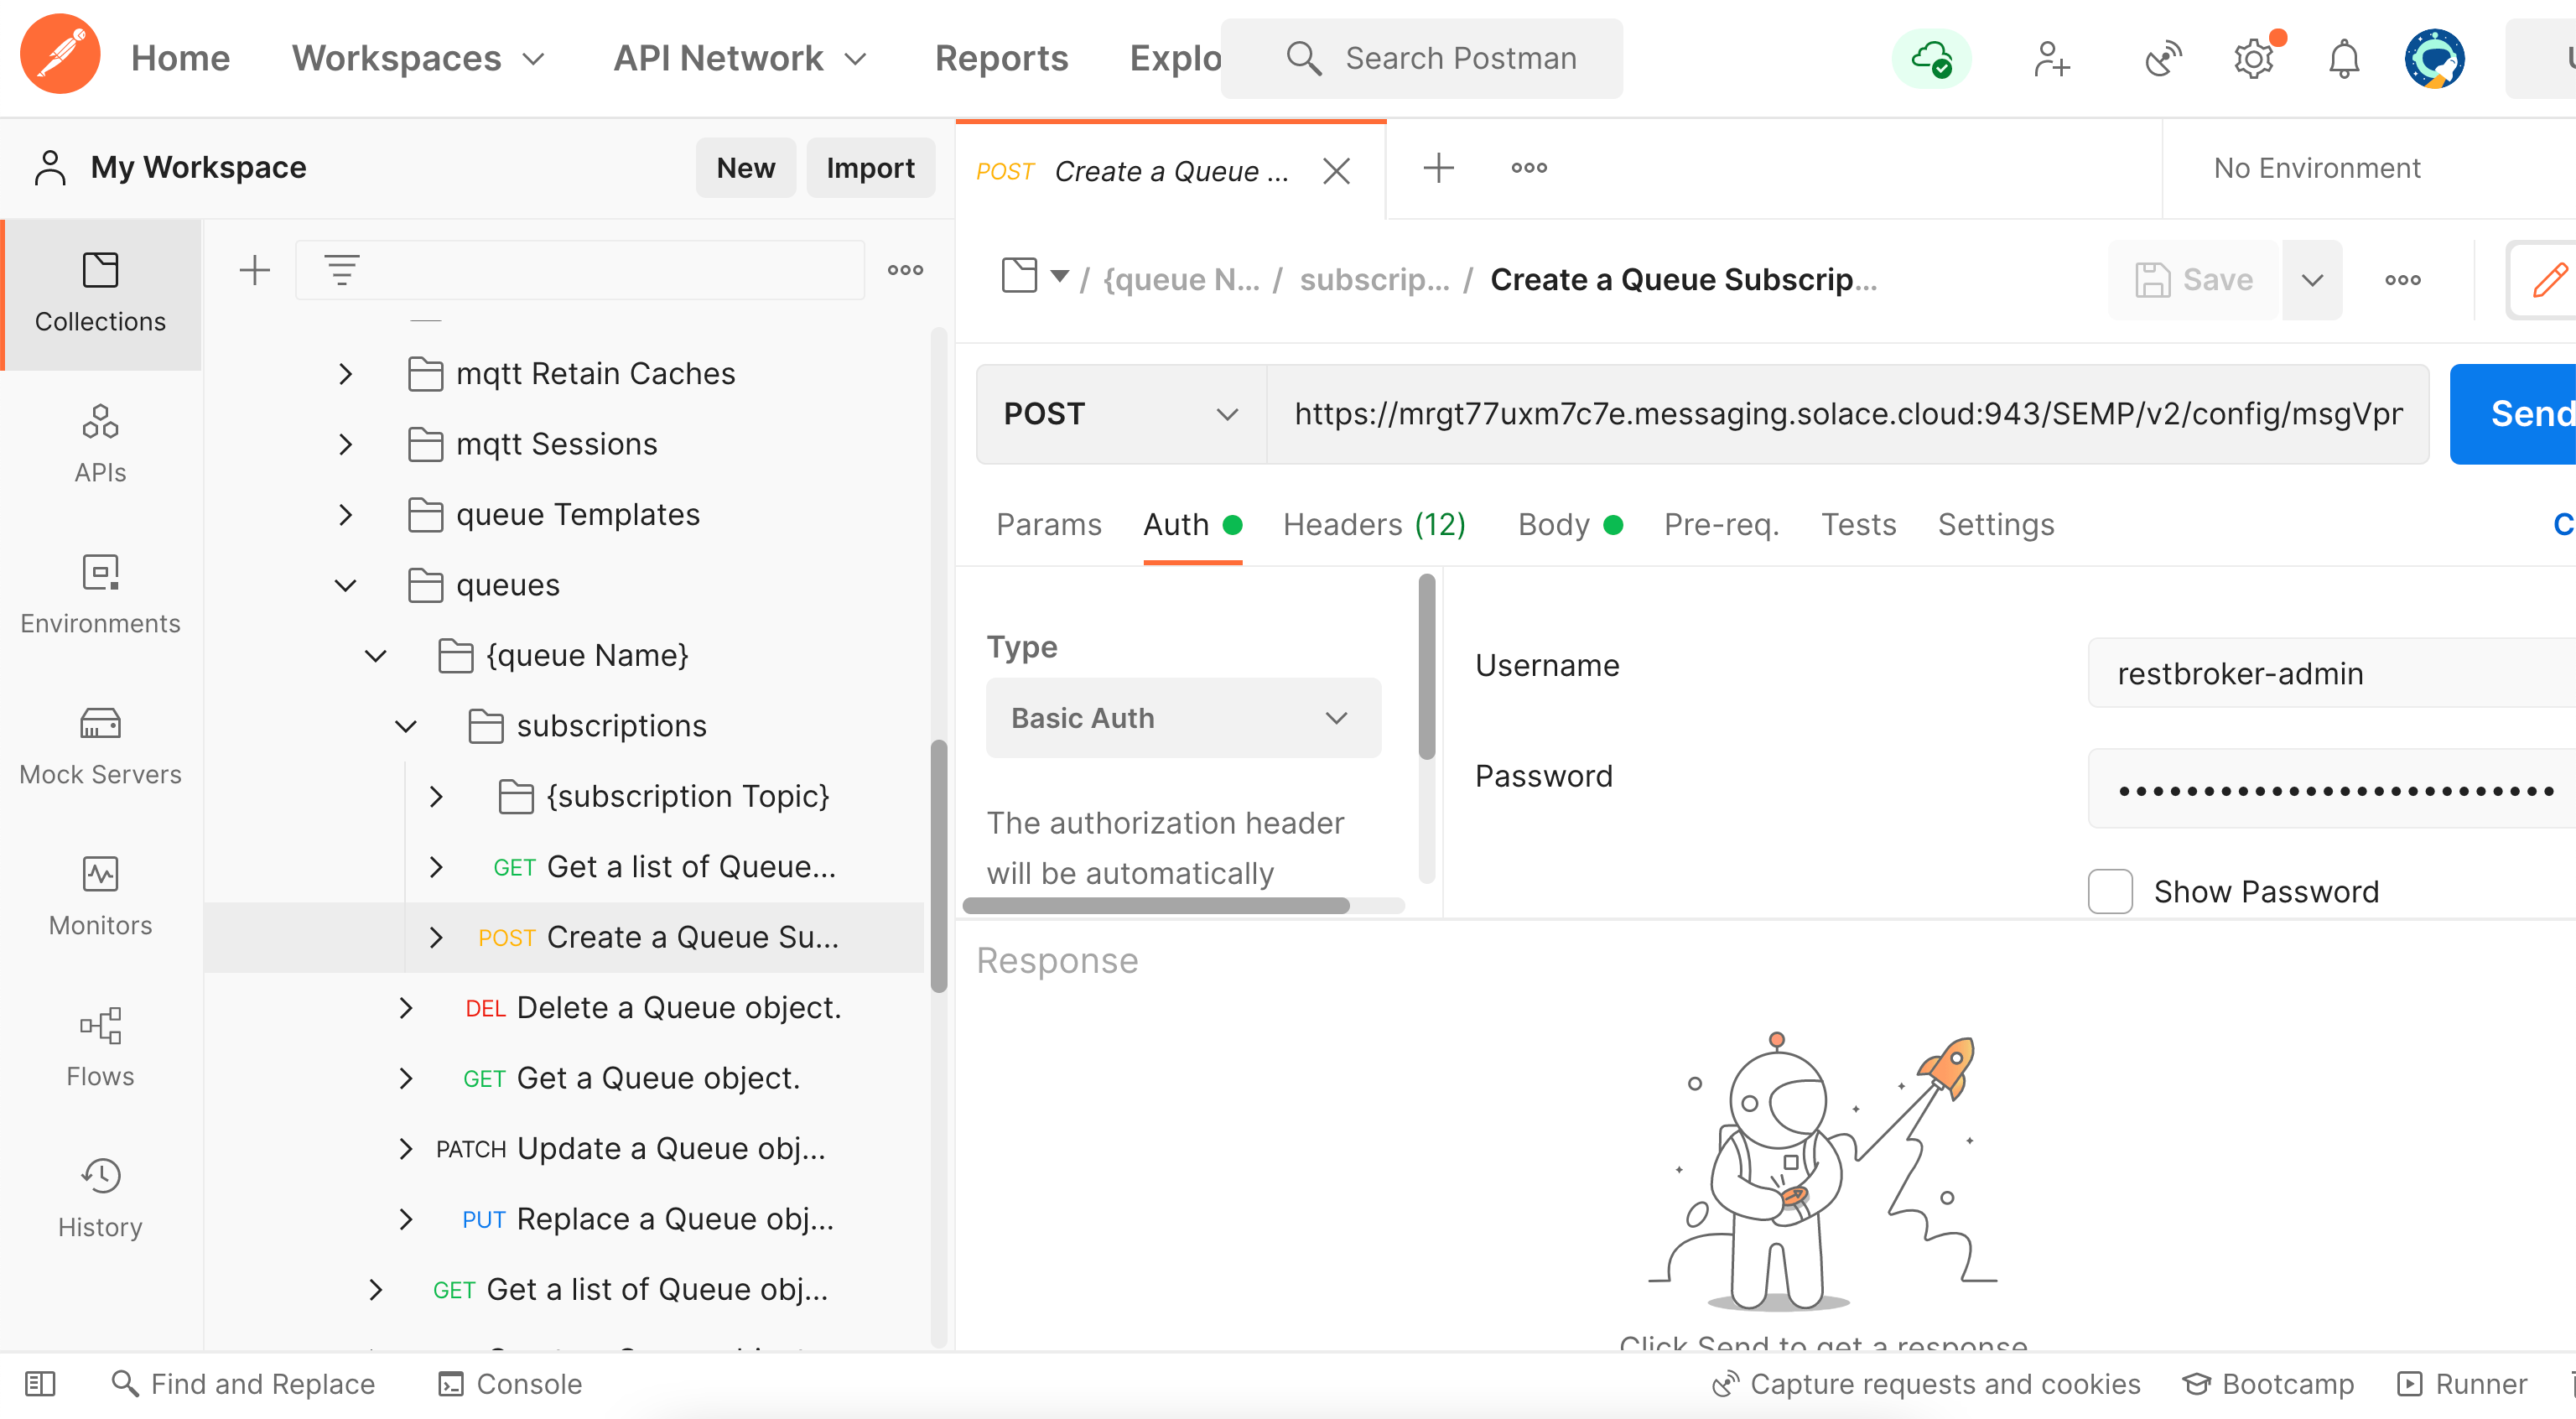
- Launch postman and import the JSON file
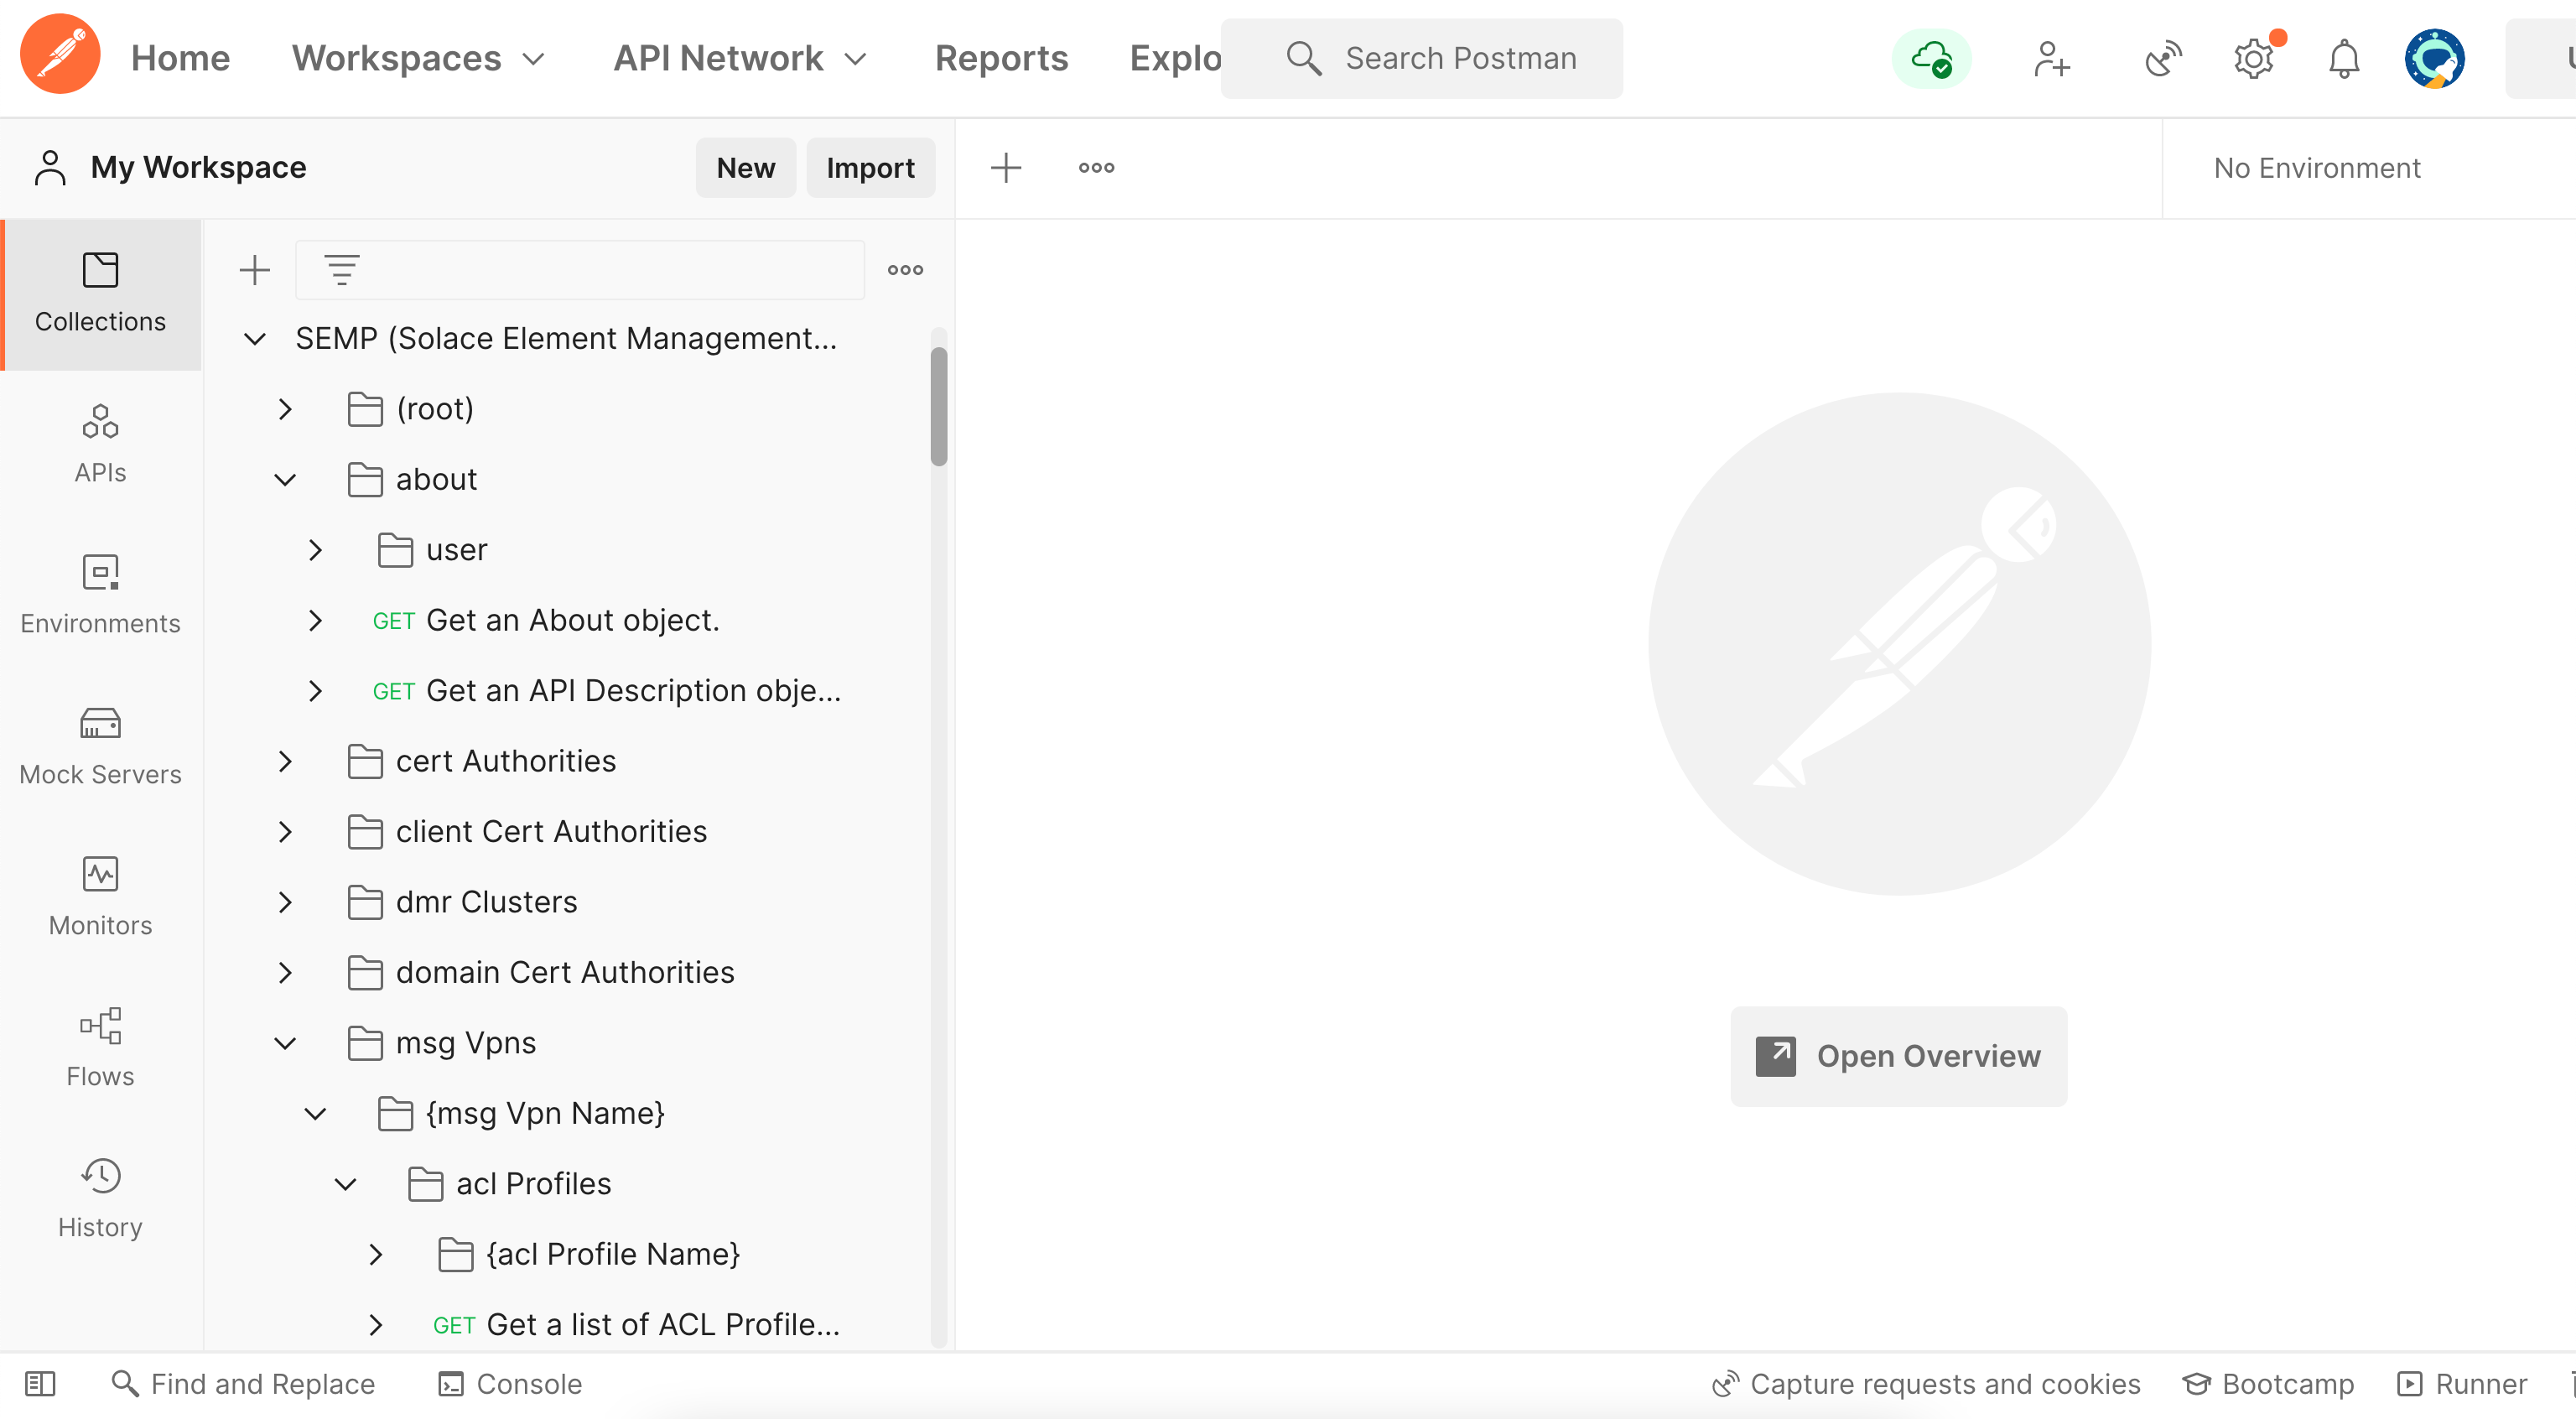
- Review the imported API collection
-
Note the SEMP v2 URL and access credentials
For Solace Event Broker Software Broker - the SEMP requests can be posted to the following URL
http://<SOFTWARE_BROKER_HOST>:8080/SEMP/v2/configWhere the SOFTWARE_BROKER_HOST is the host name where the Software Broker is running.
Make a note of the broker name, a CLI/SEMP username (or an admin username) and password that has full access to the broker.
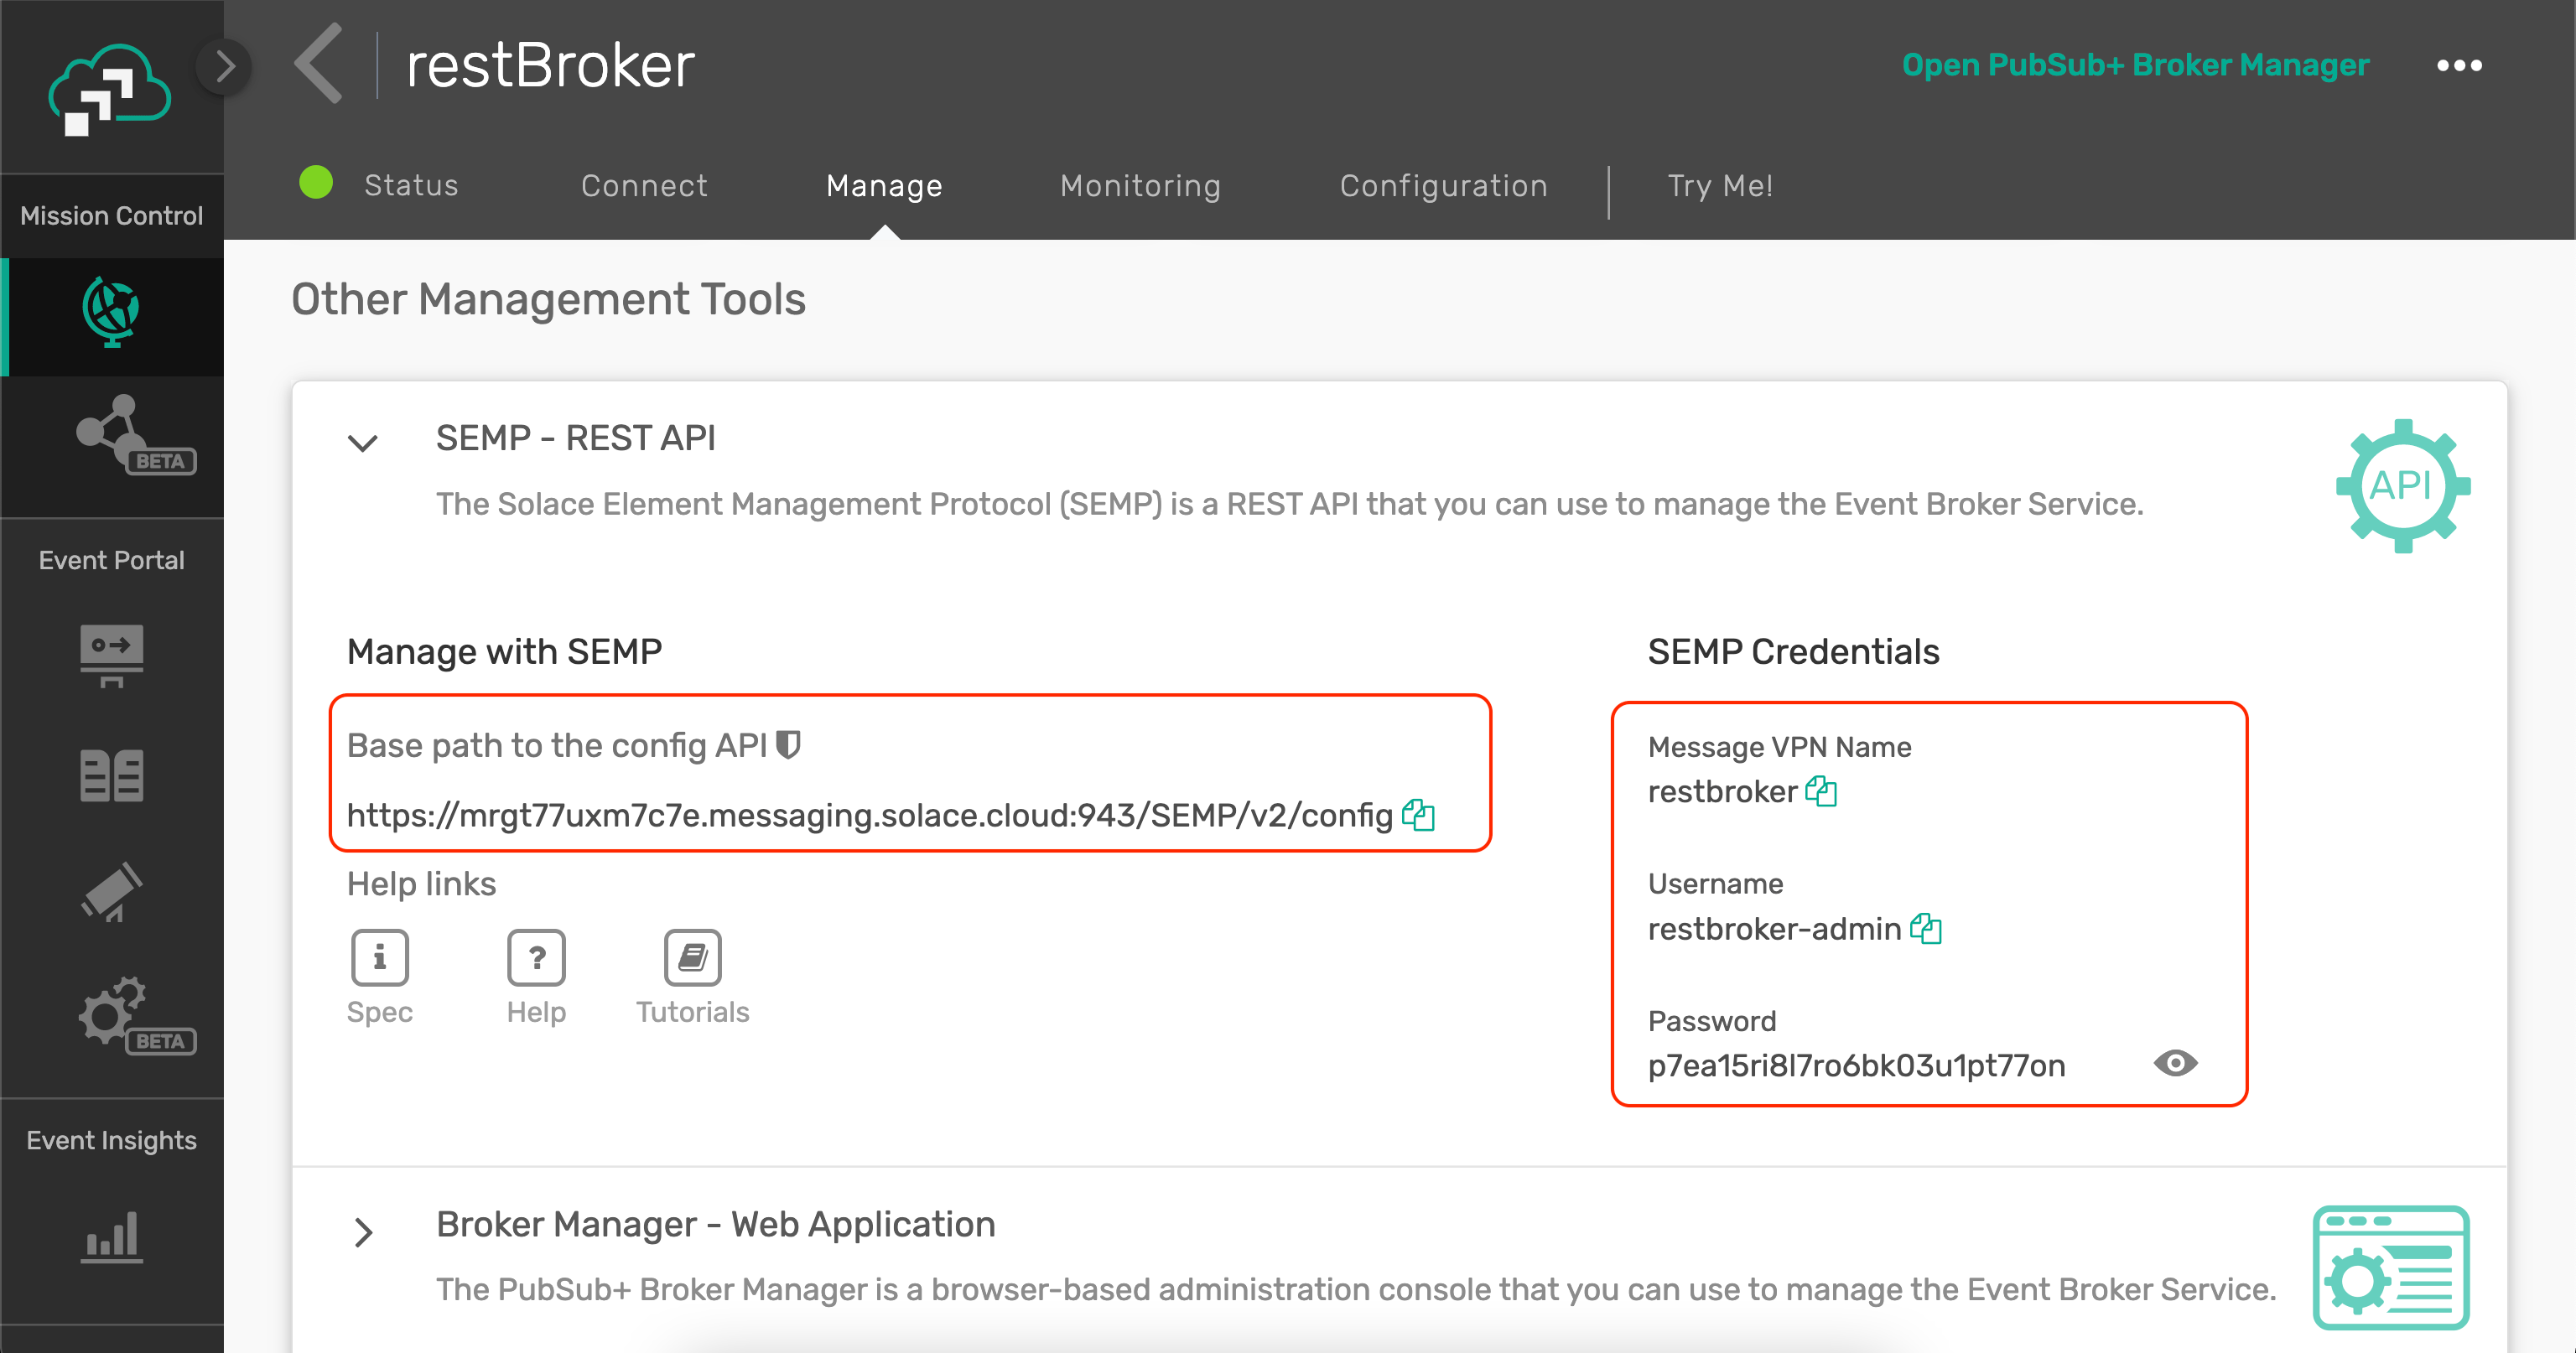
For Solace Cloud Broker - select the Broker Service, Select the Manage tab and locate the SEMP - REST API section. Note the URL to SEMP spec
https://CLOUD_BROKER_HOST:943/SEMP/v2/configWhere the CLOUD_BROKER_HOST is the host name of where the Cloud Broker is running.
Make a note of the SEMP user credentials listed here.

-
Execute the following SEMP POST requests to create resources associated with REST Delivery Point.
The following steps demonstrate invoking SEMP REST API against a Solace Cloud Broker as identified by the host CLOUD_BROKER_HOST and a Message VPN identified by VPN_NAME. For Solace Event Broker Software Broker, use the host on which the software Broker is running.
Ensure that the REST requests are appropriately updated with user credentials and the APIs are invoked as POST requests.
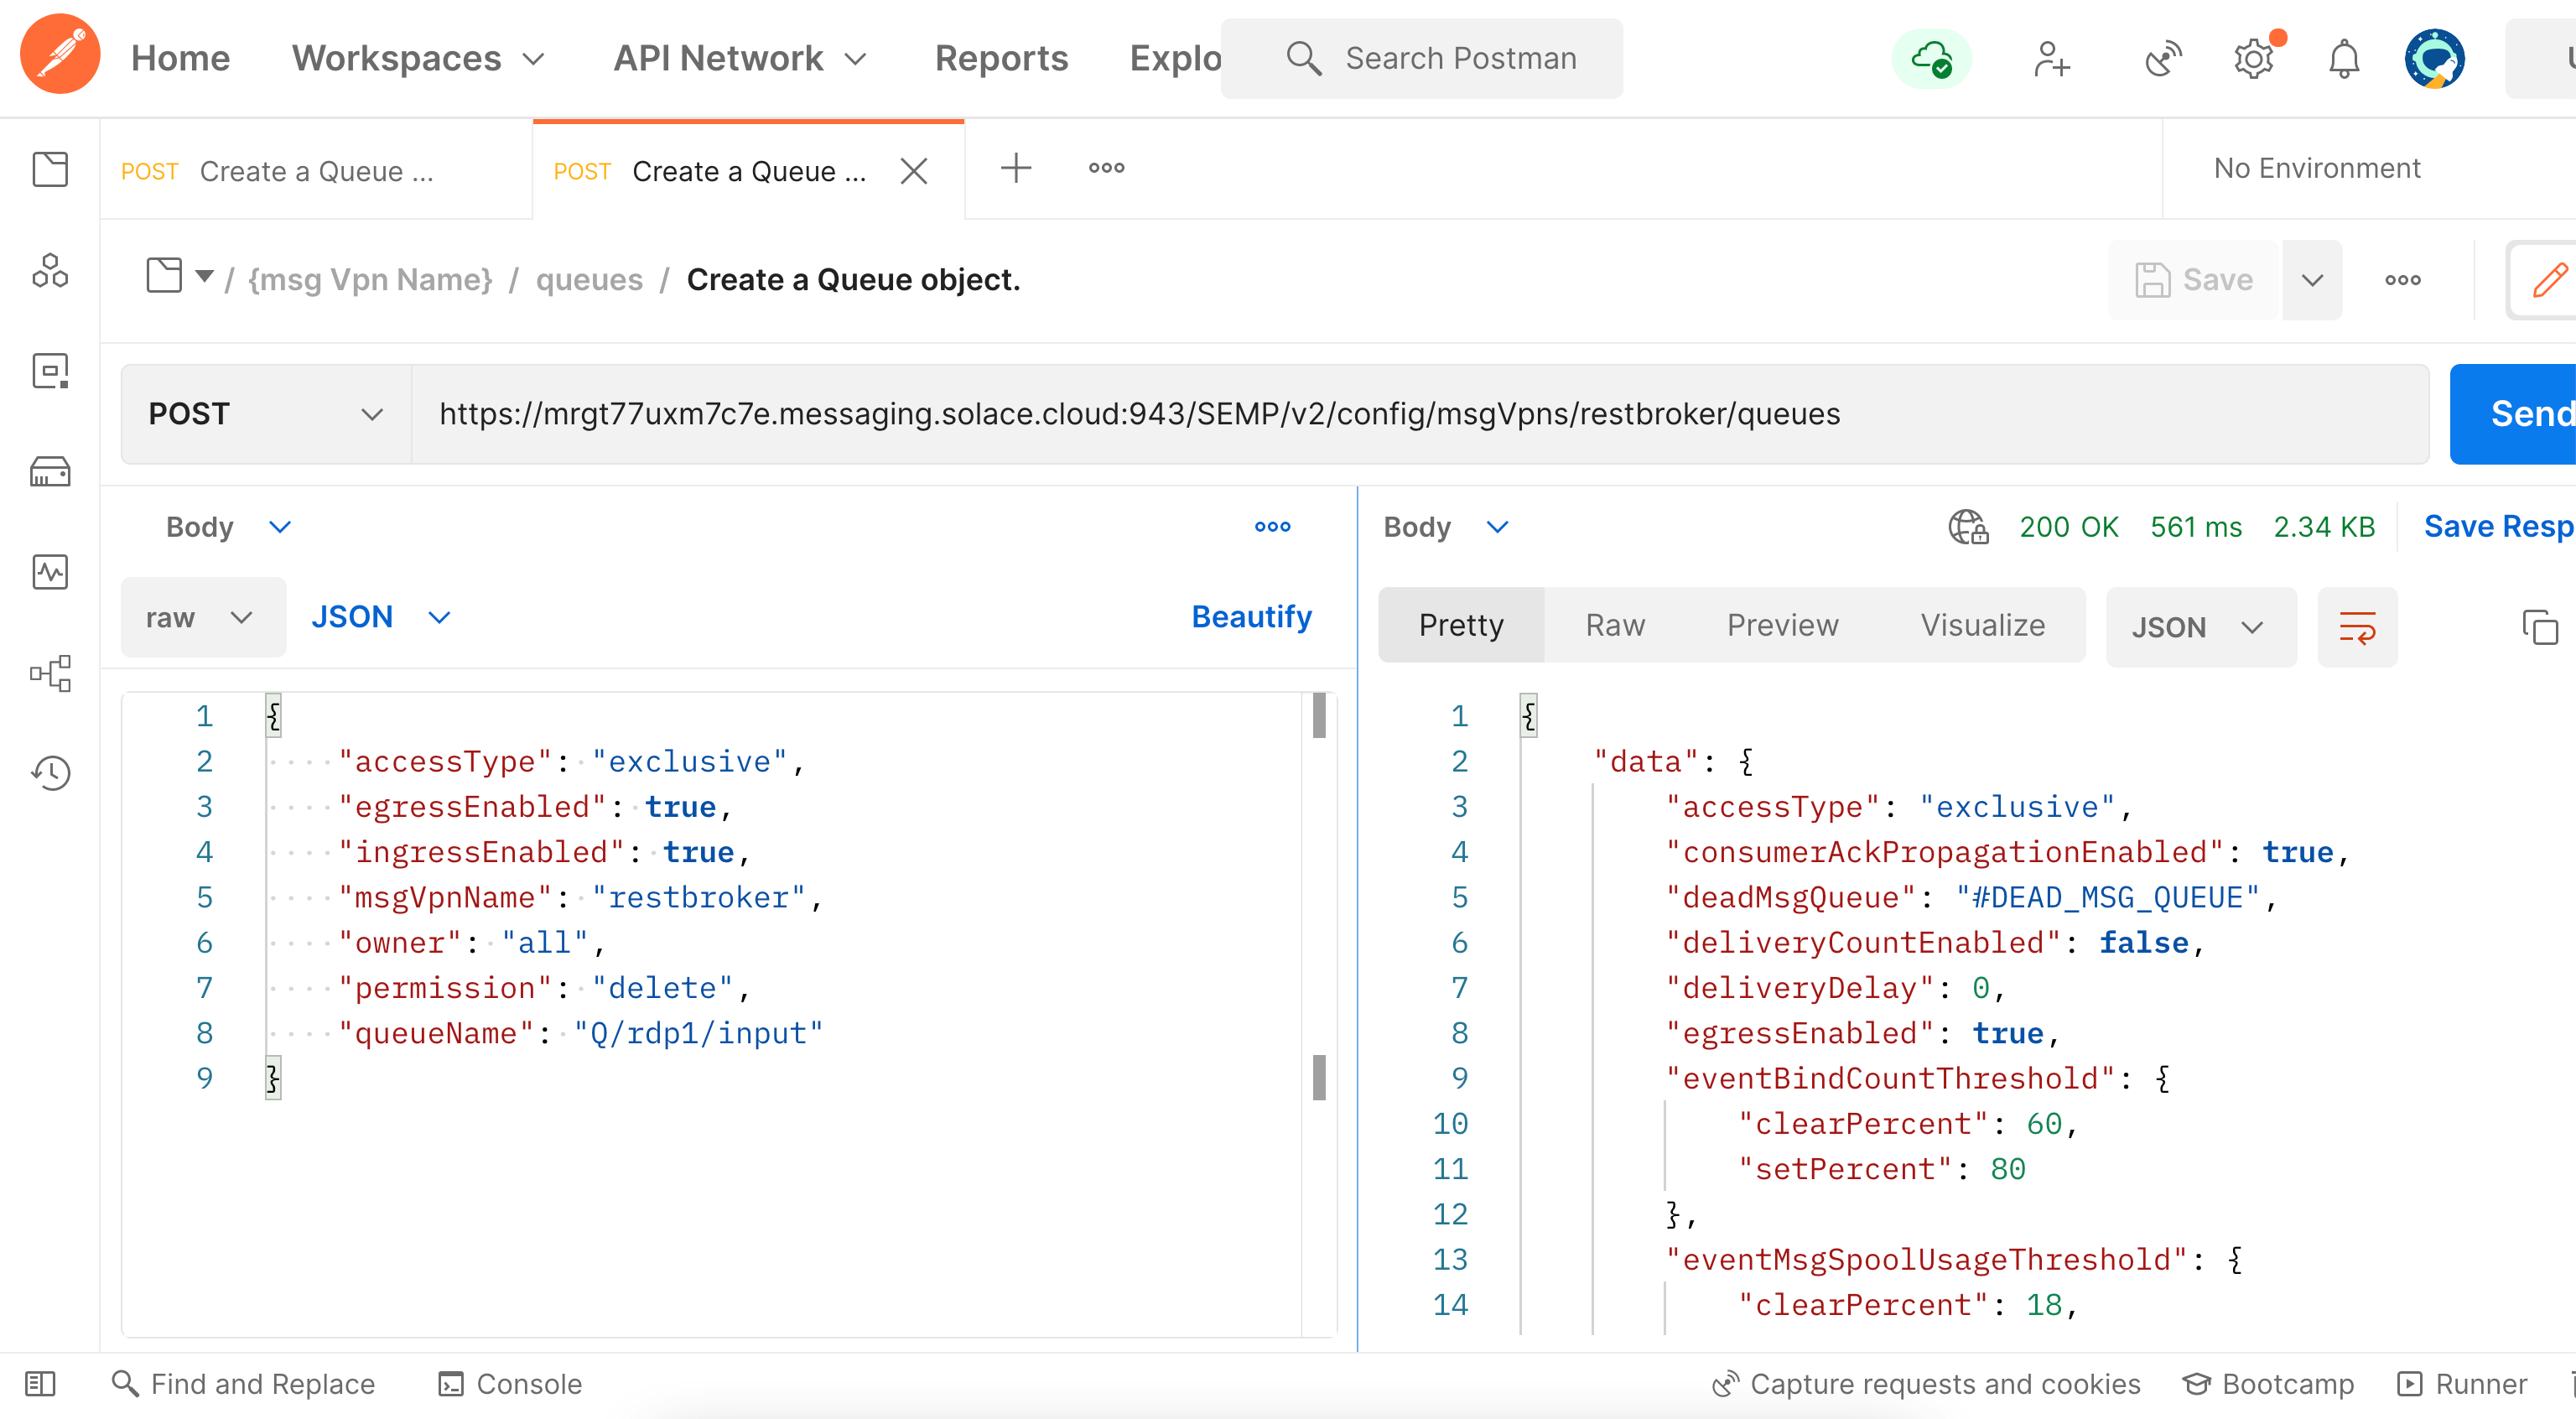
- Create a Queue object
URL:
https://CLOUD_BROKER_HOST:943/SEMP/v2/config/msgVpns/VPN_NAME/queues

BODY:
{
  "accessType": "exclusive",
  "egressEnabled": true,
  "ingressEnabled": true,
  "msgVpnName": "VPN_NAME",
  "owner": "all",
  "permission": "consume",
  "queueName": "Q/rdp1/input"
}
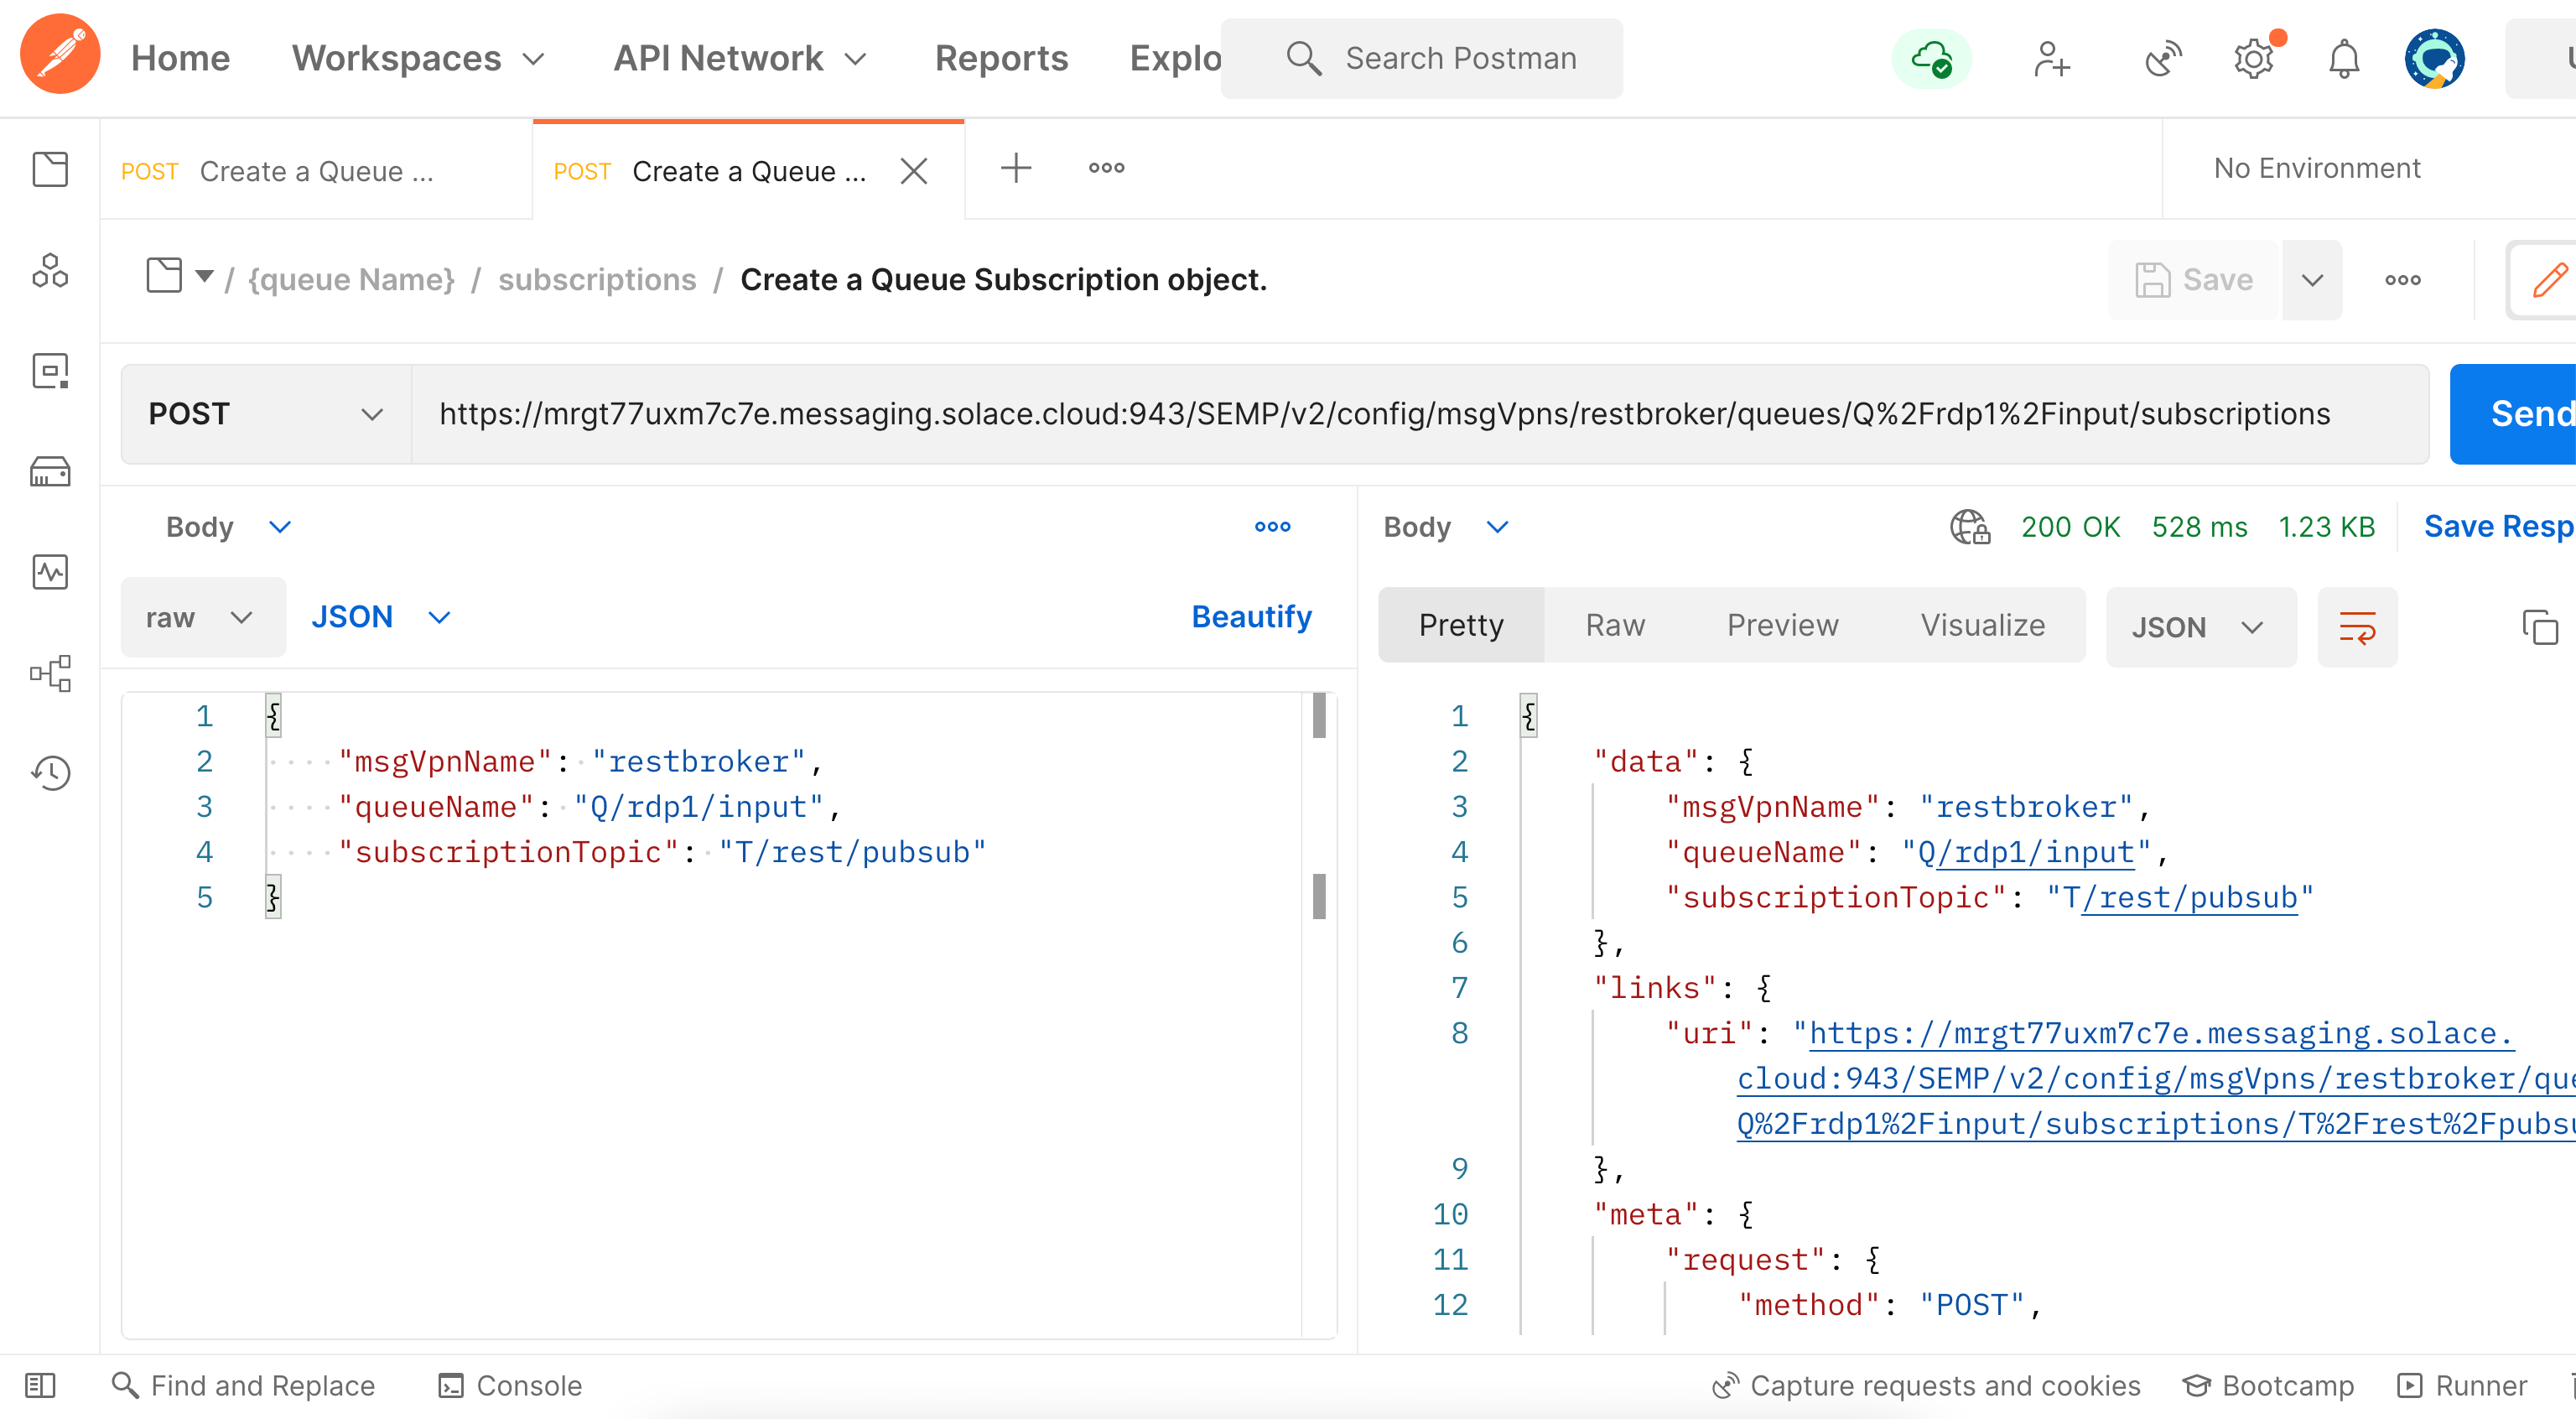
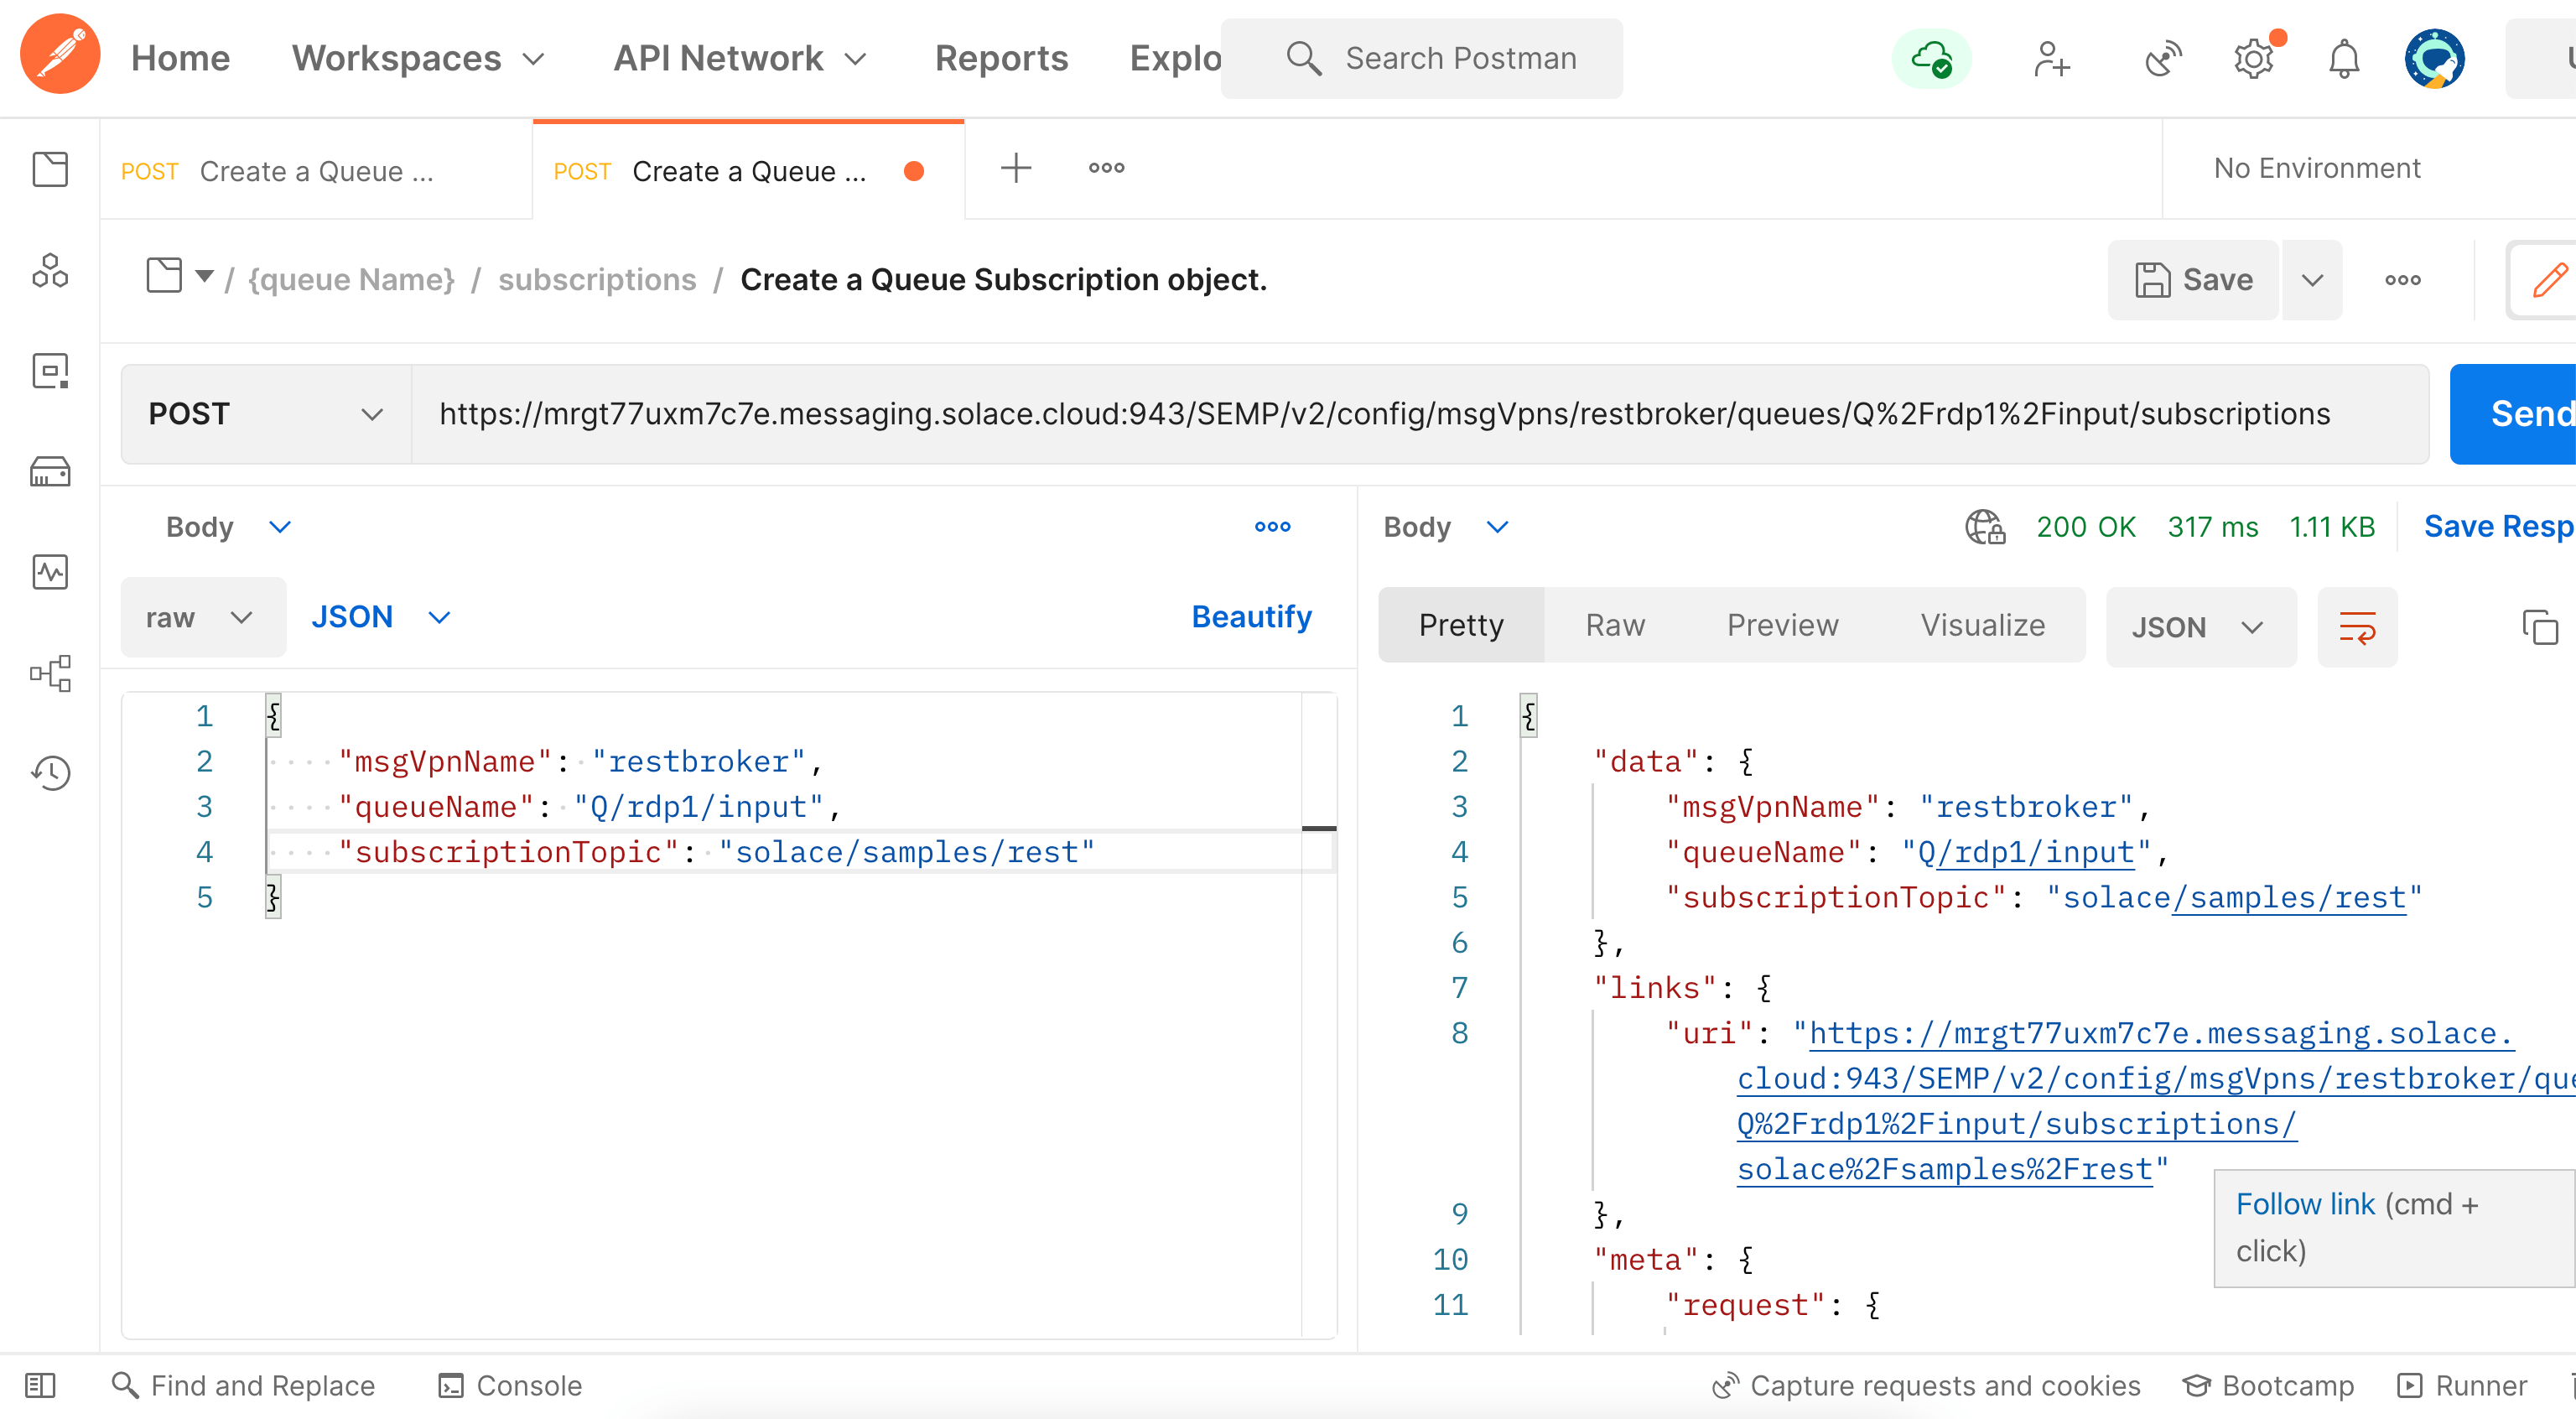
- Add a Topic Subscription to the queue


URL:
https://CLOUD_BROKER_HOST:943/SEMP/v2/config/msgVpns/VPN_NAME/queues/Q%2Frdp1%2Finput/subscriptions
BODY:
{
    "msgVpnName": "VPN_NAME",
    "queueName": "Q/rdp1/input",
    "subscriptionTopic": "solace/samples/rest"
}
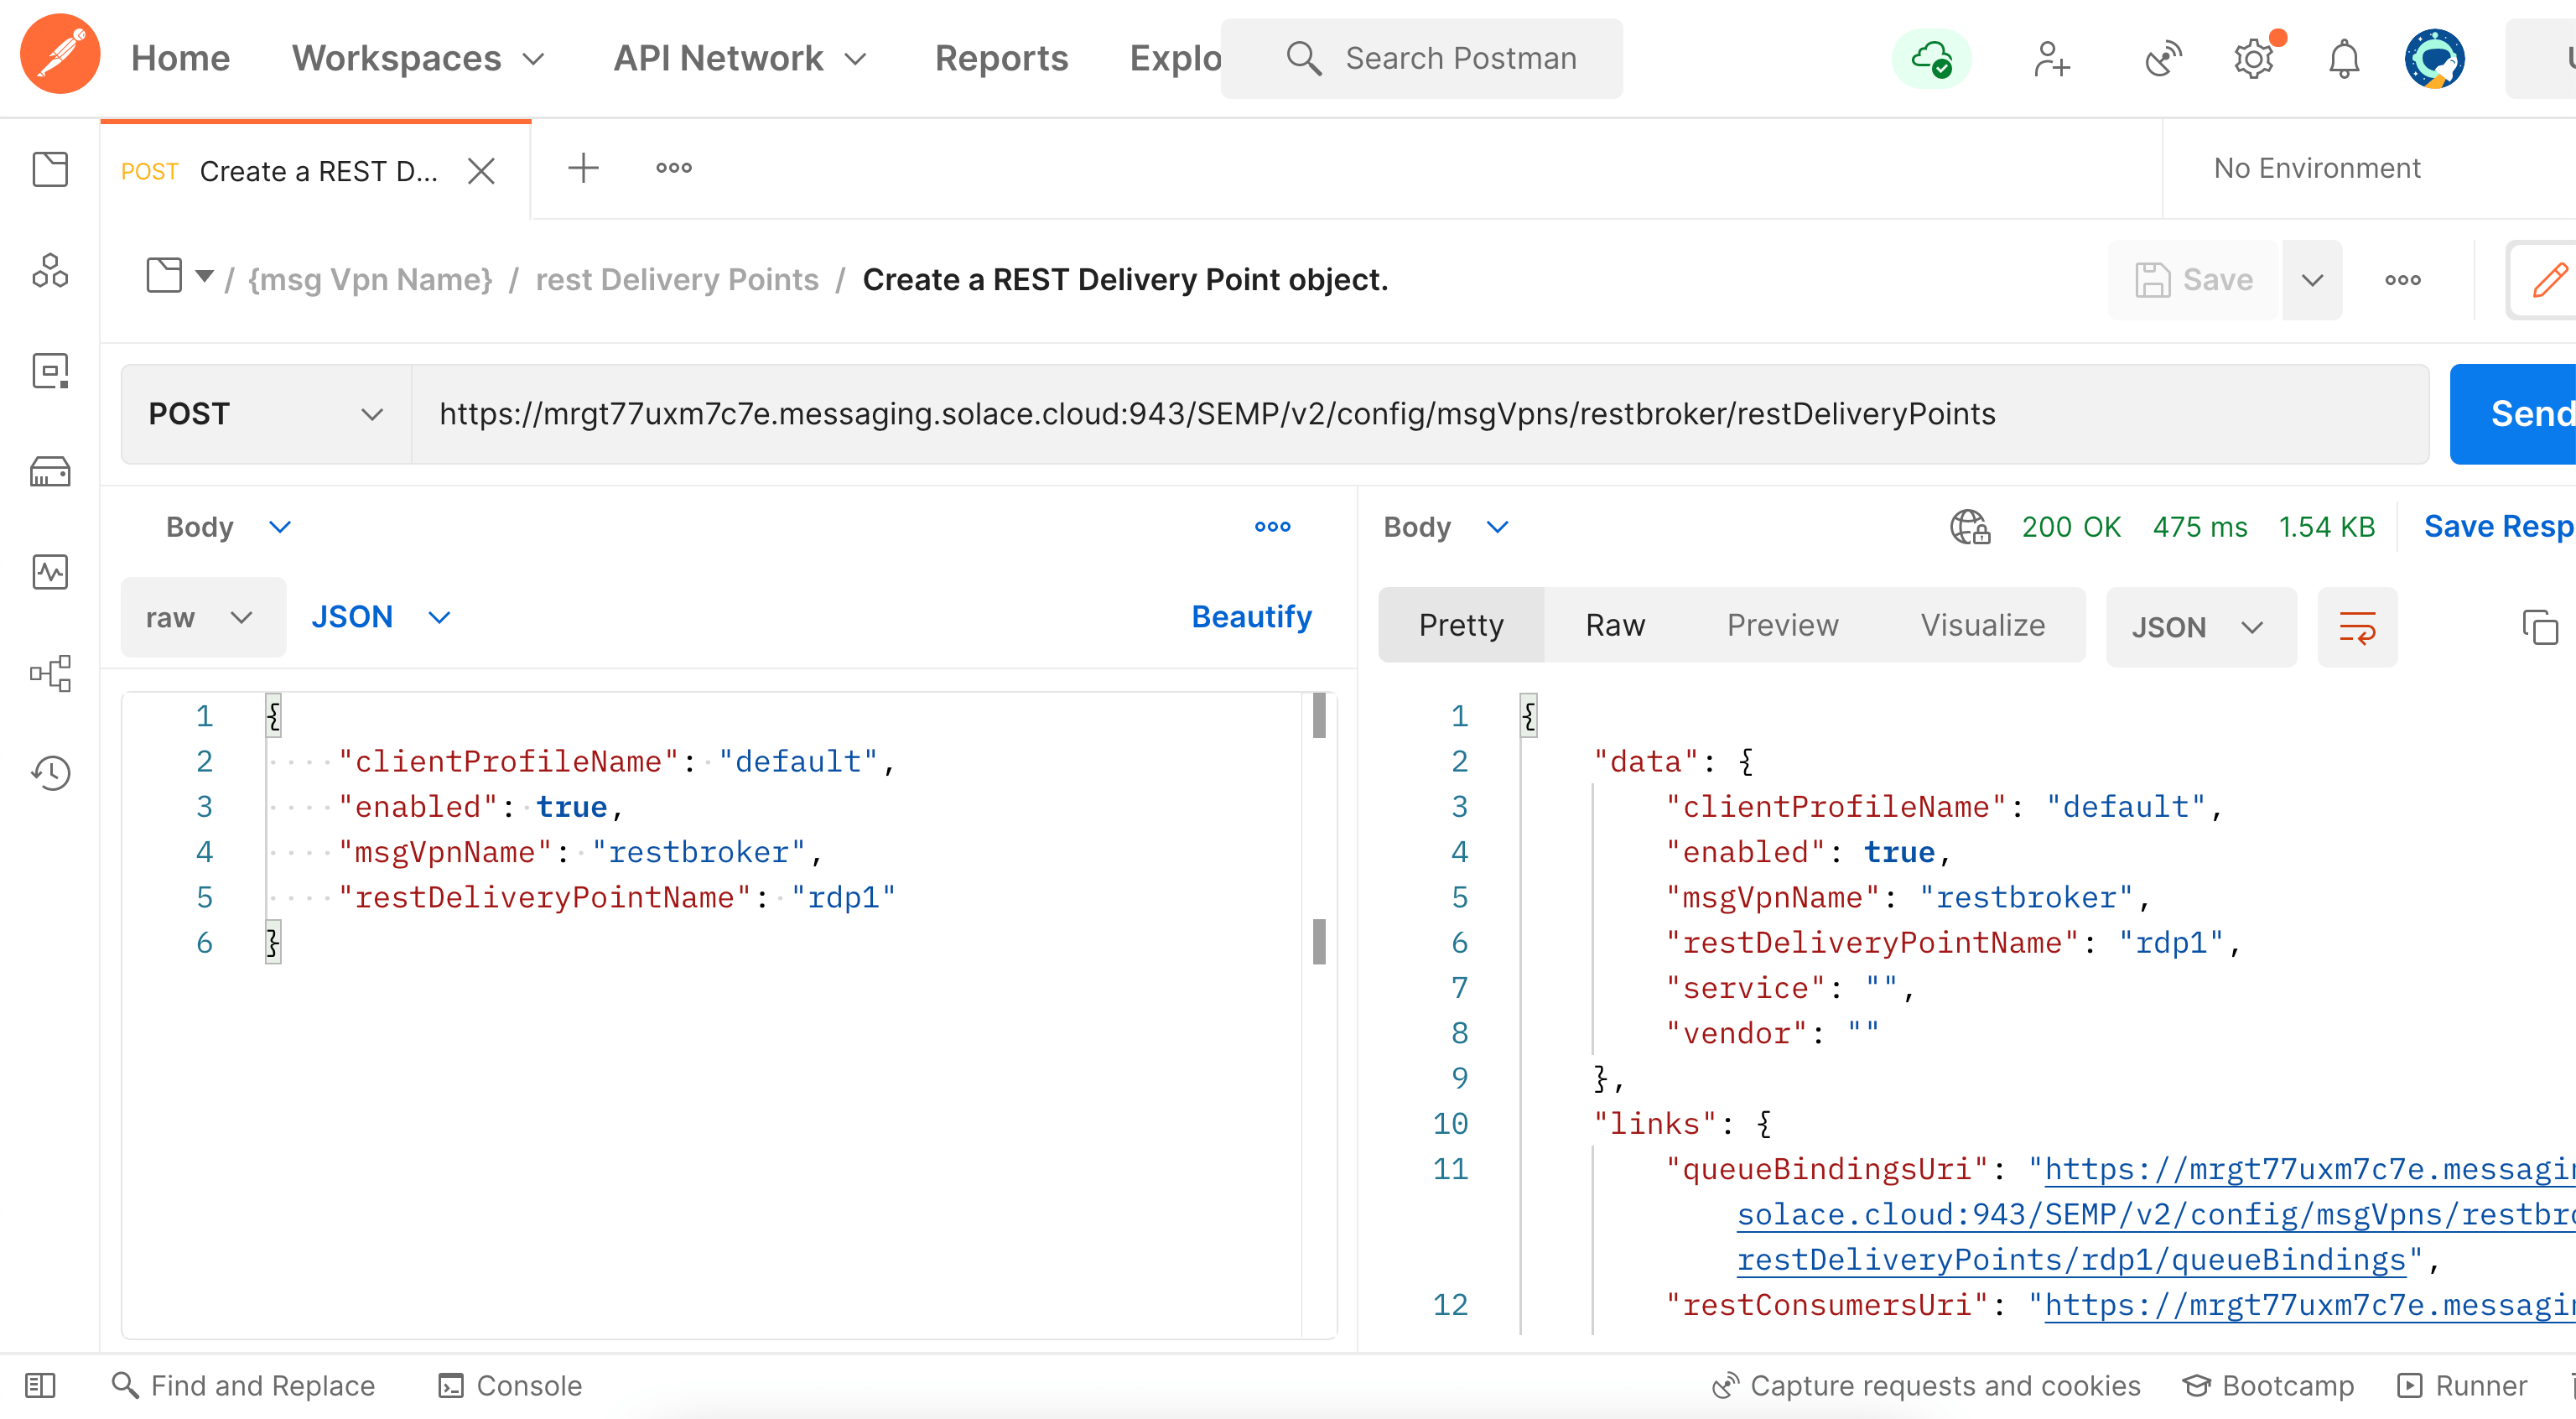
- Create a REST Delivery Point object
URL:
https://CLOUD_BROKER_HOST:943/SEMP/v2/config/msgVpns/VPN_NAME/restDeliveryPoints

BODY:
{
    "clientProfileName": "default",
    "enabled": true,
    "msgVpnName": "VPN_NAME",
    "restDeliveryPointName": "rdp1"
}
- Create a Queue Binding object
URL:
https://CLOUD_BROKER_HOST:943/SEMP/v2/config/msgVpns/VPN_NAME/restDeliveryPoints/rdp1/queueBindings

BODY:
{
    "gatewayReplaceTargetAuthorityEnabled": false,
    "msgVpnName": "VPN_NAME",
    "postRequestTarget": "/rest/tutorials",
    "queueBindingName": "Q/rdp1/input",
    "restDeliveryPointName": "rdp1"
}
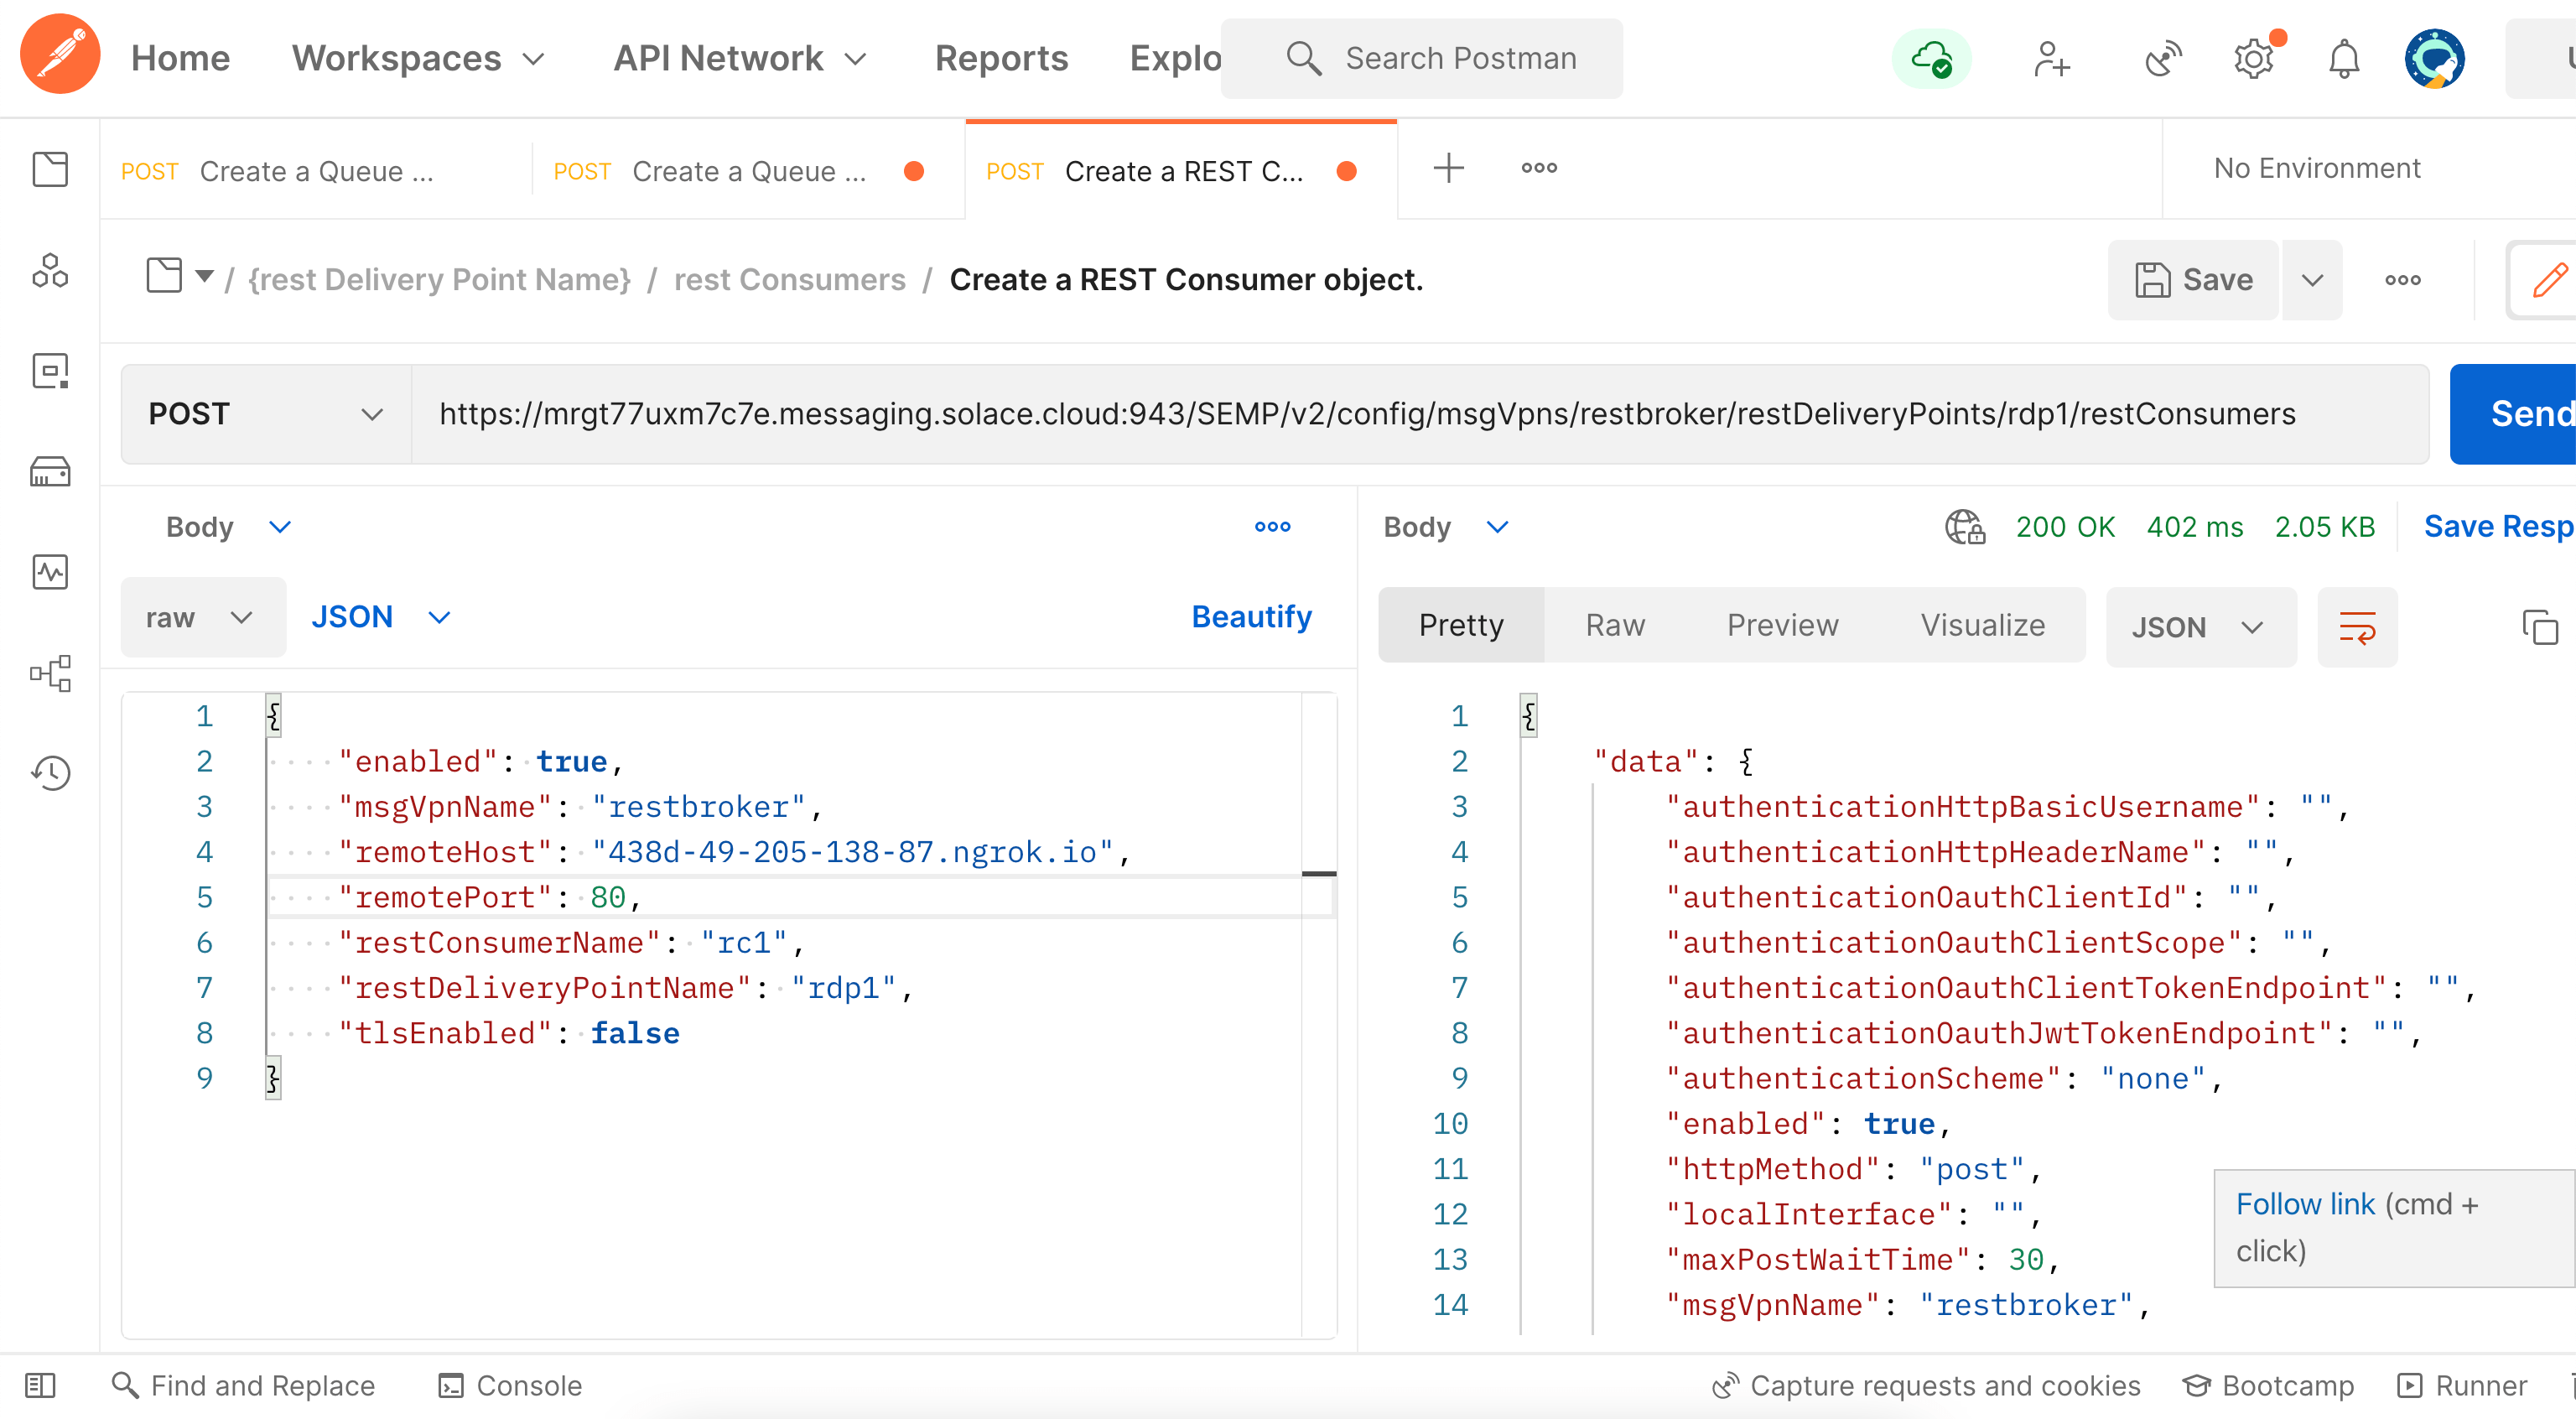
- Create a REST Consumer object
Update RC_HOST and RC_PORT to capture the HOST and PORT that your REST consumer application will be listening on along with VPN_NAME with the Message VPN name.
URL:
https://CLOUD_BROKER_HOST:943/SEMP/v2/config/msgVpns/VPN_NAME/restDeliveryPoints/rdp1/restConsumers

BODY:
{
    "enabled": true,
    "msgVpnName": "VPN_NAME",
    "remoteHost": "RC_HOST",
    "remotePort": RC_PORT,
    "restConsumerName": "rc1",
    "restDeliveryPointName": "rdp1",
    "tlsEnabled": false
}
To know more about SEMP check out SEMP overview.
Option 3: Using SEMP and curl
Here is a list of curl commands that can accomplish the REST Delivery Point creation similar to Postman.
Update RC_HOST and RC_PORT to capture the HOST and PORT that your REST consumer application will be listening on along with VPN_NAME with the Message VPN name.
Also, replace the ADMIN_USER_NAME and ADMIN_USER_PASSWORD with Solace user with admin privileges and password.
| Create a Queue object |
|---|
curl \
  -X POST 'https://CLOUD_BROKER_HOST:943/SEMP/v2/config/msgVpns/VPN_NAME/queues' \
  -d '{
      "accessType": "exclusive",
      "egressEnabled": true,
      "ingressEnabled": true,
      "msgVpnName": "VPN_NAME",
      "owner": "all",
      "permission": "delete",
      "queueName": "Q/rdp1/input"
  }'\
  -H 'Content-Type: application/json' \
  -u ADMIN_USER_NAME:ADMIN_USER_PASSWORD
|
| Create Queue Subscription object |
curl \
    -X POST 'https://CLOUD_BROKER_HOST:943/SEMP/v2/config/msgVpns/VPN_NAME/queues/Q%2Frdp1%2Finput/subscriptions' \
    -d '{
        "msgVpnName": "VPN_NAME",
        "queueName": "Q/rdp1/input",
        "subscriptionTopic": "solace/samples/rest"
    }'\
    -H 'Content-Type: application/json' \
    --user ADMIN_USER_NAME:ADMIN_USER_PASSWORD
Note: Since the queue name parameter contains '/' character, you have to select the queue name string in the URL and encode the URI component.
|
| Create a REST Delivery Point object |
curl \
    -X POST 'https://CLOUD_BROKER_HOST:943/SEMP/v2/config/msgVpns/VPN_NAME/restDeliveryPoints' \
    -d '{
        "clientProfileName": "default",
        "enabled": true,
        "msgVpnName": "VPN_NAME",
        "restDeliveryPointName": "rdp1"
    }'\
    -H 'Content-Type: application/json' \
    --user ADMIN_USER_NAME:ADMIN_USER_PASSWORD
|
| Create a Queue Binding object |
curl \
    -X POST 'https://CLOUD_BROKER_HOST:943/SEMP/v2/config/msgVpns/VPN_NAME/restDeliveryPoints/rdp1/queueBindings' \
    -d '{
        "gatewayReplaceTargetAuthorityEnabled": false,
        "msgVpnName": "VPN_NAME",
        "postRequestTarget": "/rest/tutorials",
        "queueBindingName": "Q/rdp1/input",
        "restDeliveryPointName": "rdp1"
    }' \
    -H 'Content-Type: application/json' \
    --user ADMIN_USER_NAME:ADMIN_USER_PASSWORD
|
| Create a REST Consumer object |
curl \
    -X POST 'https://CLOUD_BROKER_HOST:943/SEMP/v2/config/msgVpns/VPN_NAME/restDeliveryPoints/rdp1/restConsumers' \
    -d '{
        "enabled": true,
        "msgVpnName": "VPN_NAME",
        "remoteHost": "RC_HOST",
        "remotePort": RC_PORT,
        "restConsumerName": "rc1",
        "restDeliveryPointName": "rdp1",
        "tlsEnabled": false
    }' \
    -H 'Content-Type: application/json' \
    --user ADMIN_USER_NAME:ADMIN_USER_PASSWORD
Note: The values of RC_HOST and RC_PORT need to be updated with the host and port where the REST HTTP server is running. This will be updated as the REST endpoint host and port in the REST Delivery Point configuration.
|
Option 4: Using Solace CLI
The Solace Command Line Interface (CLI) is a text-based, interactive shell for configuring and monitoring Solace event brokers (available for Solace Event Broker Software and Appliance Brokers). It allows a user to perform event broker administration, configuration and provisioning, and network troubleshooting tasks. The CLI automatically starts after the event broker powers up.
Reference guides to the Solace CLI can be found in these locations: Appliance CLI Commands and Software Event Broker CLI Commands.
The following script captures necessary commands in sequence to configure the above mentioned resources.
home
enable
configure

message-spool message-vpn "VPN_NAME"
    ! pragma:interpreter:ignore-already-exists
    create queue "Q/rdp1/input" primary
        access-type "exclusive"
        permission all "delete"
        subscription topic "solace/samples/rest"
        no shutdown
        exit
    exit

message-vpn "VPNNAME"
    rest
        ! pragma:interpreter:ignore-already-exists
        create rest-delivery-point "rdp1"
            shutdown
            client-profile "default"
            ! pragma:interpreter:ignore-already-exists
            create queue-binding "Q/rdp1/input"
                post-request-target "/rest/tutorials"
                    exit
            ! pragma:interpreter:ignore-already-exists
            create rest-consumer "rc1"
                shutdown
                remote host "RC_HOST"
                remote port "RC_PORT"
                no shutdown
                exit
            no shutdown
            exit
        exit
    exit
end
To apply this configuration, simply log in to Solace Event Broker using CLI, with a user with administrative privileges and execute the above script fragments.
ssh admin@BROKER_HOST
Solace - Virtual Message Router (VMR)
Password:
BROKER_HOST is the host name where the Broker is running.
At this the REST delivery point is configured and should be operational and connected to your REST consumer application. You can verify this using Broker Manager or through the following CLI command.
solace(configure)# show message-vpn VPNNAME rest rest-delivery-point *

Total REST Delivery Points (up):                       1
Total REST Delivery Points (configured):               1
Total REST Consumers (up):                             1
Total REST Consumers (configured):                     1
Total REST Consumer Outgoing Connections (up):         3
Total REST Consumer Outgoing Connections (configured): 3
Total Queue Bindings (up):                             1
Total Queue Bindings (configured):                     1

Flags Legend:
A - Admin State (U=Up, D=Down)
O - Oper State (U=Up, D=Down)

                                                  REST
                                                Consumer
                                                Outgoing      Queue       Conns
                                        Status    Conns      Bindings    Blocked

RDP Name             Message VPN         A O    (up/conf)    (up/conf)     (%)
-------------------- ------------------ ------ ----------- ------------- -------
rdp1                 default             U U       3 / 3       1 / 1        0
At this point the consumer is up and ready to receive messages.
To know more about Solace CLI check out Solace CLI overview.
We have successfully configured a REST Delivery Point using Solace CLI. Follow the instructions in the next section to send a POST request on the designated POST URL and see that it is delivered to the designated queue, and in turn retrieved on the REST consumer we started here - A Simple REST Consumer.
Sending a message
Now it is time to send a message to the waiting consumer.
Sending a REST message to Solace is very simple. For this example, we will use the command line tool cURL to send the required HTTP. Refer to REST Messaging Protocol Guide for the full details of the Solace REST messaging API.
To send a message you can use the following command.
$ curl -X POST -d "Hello World REST" http://BROKER_HOST:BROKER_REST_PORT/solace/samples/rest -H "content-type: text/plain"You will need to update HOST and PORT to match your Solace Event Broker HOST and configured REST service port. This will send a message with contents “Hello World REST” as a Solace text message using the direct delivery mode. The “content-type” headers and “Solace-delivery-mode” are optional. If they are omitted then the Solace REST messaging default delivery mode of “persistent” will be used and the message contents will be treated as binary.
You can also add credentials to the request by updating the cURL command to the following:
$ curl -X POST -d "Hello World REST" http://BROKER_HOST:BROKER_REST_PORT/solace/samples/rest -H "content-type: text/plain" -u <REST_USER>:<REST_PASSWORDAt this point your REST consumer should have received a message. It will print the URL to the screen. So the output should now include:
Received message: /rest/tutorialsSummarizing
You have successfully published a message to a topic using the REST API, and have received that message through an RDP via a webhook / POST to a backend REST web server on the consumer.